
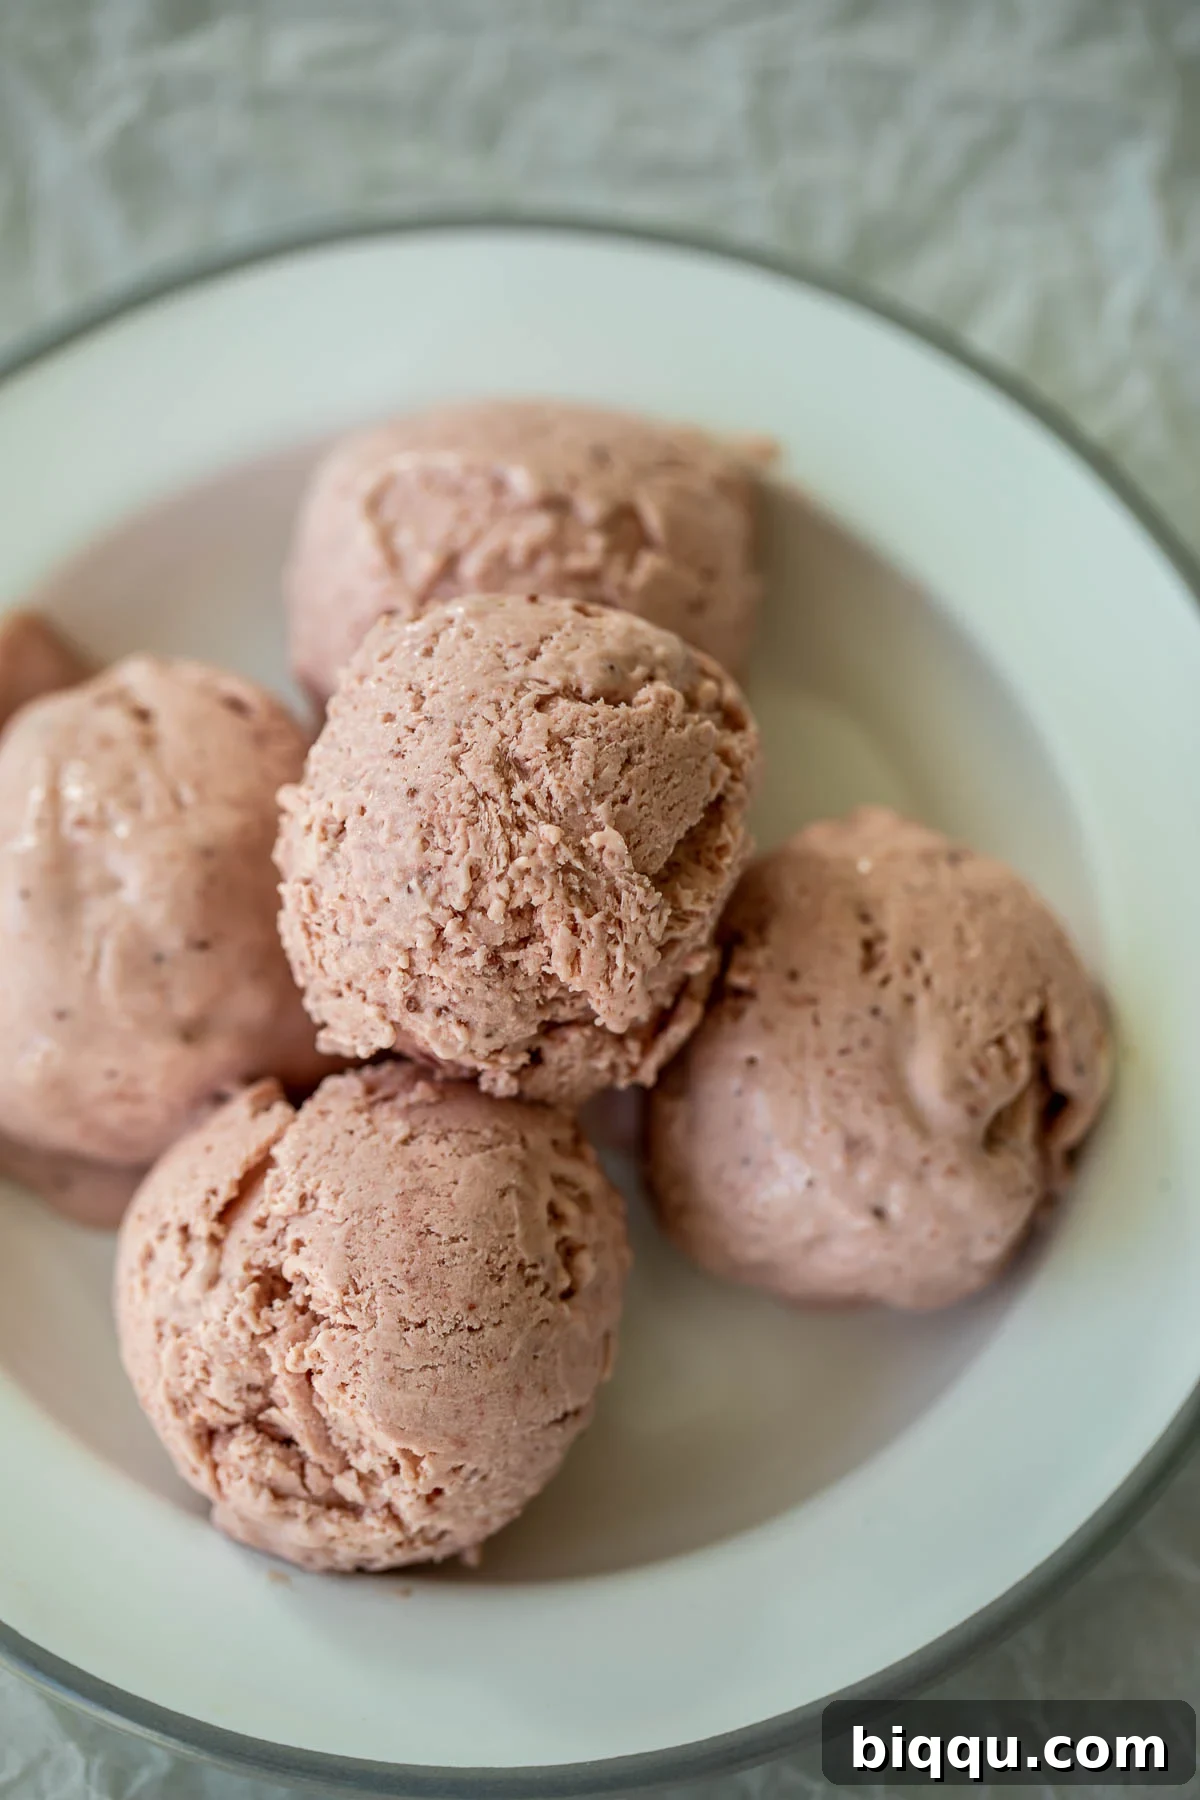
Prepare to delight your taste buds with this incredibly easy and utterly delicious No-Churn Strawberry Ice Cream! This vibrant, creamy dessert requires just 5 simple ingredients and absolutely no ice cream machine, making homemade ice cream more accessible than ever. Whether you’re craving a refreshing summer treat or a sweet escape, this recipe promises pure strawberry bliss in every scoop.
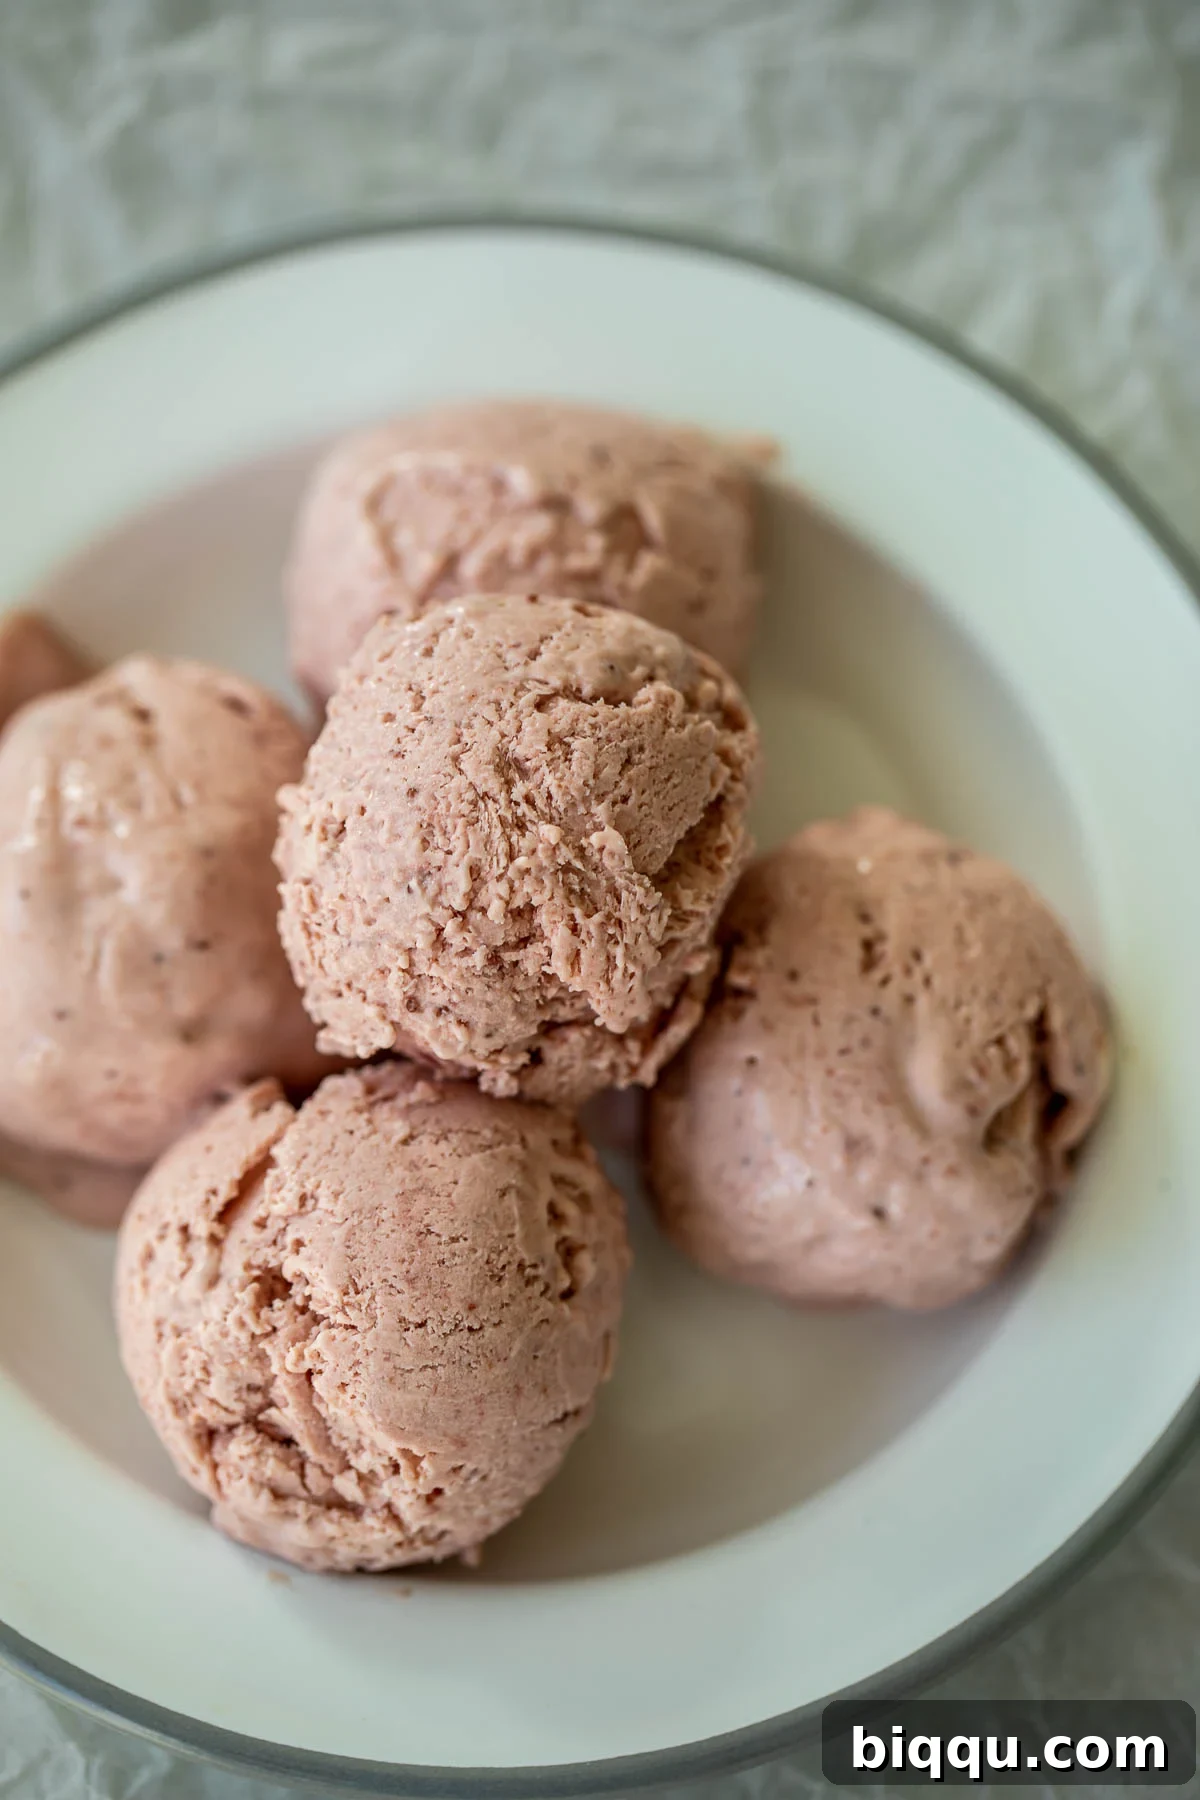
The arrival of fresh, succulent strawberries in season is always a culinary inspiration. Their bright red hue and sweet-tart flavor are simply irresistible, leading me to create a multitude of strawberry-infused delights. From refreshing beverages to comforting baked goods, strawberries add a touch of summery magic to everything they grace. After experimenting with delicious recipes like Strawberry Dutch Baby and Strawberry Limeade (recipes coming soon!), my recent obsession has culminated in this fantastic no-churn strawberry ice cream.
Inspired by the simplicity and creamy texture of my Homemade Vanilla Ice Cream and the tropical charm of my Mango Ice Cream, this strawberry version combines the best of both worlds. It delivers rich flavor and a wonderfully smooth consistency, all without the need for specialized equipment.
Table of Contents
- Why Choose No-Churn Ice Cream?
- The Essential Ingredients
- Step-by-Step: How To Make No-Churn Strawberry Ice Cream
- Tips for Perfect No-Churn Ice Cream
- Exciting Ice Cream Variations
- Recommended Equipment
- Storage Best Practices
- Watch The Recipe Video
- Serving Suggestions
- More Irresistible Ice Cream Recipes
- Delightful Strawberry Recipes
- More Sweet Treats to Explore
- No Churn Strawberry Ice Cream Full Recipe
Why Choose No-Churn Ice Cream?
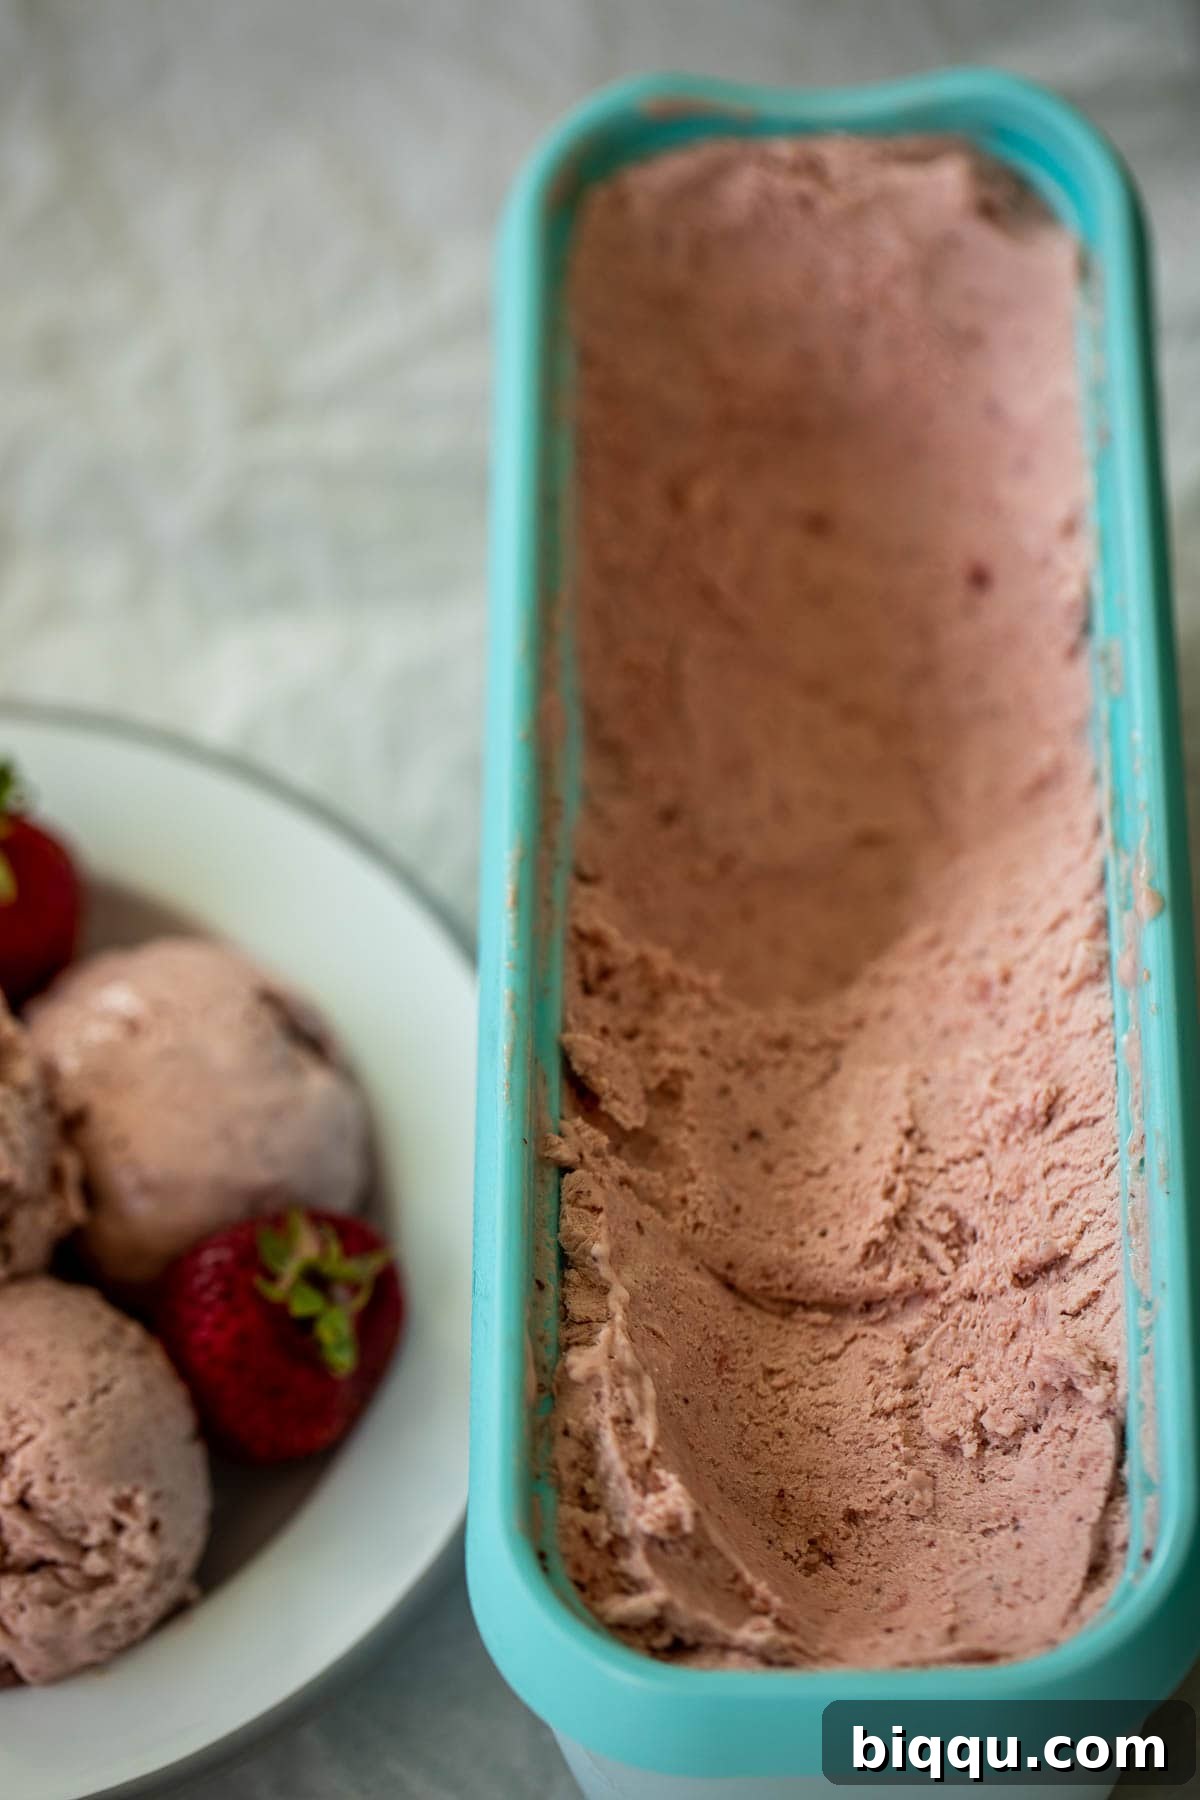
No-churn ice cream has revolutionized the way we make frozen desserts at home. The beauty of this method lies in its incredible simplicity and accessibility. Traditional ice cream typically requires an ice cream maker to continuously churn the mixture as it freezes, preventing the formation of large ice crystals and resulting in a smooth texture. However, with no-churn recipes, we achieve a similar creamy consistency by whipping heavy cream until it’s light and airy, then folding it with sweetened condensed milk and our chosen flavorings.
This technique incorporates air into the mixture, which is key to its light and fluffy texture, mimicking the churning process. The sweetened condensed milk plays a dual role, providing both sweetness and a dense, creamy base that helps prevent excessive ice crystallization. This means you can create high-quality, delicious ice cream with minimal effort and without investing in a specialized appliance. It’s perfect for impromptu dessert cravings or when you want to impress guests with a homemade treat without the fuss.
The Essential Ingredients
Crafting this easy homemade strawberry ice cream without an ice cream machine relies on a few key ingredients. Each component plays a vital role in achieving that perfect balance of flavor and creamy texture.
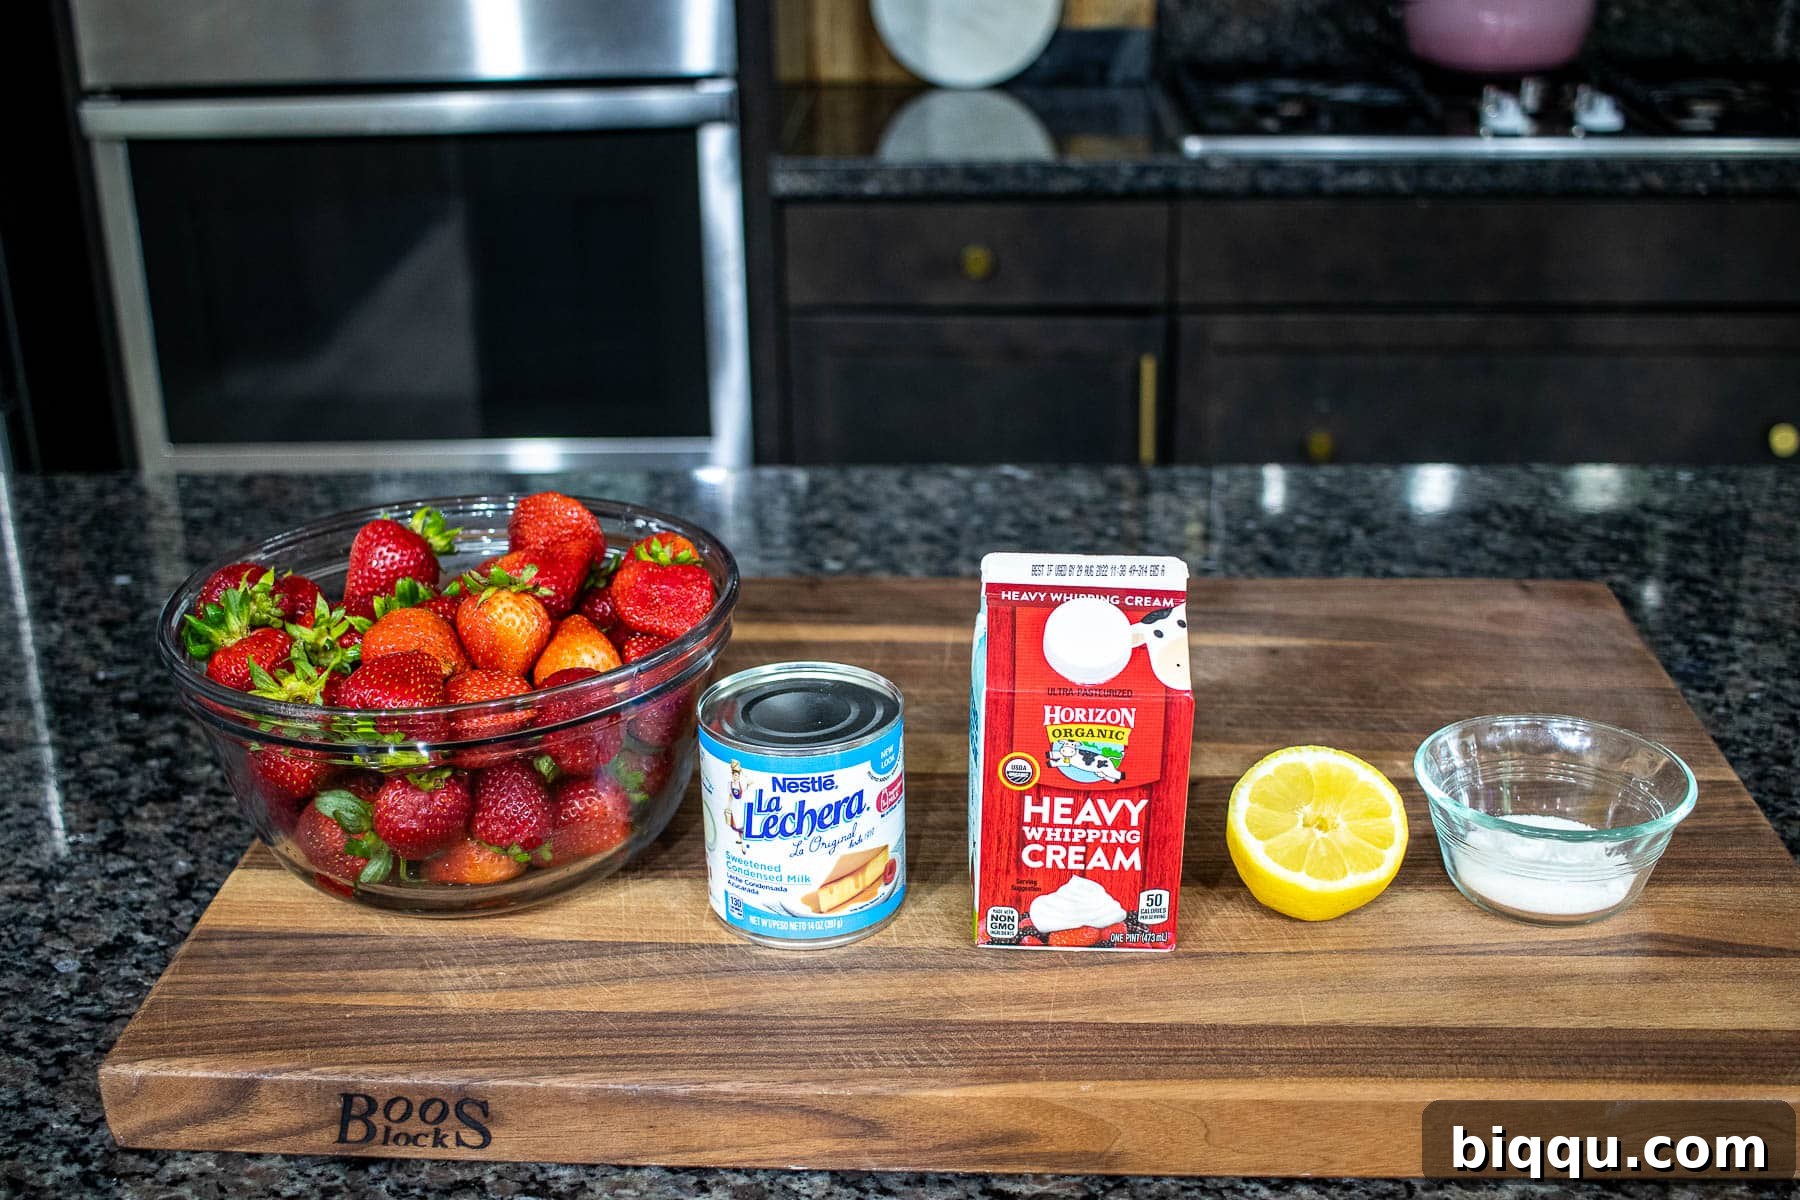
- Fresh or Frozen Strawberries: The star of our show! I highly recommend using ripe, fresh strawberries when they are in season for the best flavor and natural sweetness. However, if fresh ones aren’t available, frozen strawberries work perfectly well too. Just ensure you defrost them completely before blending to achieve a smooth puree. The quality of your strawberries will significantly impact the final taste of your ice cream.
- Granulated Sugar: A touch of sugar is added to the strawberries not just for sweetness, but also to enhance their natural flavor and help them maintain their vibrant red color during the cooking process. It also contributes to the smooth texture of the strawberry puree.
- Freshly Squeezed Lemon Juice: This might seem like an unusual addition to ice cream, but lemon juice is crucial. It brightens the flavor of the strawberries, adds a subtle tang that balances the sweetness, and, like sugar, helps to preserve the beautiful red hue of the fruit. Always opt for fresh lemon juice for the best results.
- Heavy Whipping Cream: This is the foundation of any no-churn ice cream. Also known as heavy cream, whipping cream, double cream (in the UK), or Devonshire cream, it’s essential for creating the light, airy base. When whipped, it incorporates air, which is what gives the ice cream its characteristic light texture without churning. Look for it in the dairy section of your supermarket. Ensure it is very cold before whipping for optimal volume.
- Sweetened Condensed Milk: This magical ingredient adds both sweetness and an incredibly creamy, smooth consistency to the ice cream. Its thick, viscous nature prevents large ice crystals from forming, ensuring your no-churn ice cream is velvety and delightful. Do not confuse it with evaporated milk; they are not interchangeable in this recipe.
For precise measurements of each ingredient, please refer to the detailed recipe card located at the end of this article.
Step-by-Step: How To Make No-Churn Strawberry Ice Cream
Making delicious No-Churn Strawberry Ice Cream is a straightforward process, broken down into 4 simple steps. Follow these instructions carefully for the best results:
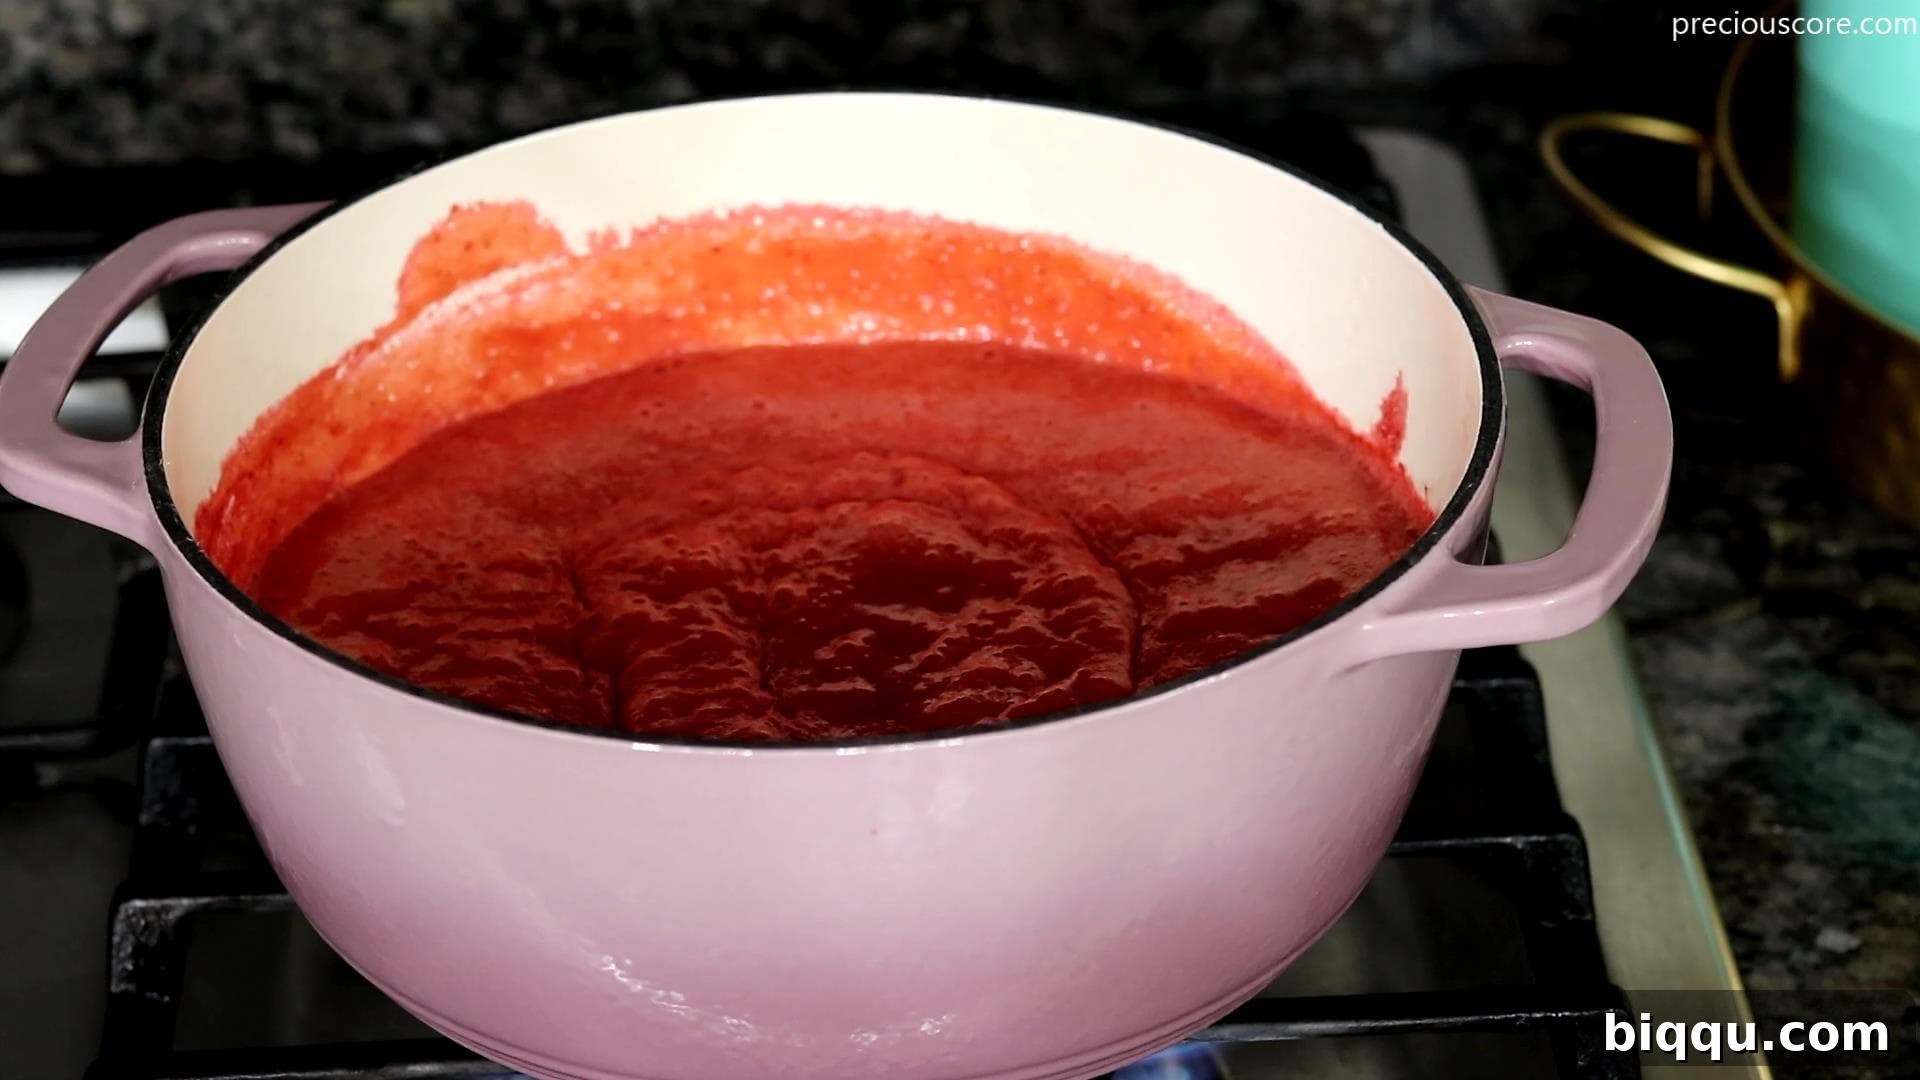
1. Prepare the Strawberry Puree: Begin by washing and hulling your fresh strawberries (or defrosting frozen ones). Place them into a blender and process until you have a smooth, consistent puree. Transfer this puree into a medium-sized pot – a cast iron or non-stick pot works best to prevent sticking. Add the granulated sugar and freshly squeezed lemon juice to the puree. Bring the mixture to a simmer over high heat, then reduce the heat to medium. Allow it to simmer gently for about 10-15 minutes, stirring occasionally, until the puree thickens and its volume reduces by approximately half. This simmering process concentrates the strawberry flavor and reduces excess water. Once thickened, remove from heat and let it cool completely. For best results, chill the puree in the fridge until it is thoroughly cold before proceeding.
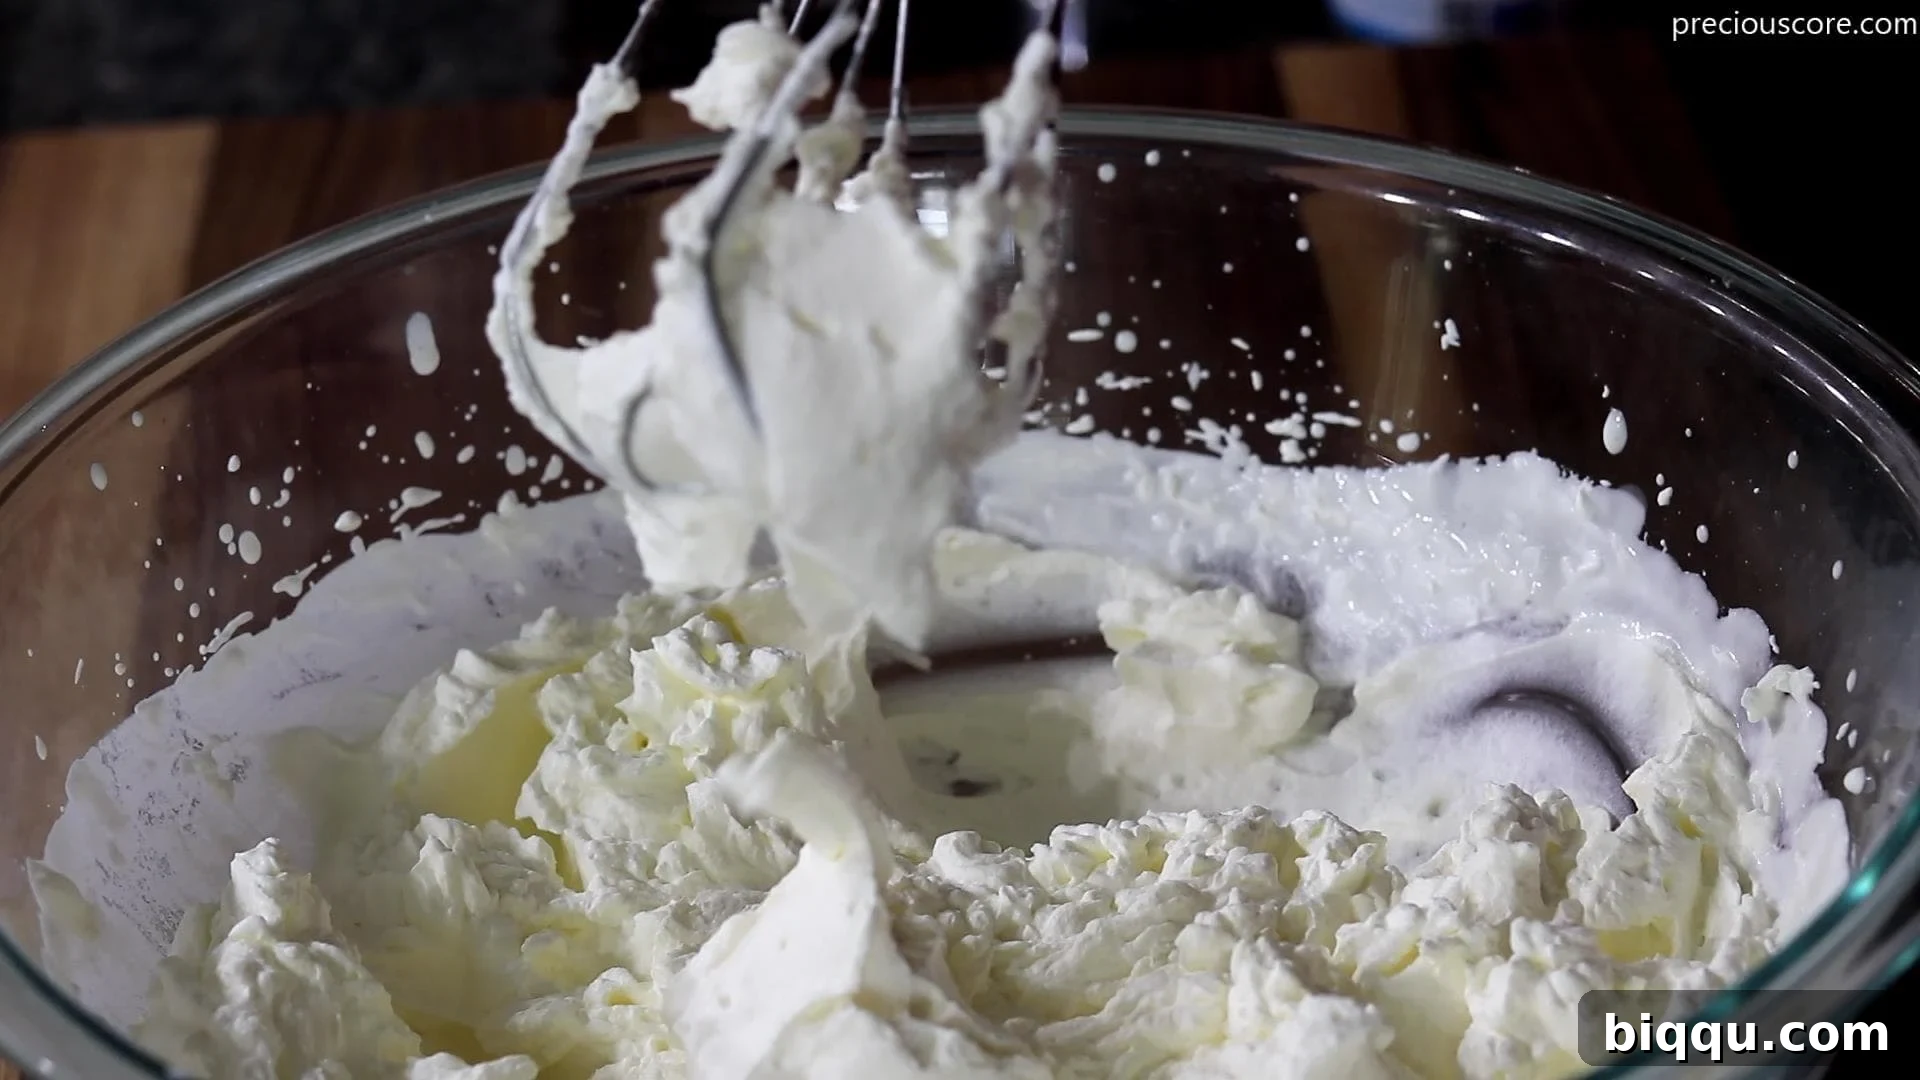
2. Whip the Heavy Cream: Pour the very cold heavy whipping cream into a large mixing bowl. Using an electric hand mixer (or a stand mixer with a whisk attachment), beat the cream on medium-high speed. Continue beating until stiff peaks form. This means when you lift the beaters, the cream stands up firmly without collapsing. Be careful not to overbeat, as this can cause the cream to separate and turn into butter.
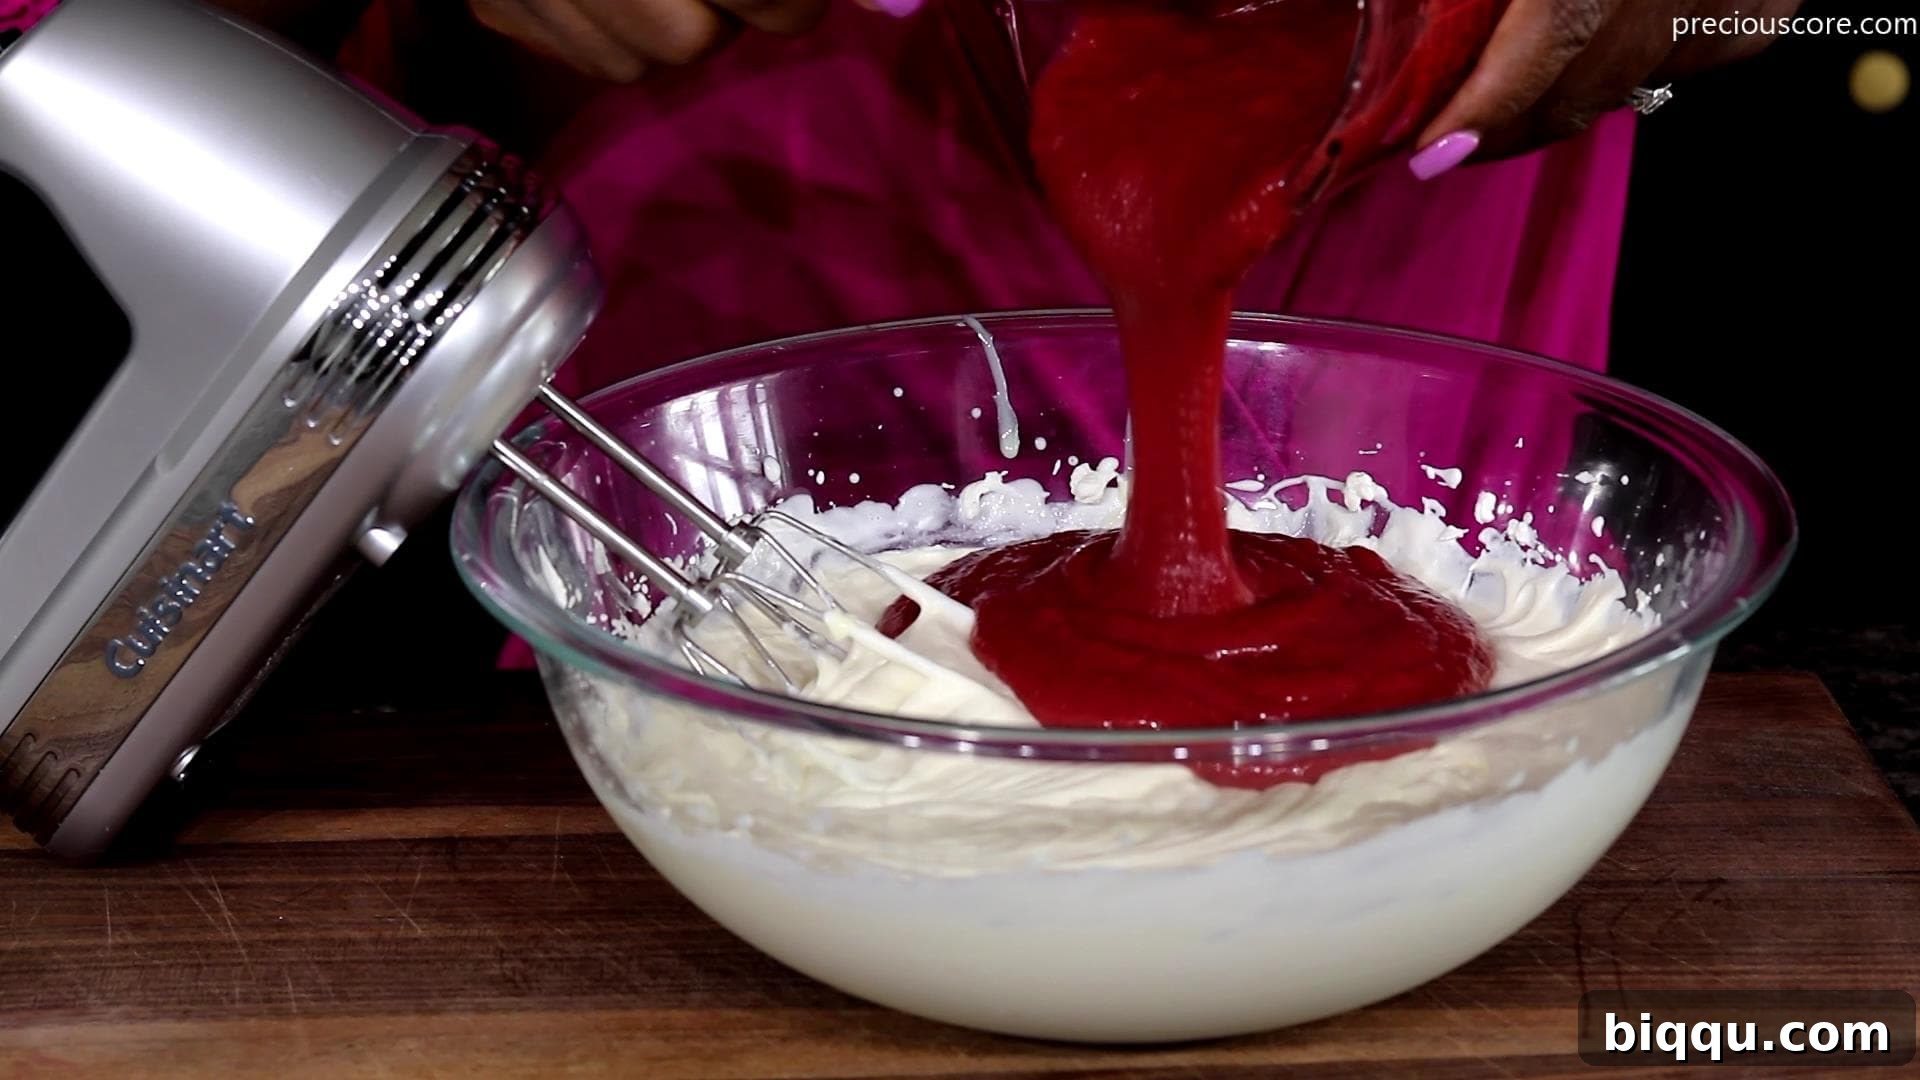
3. Combine Ingredients: Once your heavy cream is perfectly whipped, gently add the sweetened condensed milk and the thoroughly chilled strawberry puree to the bowl. Switch your electric mixer to a low speed, or use a spatula, and carefully beat or fold the ingredients until they are just combined. You want to mix thoroughly enough that there are no streaks of unmixed ingredients, but avoid overmixing, which can deflate the whipped cream and compromise the ice cream’s texture.
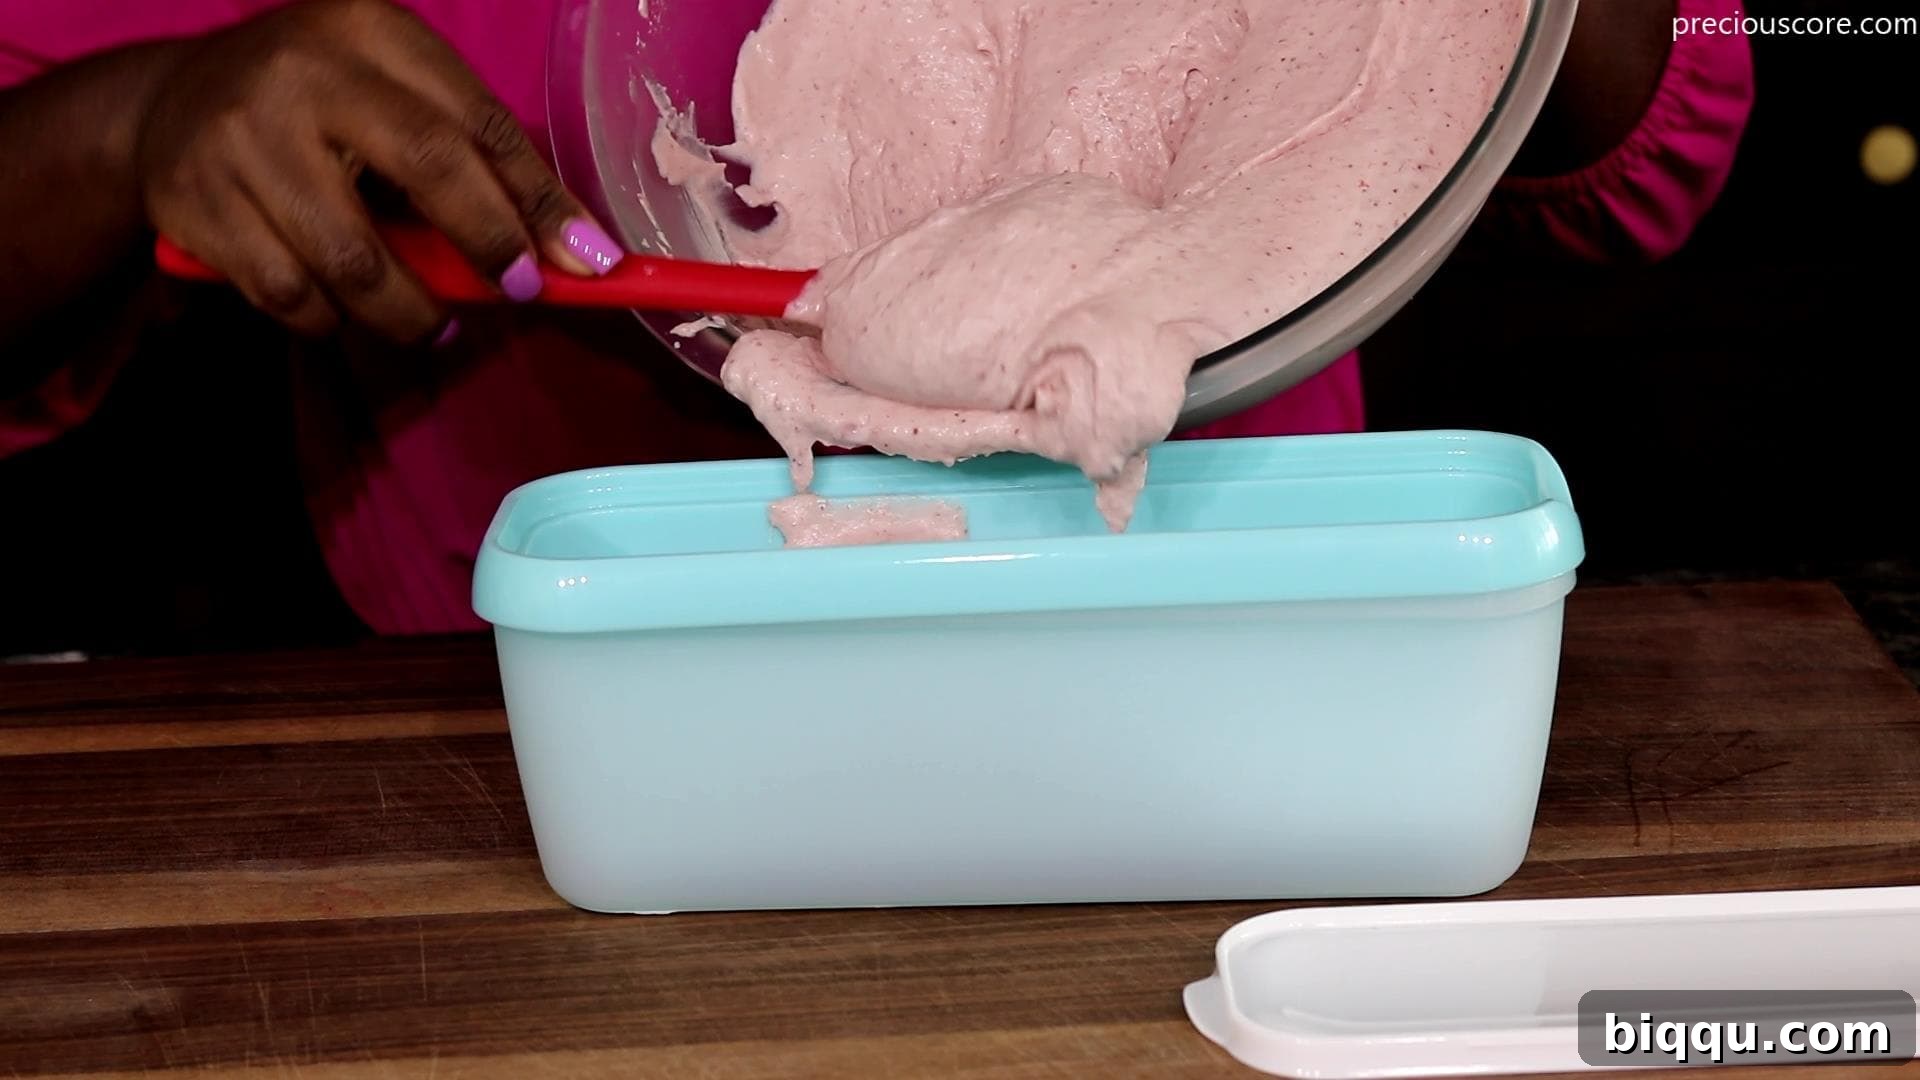
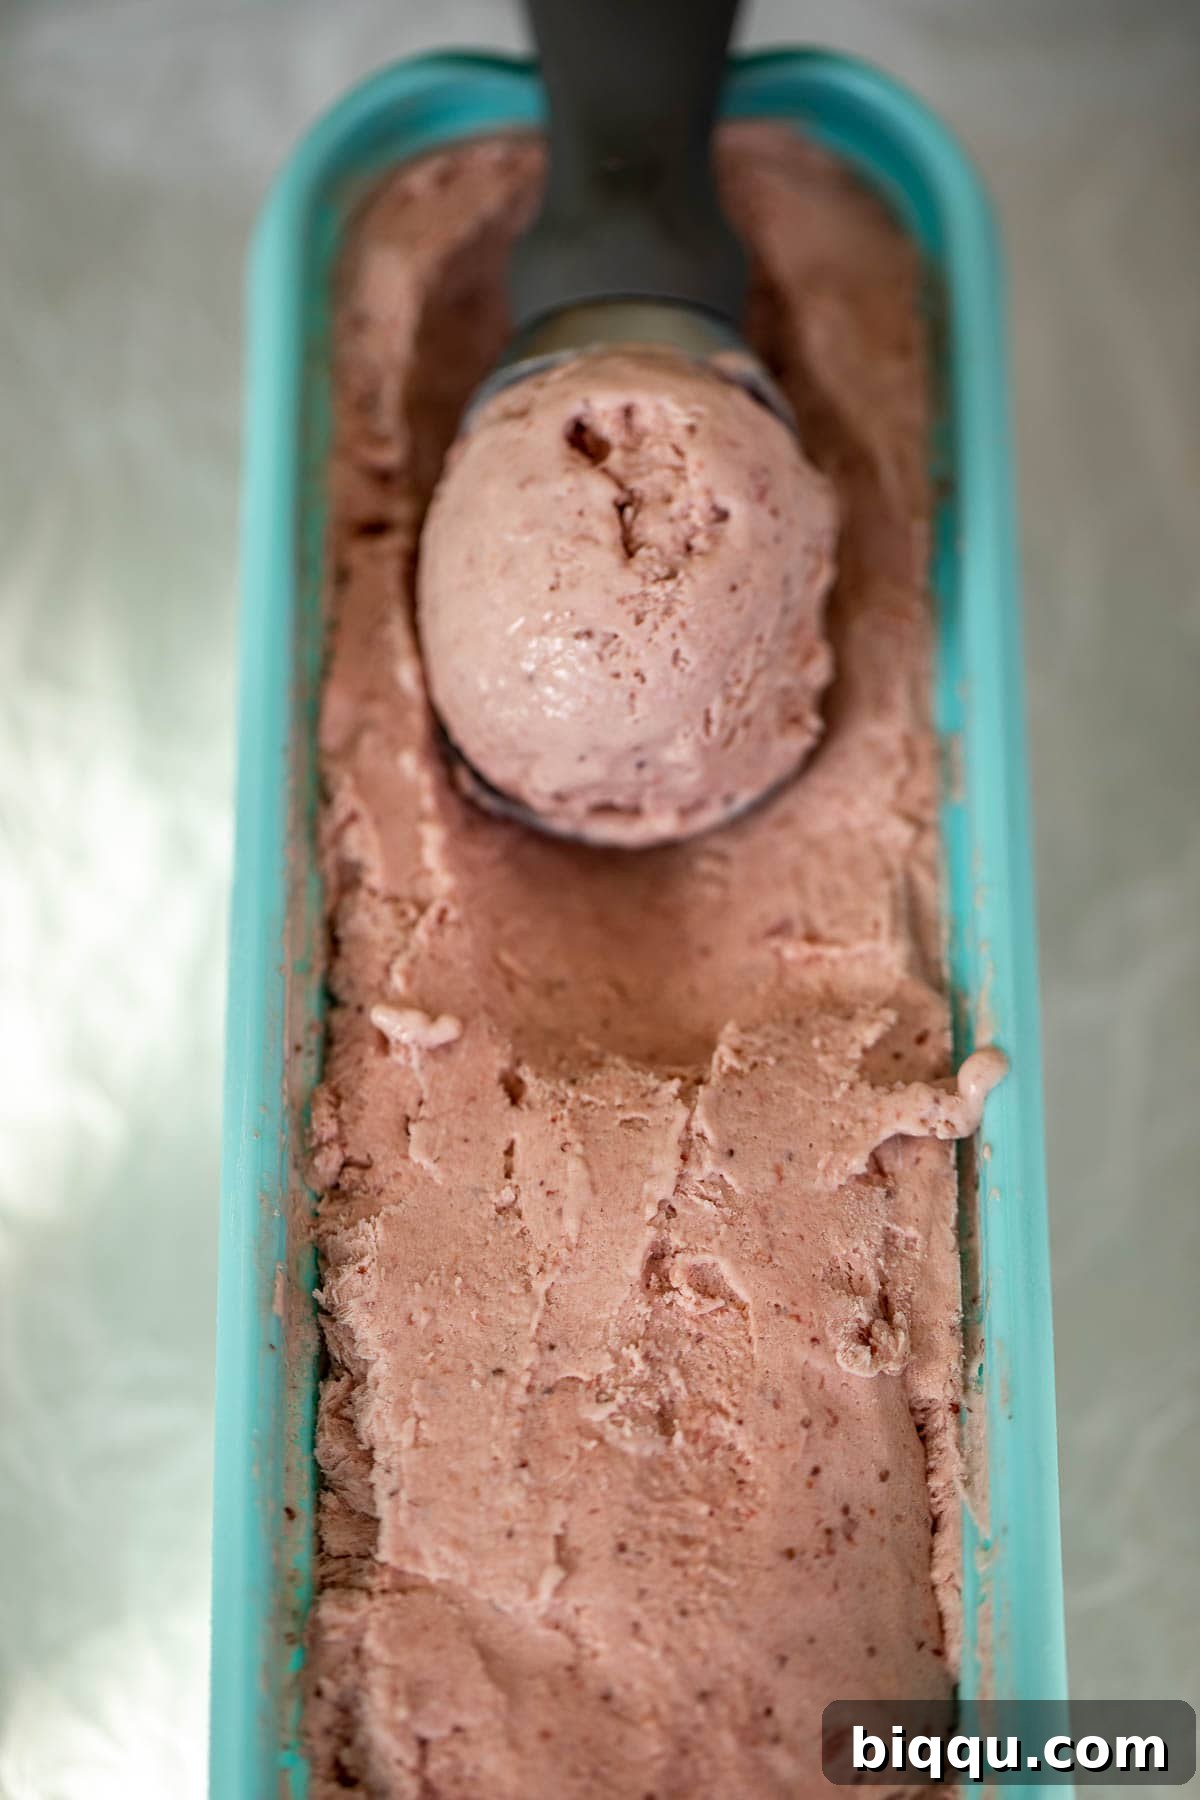
4. Freeze to Perfection: Carefully pour the combined ice cream mixture into a loaf pan (a standard 9×5 inch pan works well) or a freezer-safe plastic bowl with a tight-fitting lid. If using a loaf pan, it’s crucial to cover the surface of the mixture directly with plastic wrap, ensuring the wrap touches the entire surface. This prevents ice crystals from forming on top and keeps your ice cream smooth and creamy. Place the covered pan or bowl into the freezer and allow it to freeze for at least 8 hours, or ideally, overnight, until it’s completely solid and scoopable.
Important Note: The chilling of the strawberry puree is a critical step that cannot be skipped. Adding warm or even lukewarm puree to your delicate whipped cream will cause the cream to melt and lose its airy volume, resulting in a less desirable, icy texture. To ensure your ice cream is perfectly smooth and fluffy, make the strawberry puree several hours in advance or even the day before, allowing it ample time to chill thoroughly in the refrigerator.
Tips for Perfect No-Churn Ice Cream
Achieving perfectly creamy no-churn ice cream every time is simple with a few helpful tips:
- Ensure Cold Cream: This is paramount! Heavy whipping cream whips best when it’s very cold. Take it out of the fridge only when you are ready to start whipping. For an extra boost, you can even place your mixing bowl and whisk attachments in the freezer for 5-10 minutes before you begin. A cold environment helps the cream hold its structure better.
- Chill the Puree Completely: As mentioned in the instructions, a warm puree will deflate your whipped cream. Plan ahead and make the strawberry puree well in advance to give it enough time to cool down completely in the refrigerator. Overnight chilling is ideal.
- Don’t Overbeat the Cream: Whip the heavy cream until stiff peaks form, but stop immediately once they are achieved. Overbeating can cause the cream to become grainy or even turn into butter, which will ruin the texture of your ice cream.
- Gentle Folding: When combining the whipped cream, sweetened condensed milk, and strawberry puree, fold them together gently. You want to incorporate everything evenly without deflating the airy whipped cream.
- Cover Properly: When freezing, ensure the ice cream mixture is covered tightly with plastic wrap, pressing it directly onto the surface of the ice cream. This crucial step prevents the formation of ice crystals on top, which can lead to an icy rather than creamy texture.
- Patience is Key for Freezing: Allow sufficient time for the ice cream to freeze solid, at least 8 hours or, ideally, overnight. Rushing this step will result in a soft, unset dessert.
Exciting Ice Cream Variations
While strawberry ice cream is a classic, the beauty of the no-churn method is how easily you can adapt it to create a variety of other delicious flavors. Here are a few ideas to spark your culinary creativity, simply by swapping out the fruit puree:
- Lemon Ice Cream: For a bright and zesty treat, substitute the strawberry puree with a homemade lemon curd or a good quality store-bought lemon curd. The tangy sweetness will create a wonderfully refreshing dessert.
- Peach Ice Cream: Capture the essence of summer by pureeing ripe peaches instead of strawberries. For an extra burst of flavor, you can gently simmer the peach puree with a little sugar and a hint of vanilla before chilling, just as we do with the strawberries.
- Pineapple Ice Cream: If you love tropical flavors, swap the strawberry puree for a homemade Pineapple Jam or a reduced, thickened pineapple puree. The sweet and tart notes of pineapple create an exotic twist.
- Raspberry Ripple Ice Cream: Instead of fully incorporating a raspberry puree, create a “ripple” effect. Prepare a raspberry sauce (similar to the strawberry puree, but perhaps a bit thicker) and swirl it through the ice cream mixture just before freezing, leaving beautiful streaks of fruit throughout.
- Mixed Berry Ice Cream: Can’t decide on one berry? Combine a medley of strawberries, blueberries, and raspberries for a vibrant and complex mixed berry ice cream. Puree them together and reduce as directed for the strawberries.
Recommended Equipment
One of the many advantages of this no-churn recipe is its minimal equipment requirements. You likely have most of these items already in your kitchen, making it super convenient to whip up a batch of homemade ice cream:
- Blender: Essential for transforming fresh or defrosted strawberries into a smooth, consistent puree, ensuring a silky texture in your ice cream.
- Hand Mixer (or Stand Mixer): A powerful tool for whipping the heavy cream to stiff peaks. While you can do this by hand with a whisk, an electric mixer saves time and effort, ensuring optimal aeration.
- Large Mixing Bowl: You’ll need a spacious bowl to comfortably whip the heavy cream and then combine all the ingredients without spills.
- Spatula: Perfect for scraping down the sides of the bowl, ensuring all ingredients are thoroughly incorporated, and gently folding the mixtures to maintain volume.
- Medium-sized Pot: For simmering and reducing the strawberry puree, concentrating its flavor and thickening its consistency.
- Loaf Pan or Freezer-Safe Container: For freezing your ice cream. A standard loaf pan works perfectly, but any airtight, freezer-safe container will do.
Storage Best Practices
To enjoy your homemade no-churn strawberry ice cream at its best for an extended period, proper storage is crucial. Once fully frozen, transfer the ice cream to an airtight container. This will protect it from freezer burn and prevent it from absorbing any unwanted odors from other items in your freezer. Stored correctly, your delicious strawberry ice cream can maintain its quality and flavor for approximately one month in the freezer. While it might last longer, the texture and freshness are best within this timeframe. When you’re ready to serve, if the ice cream is too hard, simply let it sit at room temperature for about 10-15 minutes to soften slightly, making it easier to scoop.
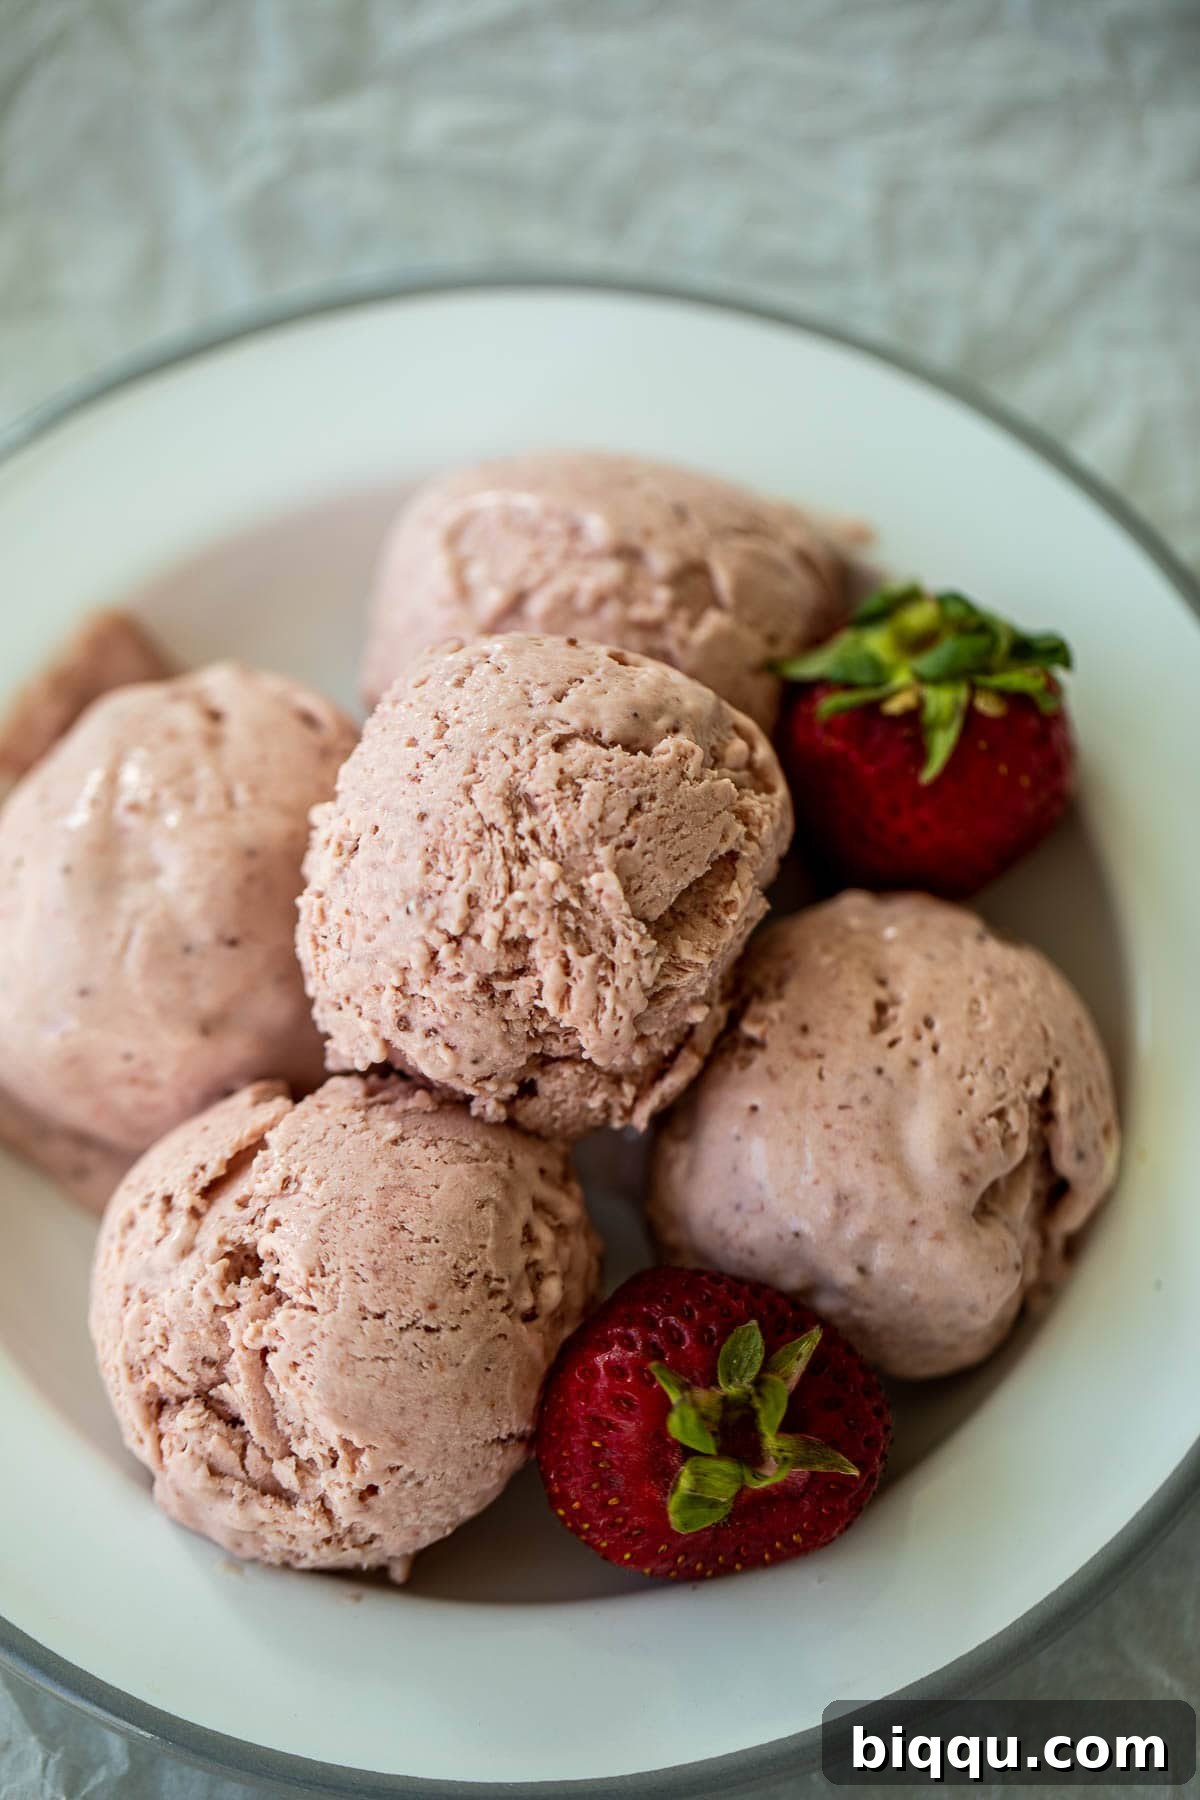
Top Tip for Ultimate Creaminess
The secret to incredibly light and airy no-churn ice cream lies in the temperature of your heavy whipping cream. It is absolutely essential that your heavy whipping cream is very cold before you begin whipping it. To ensure it’s at the optimal temperature, keep it in the refrigerator until the very moment you are ready to start beating it. As an additional measure to guarantee excellent results, consider placing the empty mixing bowl you intend to use for whipping the cream into the freezer for about 5 to 10 minutes. This pre-chilling of the bowl will help maintain the cream’s cold temperature during the whipping process, promoting maximum volume and stability for those perfect stiff peaks.
Watch The Recipe Video
For a visual guide to perfecting this delightful dessert, watch me prepare this No-Churn Strawberry Ice Cream in a step-by-step video on my YouTube channel. Seeing the process in action can be incredibly helpful! If you enjoy my culinary videos and want to stay updated with new recipes, I invite you to SUBSCRIBE to my YouTube channel and click the notification bell. This way, you’ll be instantly notified whenever I post a new video, ensuring you never miss out on fresh inspiration for your kitchen.
Serving Suggestions
This luscious No-Churn Strawberry Ice Cream is absolutely divine on its own, offering a pure, unadulterated taste of summer. However, it also serves as a fantastic accompaniment to a variety of other desserts, enhancing their flavors with its creamy, fruity profile. Here are some delightful serving ideas:
- Alongside Warm Desserts: Pair a scoop of this cool, creamy ice cream with a warm, comforting dessert like a rich Malva Pudding or a decadent Challah Bread Pudding. The contrast in temperature and texture is simply heavenly.
- With Fruit Pies: It’s the perfect counterpoint to a flaky, sweet Homemade Apple Pie. The tartness of the apple and the sweetness of the strawberry create a symphony of flavors.
- On Cakes and Crumbles: Serve it alongside a slice of moist Mango Upside Down Cake or a classic fruit crumble for an elevated dessert experience.
- Garnish Galore: Elevate your presentation with simple garnishes. A few fresh mint leaves, a sprinkle of toasted coconut flakes, a drizzle of chocolate sauce, or even a few extra fresh strawberry slices can add visual appeal and an extra layer of flavor.
- In Milkshakes or Smoothies: Blend a scoop or two with milk, extra strawberries, and perhaps a banana for a thick, refreshing strawberry milkshake or a creamy smoothie.
- As a Topping: Use it as a luxurious topping for pancakes, waffles, or even a plain pound cake.
More Irresistible Ice Cream Recipes
If you’ve fallen in love with the ease and deliciousness of homemade ice cream, here are more recipes to keep your freezer stocked with delightful frozen treats:
- Homemade Vanilla Ice Cream (VIDEO)
- Homemade Chocolate Ice Cream
- Mango Ice Cream
- No-Churn Coconut Ice Cream
- Watermelon Ice Cream
Delightful Strawberry Recipes
Strawberry Cinnamon Rolls
Healthy Strawberry Jam
Easy Chocolate Covered Strawberries
More Sweet Treats to Explore
Plain Cake Recipe
How To Make Shortbread Cookies
Yogurt Cake
Homemade Vanilla Ice Cream (VIDEO)
COCONUT SWEET – TOASTED COCONUT FLAKES
Classic Chocolate Cake
If you try this delightful No-Churn Strawberry Ice Cream recipe, please take a moment to leave a star rating or share your comments below! Your feedback helps others discover and enjoy this wonderful treat.
No-Churn Strawberry Ice Cream
30 mins
6 hrs
6 hrs 30 mins
6 servings
Print Recipe
Equipment
-
Hand Mixer
-
Blender
-
Large Mixing Bowl
-
Spatula
-
Medium Pot
-
Loaf Pan or Freezer-Safe Container
Ingredients
- 2 pounds fresh strawberries, hulled and quartered (or frozen, defrosted)
- 2-3 tablespoons freshly squeezed lemon juice
- 2 tablespoons granulated sugar
- 2 cups heavy whipping cream (about 500ml)
- 14 oz can sweetened condensed milk
Instructions
-
Make the Strawberry Puree: Place hulled, quartered strawberries (or defrosted frozen strawberries) into a blender and blend until completely smooth. Pour the puree into a medium-sized pot (preferably non-stick or cast iron). Add the lemon juice and granulated sugar. Bring the mixture to a simmer over high heat, then reduce the heat to medium and continue to simmer for 10-15 minutes, or until the puree has thickened and reduced by about half. Stir occasionally to prevent sticking.
-
Chill the Puree: Remove the thickened strawberry puree from the heat and allow it to cool completely at room temperature. Once cooled, transfer it to the refrigerator to chill thoroughly, ideally for several hours or overnight, until it is very cold.
-
Whip the Cream: Pour the very cold heavy whipping cream into a large mixing bowl. Using an electric hand mixer, whip the cream on medium-high speed until stiff peaks form. Stop beating as soon as the peaks hold their shape to avoid over-whipping.
-
Combine Ingredients: Add the sweetened condensed milk and the chilled strawberry puree to the bowl with the whipped cream. Gently beat on low speed or fold with a spatula until all ingredients are just combined and no streaks remain. Be careful not to deflate the whipped cream.
-
Freeze the Ice Cream: Pour the creamy mixture into a loaf pan (9×5 inches) or a freezer-safe plastic container with a tight-fitting lid. If using a loaf pan, cover the surface of the ice cream directly with plastic wrap, pressing it down to touch the mixture completely. This prevents ice crystals from forming. Place in the freezer for at least 8 hours, or ideally overnight, until thoroughly frozen and firm.
-
Serve: Once frozen, scoop and serve your homemade no-churn strawberry ice cream. If the ice cream is too hard to scoop directly from the freezer, let it thaw at room temperature for about 10-15 minutes until it reaches your desired consistency. Enjoy!
Video
Notes
2. Heavy Cream Varieties: Heavy whipping cream is known by various names globally, including heavy cream, whipping cream, double cream (British), or Devonshire cream. All these refer to a cream with a high fat content (typically 36% or more), essential for whipping to stiff peaks.
3. Plastic Wrap Technique: Covering the ice cream mixture with plastic wrap directly touching its surface is a crucial step. This method helps prevent the formation of ice crystals on the top layer, ensuring your ice cream remains smooth and creamy throughout the freezing process.
4. Storage Guidelines: For optimal freshness and texture, store your homemade strawberry ice cream in an airtight container in the freezer for up to one month. This protects against freezer burn and maintains its delightful flavor.
Nutrition Information (per serving)
Additional Information
Dessert
Western
551
Tried this recipe?
Mention @preciouscore or tag #PreciousCore!