
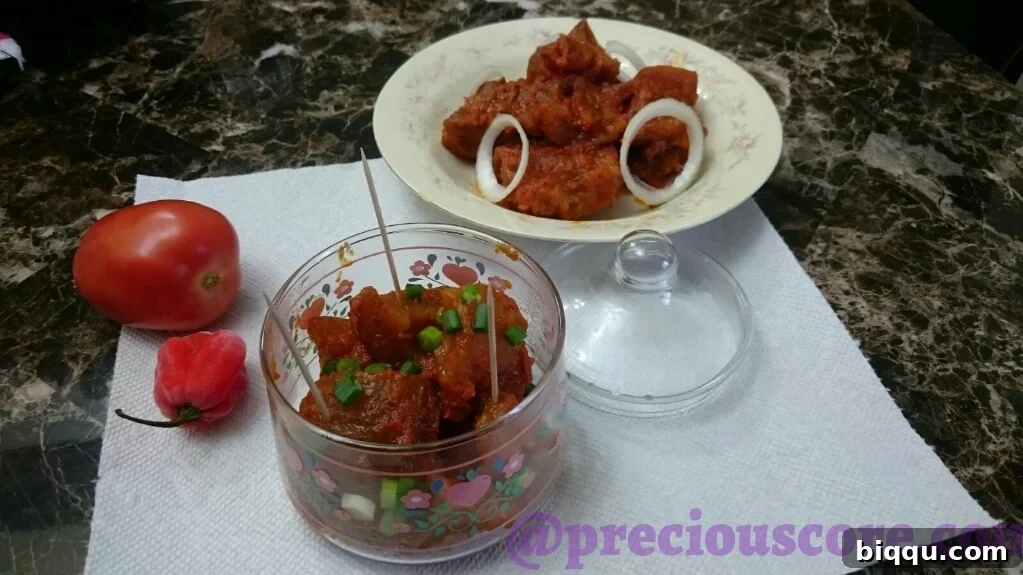
Unleash the Flavors of the Street: The Ultimate Stewed Canda (Ponmo) Recipe
There’s an undeniable magic to street food – it’s vibrant, accessible, and packed with authentic flavors that captivate a wide audience. Recreating these beloved culinary experiences in your own kitchen is a rewarding endeavor, allowing you to savor global tastes with a homemade touch. Today, we’re diving into a cherished African street food that promises a melt-in-your-mouth texture and an explosion of savory goodness: Stewed Canda, also widely known as Ponmo in Nigeria. This easy-to-follow recipe will guide you through preparing this flavorful delicacy, bringing the spirit of the streets right to your dining table.
The Allure of Canda: A Journey Through Taste and Tradition
I affectionately call this dish “Stewed Canda,” though its proper name might vary across different regions. Growing up, we often referred to it as chuking canda, a descriptive term reflecting the delightful street vendor experience. Imagine vendors parading through bustling streets, their large iron cast pots filled with glistening, tender beef skin. Buyers would eagerly use a fork or toothpick to ‘chuk’ (pick) a piece of canda, savoring each succulent bite. This simple act wasn’t just about eating; it was a communal ritual, a moment of connection to a rich culinary heritage, passed down through generations.
This particular recipe holds a special place in my heart, stirring a flood of cherished memories. I recall youthful adventures with my little aunt, venturing to the famous Mount Cameroon race in Buea, our pot of canda ready for eager customers. I remember the sheer delight of chewing a perfectly prepared slice of canda, its rich flavor so captivating that you wished the moment would never end. The vivid memory of 100 frs holding immense value, enough to procure a plump piece of tomato sauce-marinated canda, still brings a smile to my face. And who could forget the intoxicating aroma wafting from canda pots, a tantalizing scent that permeated the streets, teasing our senses with promises of deliciousness?
The joy of reliving these vibrant memories, transforming them into a culinary reality within my own kitchen, is truly immeasurable. This Stewed Canda recipe, while deeply rooted in tradition, is surprisingly simple to master, provided you pay close attention to the steps. Canda, or Ponmo as it’s known in Nigeria, is essentially the skin of beef, traditionally singed or burnt before undergoing a meticulous cooking process. Its unique texture – both chewy and tender when properly prepared – and its remarkable ability to absorb flavors make it a beloved ingredient across many West African cuisines.
Crafting Authentic Stewed Canda: Ingredients You’ll Need
To embark on this delightful culinary journey and create this incredibly flavorful dish, gather the following essential ingredients. Sourcing fresh, high-quality components will undoubtedly elevate your final product.
- Beef Skin (Canda/Ponmo): Approximately 2 pounds (about 1 kg). Look for good quality, thick beef skin from a reputable butcher.
- Tomatoes: 1 cup of blended fresh tomatoes or canned crushed tomatoes/tomato paste. (Using canned crushed tomatoes offers convenience and consistent flavor, but fresh tomatoes provide a brighter taste.)
- Garlic: 5 cloves, peeled. Fresh garlic is indispensable for creating a deep, aromatic foundation for the stew.
- Ginger: About an inch-long piece, peeled. This adds a warm, zesty, and slightly peppery kick that complements the other spices beautifully.
- Habanero Pepper: 1 red habanero pepper. This provides the signature heat; adjust to your preferred spice level. For a milder stew, use half a habanero or a less potent chili like a scotch bonnet (if available) or even a pinch of cayenne pepper.
- Seasoning Cubes: 2 small seasoning cubes (such as Maggi or Knorr), preferably chicken flavor, to enhance the savory notes and bring out the umami in the stew.
- Onion: 1 medium-sized onion. Essential for building a robust flavor base and adding a subtle sweetness when sautéed.
- Salt: To taste. Always start with a little and adjust as you cook.
- Vegetable Oil: 1/2 cup, for frying the sauce. A neutral oil is best to let the flavors of the ingredients shine.
Step-by-Step Guide: How to Prepare Melt-in-Your-Mouth Stewed Canda
Follow these detailed instructions carefully to achieve the perfect tender and flavorful Stewed Canda. Patience and attention to detail at each stage will ensure a truly authentic and delicious outcome.
1. Preparing Your Canda (Beef Skin) for Cooking
The initial preparation of the beef skin is crucial for both flavor and texture. If you’ve purchased raw, unburnt canda, a DIY method will yield excellent results. I learned a fantastic technique from 9jafoodie that cleverly mimics the traditional burning process, which is often done over an open flame and can be quite challenging at home.
- Begin by thoroughly cleaning your raw beef skin. Trim off any excess fat or impurities.
- Carefully cut the beef skin into manageable pieces, roughly 2-3 inches square, or slightly larger if you prefer.
- Line a sturdy baking tray with foil paper to prevent sticking and simplify cleanup. Arrange the canda pieces on the lined tray in a single layer, ensuring they don’t overlap too much.
- You may choose to remove the inner fleshy layer of the skin if you prefer a leaner texture, but leaving it in can add to the richness and a slightly varied mouthfeel, which I personally find delightful.
- Place the tray into a preheated oven set to 350°F (175°C).
Allow the canda to bake until it turns a rich, golden-brown color. This process typically takes around 15-20 minutes, but keep a close eye on it to prevent burning. This oven method effectively replaces the traditional and often more challenging technique of singeing the skin over an open flame, offering a safer and more convenient alternative. Not only does it make the preparation accessible, but baking also imparts a wonderful smoky flavor, significantly enhancing the overall taste of your stewed canda. If your beef skin is lean, you’ll observe it curling up as it bakes, which is a desirable sign of an authentic canda look. If you are fortunate enough to have already processed (brown, singed) beef skin, you can skip this baking stage entirely and proceed directly to the next step: boiling.
2. Boiling the Canda to Perfect Tenderness
- Once your canda is prepared (either baked or pre-processed), transfer the slices into a sturdy pot.
- Add just enough water to cover the canda, ensuring not to drown it. The goal is to have minimal water left once the meat is fully cooked, allowing the flavors to concentrate into a rich stock.
- Bring the pot to a vigorous boil over medium-high heat.
- As the water begins to boil, chop a portion of your medium onion (about half) and add it to the pot. This will subtly flavor the canda from within.
- Season the boiling canda generously with salt and the chicken seasoning cubes. These will infuse flavor deep into the beef skin as it softens, ensuring every bite is delicious.
Continue to boil the canda until it is exceptionally soft. This stage is paramount; nobody enjoys tough, rubbery canda, which can be quite difficult to chew. The ideal texture should be yielding, gelatinous, and easy to bite through. Depending on the thickness and quality of your beef skin, this could take anywhere from 45 minutes to 1.5 hours. Throughout the boiling process, you might need to add small amounts of water periodically to prevent it from drying out, always keeping an eye on the liquid level to maintain a gentle simmer. By the time it’s perfectly tender, there should only be a minimal amount of concentrated stock left in the pot, as shown in the image below. This flavorful stock is absolutely essential for the stew and should NOT be discarded – it is the foundation of your dish’s rich, savory taste. Set aside the tenderized canda and its precious stock.
3. Preparing the Aromatic Spice Paste
This paste is where much of the stew’s distinctive aroma, depth of flavor, and characteristic heat come from. Using fresh aromatics makes a significant difference.
- Carefully peel the garlic cloves, ensuring all skin is removed.
- Peel the ginger root. A spoon can be surprisingly effective for scraping off ginger skin.
- Combine the peeled garlic, ginger, and the habanero pepper (or your chosen chili) in a blender or food processor.
- Add a small amount of water (about 1/4 cup) to aid blending and achieve a smooth consistency.
Blend the ingredients until you achieve a smooth, fragrant paste. The pungency of fresh ginger and garlic, combined with the fiery kick of habanero, will elevate the entire dish, creating a complex and inviting aroma that will fill your kitchen.
4. Crafting the Rich Tomato Base for the Stew
A well-fried tomato base is fundamental to many West African stews, providing depth, a vibrant color, and a rich umami flavor that cannot be achieved by simply adding raw tomatoes. This step requires patience but is vital for a truly authentic taste.
- Heat the vegetable oil in a large, heavy-bottomed pot or deep pan over medium heat.
- Add the remaining chopped onions and sauté them gently. Stir frequently until they turn translucent and become very fragrant, but avoid browning them too much. This step extracts their natural sweetness and aromatic compounds.
- Once the onions are softened, pour in the crushed tomatoes (or fresh blended tomatoes/paste).
- Begin frying the tomatoes, stirring occasionally to prevent sticking. Reduce the heat slightly if the tomatoes are splattering too much.
Continue frying until the tomatoes darken significantly, thicken, and start to stick slightly to the bottom of the pot. A key indicator that the tomatoes are ready is when the oil begins to separate and rise to the top of the tomato mixture. This process, often called “frying the stew base,” indicates that the raw tomato flavor has cooked out, and a deep, concentrated, and rich flavor has developed. This step can take 15-25 minutes, depending on the heat and moisture content of your tomatoes.
- Now, add your finely blended garlic, ginger, and pepper paste to the fried tomatoes. Stir everything together and allow it to fry for another 3-5 minutes. The act of frying these aromatics in oil at this stage releases their full flavor profile, imparting an incredibly desirable essence and depth to the stew.
5. Combining and Simmering for Ultimate Flavor
The final stage brings all the prepared components together to meld into a harmonious and deeply satisfying stew. This simmering period allows all the incredible flavors to infuse into the tender canda.
- Carefully add the boiled canda, along with all of its precious, concentrated stock, into the pot with the fried tomato and spice base. Do not throw away that stock; it is liquid gold for your stew!
- Stir everything thoroughly, ensuring the canda pieces are fully coated in the rich, aromatic sauce. If the stew appears too thick, you can add a tiny splash of hot water, but be mindful not to dilute the flavor too much.
- Reduce the heat to low, cover the pot tightly, and let the stew simmer gently for approximately 5-10 minutes. Stir occasionally to prevent sticking and to allow the flavors to truly penetrate the canda, making each piece burst with taste. This simmering period is crucial for developing the stew’s complex taste and ensuring the beef skin absorbs all the deliciousness from the sauce. Taste and adjust for salt if necessary.
Serving Your Perfect Stewed Canda
Congratulations, my friends! You have successfully created a truly authentic and incredibly delicious Stewed Canda. The aroma alone is enough to transport you to the bustling streets where this delicacy is celebrated. If you desire, you can garnish your masterpiece with a sprinkle of freshly chopped onions or fresh parsley for an added touch of freshness, a slight crunch, and visual appeal.
Stewed Canda is incredibly versatile and can be enjoyed in various ways. It shines brilliantly on its own as a hearty appetizer, perfect for sharing with friends and family, perhaps with toothpicks as a nod to its street food origins. Alternatively, elevate it to a satisfying main dish by serving it alongside classic accompaniments such as fluffy white rice, golden fried plantains, pounded yam (fufu), eba, or even simple boiled potatoes. Its rich, spicy, and savory profile makes it an unforgettable addition to any meal, promising a delightful culinary experience that celebrates the vibrant flavors of West Africa.
Essential Tips for Stewed Canda Success
To ensure your Stewed Canda turns out perfectly every time, keep these key tips in mind:
- Cut into Bite-Sized Pieces: For an authentic street food experience and ease of eating with a toothpick, aim to cut your canda into easily manageable, bite-sized pieces. While I used larger pieces for photographic clarity to resemble the street vendor style, smaller cuts are generally preferred for serving and convenience.
- Tenderness is Key: Do not rush the boiling process. The success of this dish heavily relies on the canda being incredibly soft, yielding, and pleasant to chew. If it’s still tough, boil it longer.
- Save the Stock: The small amount of concentrated stock left after boiling the canda is a flavor powerhouse. Never discard it, as it contributes immensely to the stew’s depth and authentic taste.
- Patience with Tomato Frying: Allow the tomatoes to fry properly until the oil separates and they darken. This step is crucial for removing raw acidity and developing a deep, complex umami flavor that forms the heart of the stew.
- Spice Adjustment: The habanero provides significant heat. Feel free to adjust the quantity based on your personal preference or substitute with a milder pepper if you prefer a less spicy stew.
- Cleanliness: Ensure the beef skin is thoroughly cleaned before cooking. Any impurities can affect the taste and texture.
- Fresh Ingredients: Whenever possible, use fresh garlic, ginger, and onions for the best flavor outcome.
This Stewed Canda recipe isn’t just about cooking; it’s about reconnecting with culture, reliving precious memories, and sharing a truly special dish. The satisfaction of creating this tender, flavorful beef skin stew from scratch is immense, and the taste is unparalleled. It’s a culinary journey that brings comfort, flavor, and a touch of vibrant street food culture to your home.
If you’re planning to try this incredible recipe, I’d love to hear about your experience! Please leave a comment below and share your thoughts, tips, or any variations you’ve tried. Until next time, happy cooking and enjoy the rich flavors of West Africa!