
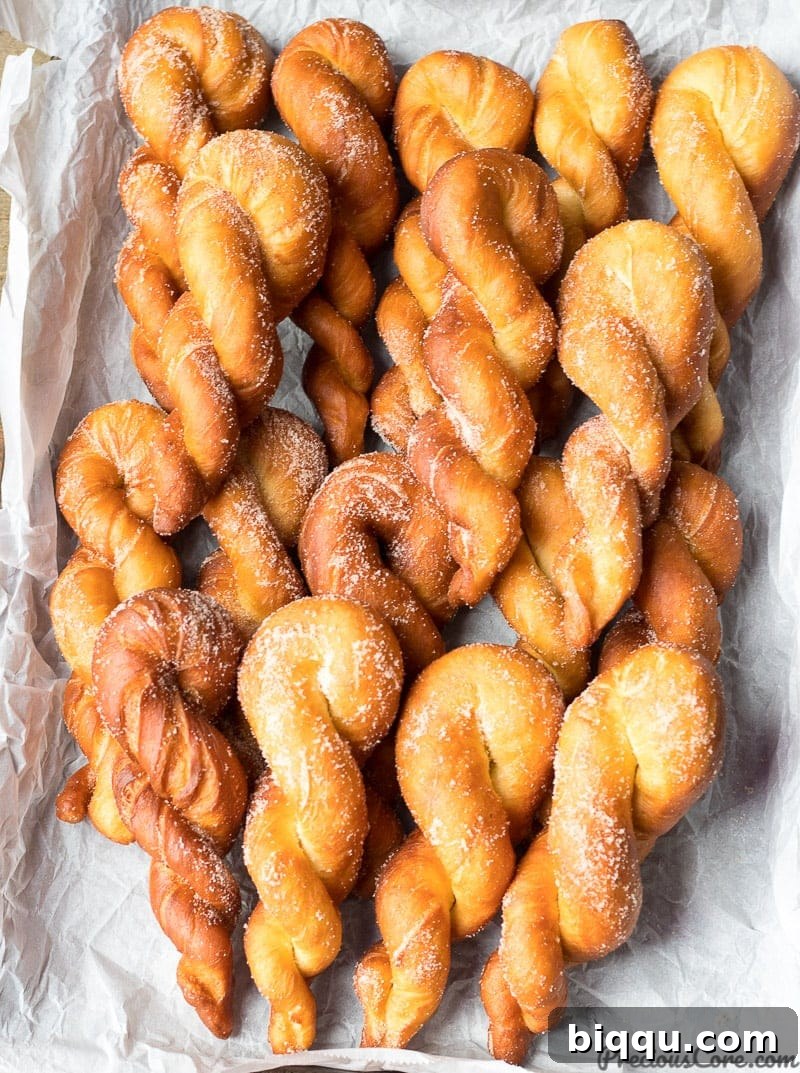
Imagine indulging in a batch of warm, pillowy African Twisted Doughnuts, fresh from the fryer and lightly dusted with sugar, alongside a glass of cold milk. This isn’t just a snack; it’s a moment of pure bliss, a taste of home, and a journey across continents, all in one delightful bite. These doughnuts are more than just a treat; they’re a celebration of texture and flavor, boasting a soft, airy interior, a subtly crisp exterior, and an irresistible buttery aroma that fills your kitchen with warmth and anticipation.
The beauty of these twisted delights lies in their unique shape and the incredible story of their culinary heritage. They are a beloved variation of traditional African doughnuts, skillfully crafted into charming twists that are as fun to make as they are to eat. This recipe brings you closer to the heart of African cuisine, offering a taste experience that is both authentic and universally appealing.
A Global Culinary Journey: The Twisted Doughnut Across Continents
My journey with these extraordinary doughnuts began at a lively party, where I was busy preparing “hot gateau,” an incredibly delicious deep-fried dough snack. A Sierra Leonean woman, watching and assisting me, shared captivating stories of her homeland. She pointed out the striking similarity between the gateau dough and the dough used for Sierra Leonean doughnuts. To illustrate, she even took a portion of my dough and skillfully shaped it into the very twists you see here, a testament to the beautiful interconnectedness of global culinary traditions.
The world of food fusion is truly astonishing! These twisted doughnuts, known by various names, transcend geographical boundaries. In Sierra Leone and Cameroon, where they are also called Gateau, they are a cherished staple. But their popularity doesn’t stop in Africa. Travel to Korea, and you’ll find a similar delicacy called “kkwabaegi.” In the Philippines, they are known as “shakoy.” What’s even more fascinating is that this versatile dough can be easily transformed into Nigerian doughnuts by simply shaping it into rings. This universal appeal underscores a simple truth: deliciousness knows no borders.
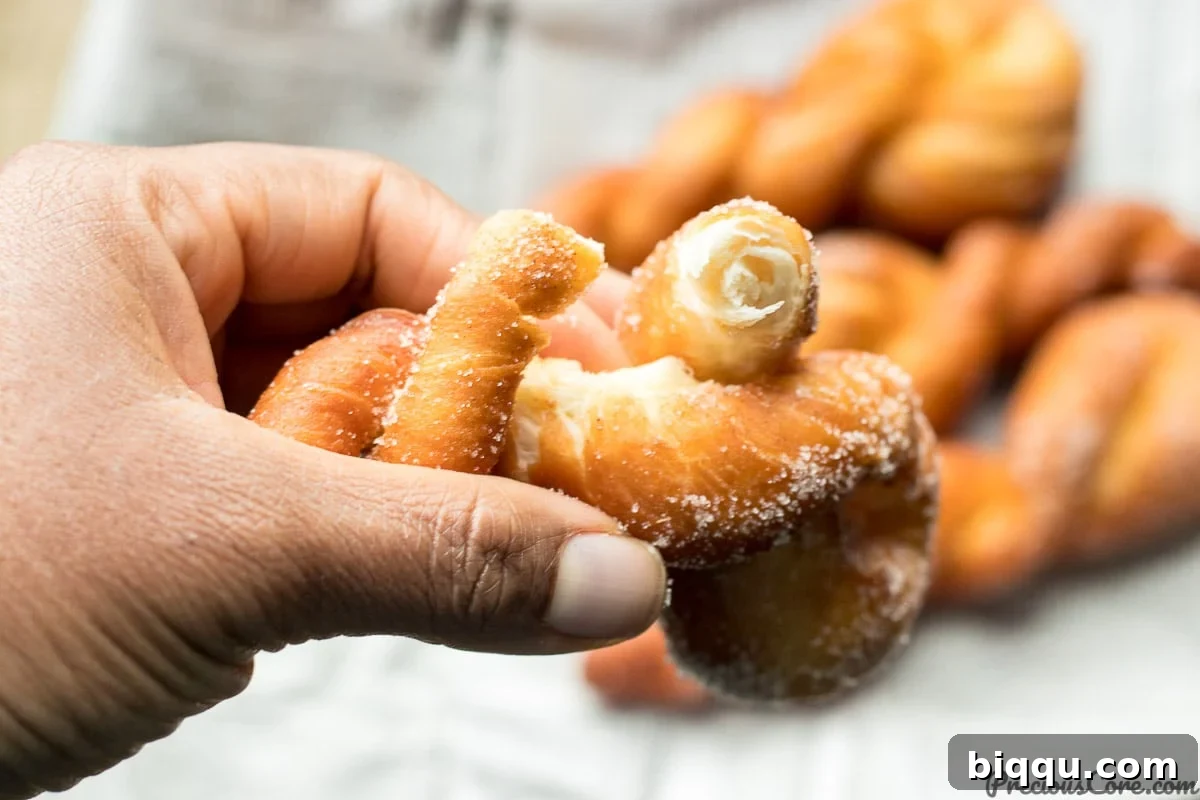
It’s hard to resist the perfect balance of a slightly crunchy outside giving way to a wonderfully fluffy, buttery interior. This delightful contrast is what makes these twisted doughnuts an instant favorite, no matter where you are from. Their timeless taste is a testament to simple ingredients prepared with love and skill, creating a snack that brings joy to every palate.
If you’re a true doughnut enthusiast, be sure to explore more of our delightful recipes! You might also love our Sugar Coated Donuts, the comforting flavors of Baked Pumpkin Spice Doughnuts, and the exotic twist of our Coconut Doughnuts Recipe. Each offers a unique take on this beloved treat, promising a new favorite for every occasion.
The Unbeatable Charm of Homemade Twisted Doughnuts
While exploring my local Asian market for African food staples, I often come across items similar to these twisted doughnuts, typically labeled as “sweet twists.” I’ll admit, buying a pack can be a convenient treat. However, the experience of homemade twisted doughnuts truly stands in a league of its own. The difference is profound, transforming a simple snack into an extraordinary culinary event.
One notable distinction is the quality of the oil used for frying. Store-bought versions can sometimes suffer from being fried in old oil, which unfortunately imparts an unpleasant aftertaste that detracts from the doughnut’s inherent deliciousness. When you prepare these at home, you have complete control over the freshness and quality of your ingredients, including the frying oil. This control ensures a clean, pure taste that store-bought varieties simply cannot replicate.
Beyond the superior taste, there’s an immense joy and satisfaction in the process of making these doughnuts from scratch. The aroma of yeast-activated dough, the tactile pleasure of kneading, and the fun of shaping each twist by hand all contribute to an experience that is deeply rewarding. The fresh, homemade taste is truly unbeatable, and the entire process becomes a delightful activity for yourself or with loved ones. It’s an opportunity to connect with your food, ensuring every bite is infused with freshness and care. Plus, customizing the sweetness or adding a hint of cinnamon becomes an easy option, something you rarely get with pre-packaged items. This hands-on approach elevates the simple act of eating a doughnut into a memorable culinary adventure.
Mastering the Art of African Twisted Doughnuts: A Detailed Recipe Guide
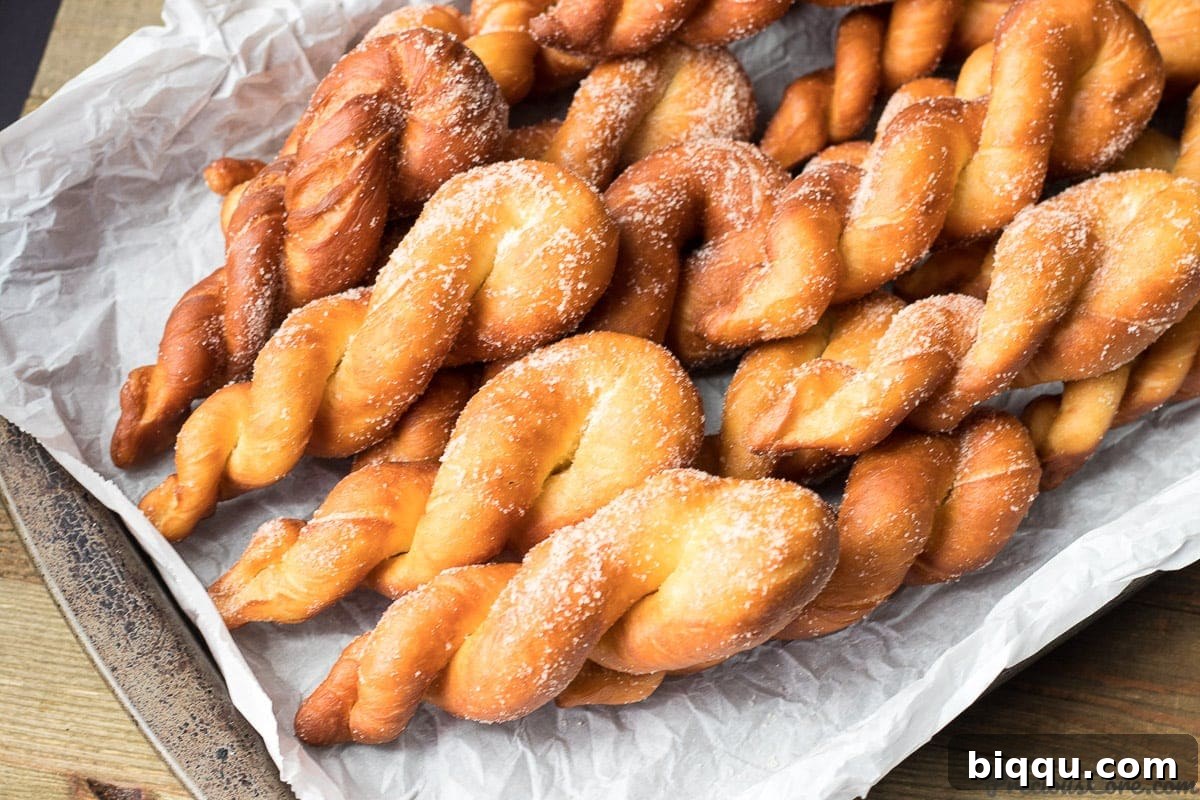
Creating these heavenly African Twisted Doughnuts might seem like a grand undertaking, but it’s a straightforward and incredibly rewarding process. The secret lies in a well-balanced dough and a bit of patience as the yeast works its magic. Here’s how to bring these soft, pillowy treats to life in your own kitchen.
Gathering Your Essential Ingredients
The foundation of these delicious doughnuts is a simple yet potent combination of pantry staples: all-purpose flour, active dry yeast (the magical component that gives them their incredible rise and fluffiness), rich butter for that irresistible flavor, granulated sugar for sweetness, wholesome milk, a single egg to bind everything together and add richness, and a pinch of salt to balance the flavors. Each ingredient plays a crucial role in achieving the perfect texture and taste, ensuring every bite is a harmonious blend of sweet and savory.
Bringing the Dough to Life: Mixing and First Rise
The journey begins by activating the yeast. Gently warm your milk until it’s just slightly warm to the touch (around 110 degrees Fahrenheit is ideal for yeast activation, ensuring it’s not too hot to kill the yeast, nor too cold to hinder its activity). Stir in the active dry yeast and let it rest for a couple of minutes until it begins to foam, indicating it’s active and ready to work its magic. This simple step is crucial for light and airy doughnuts.
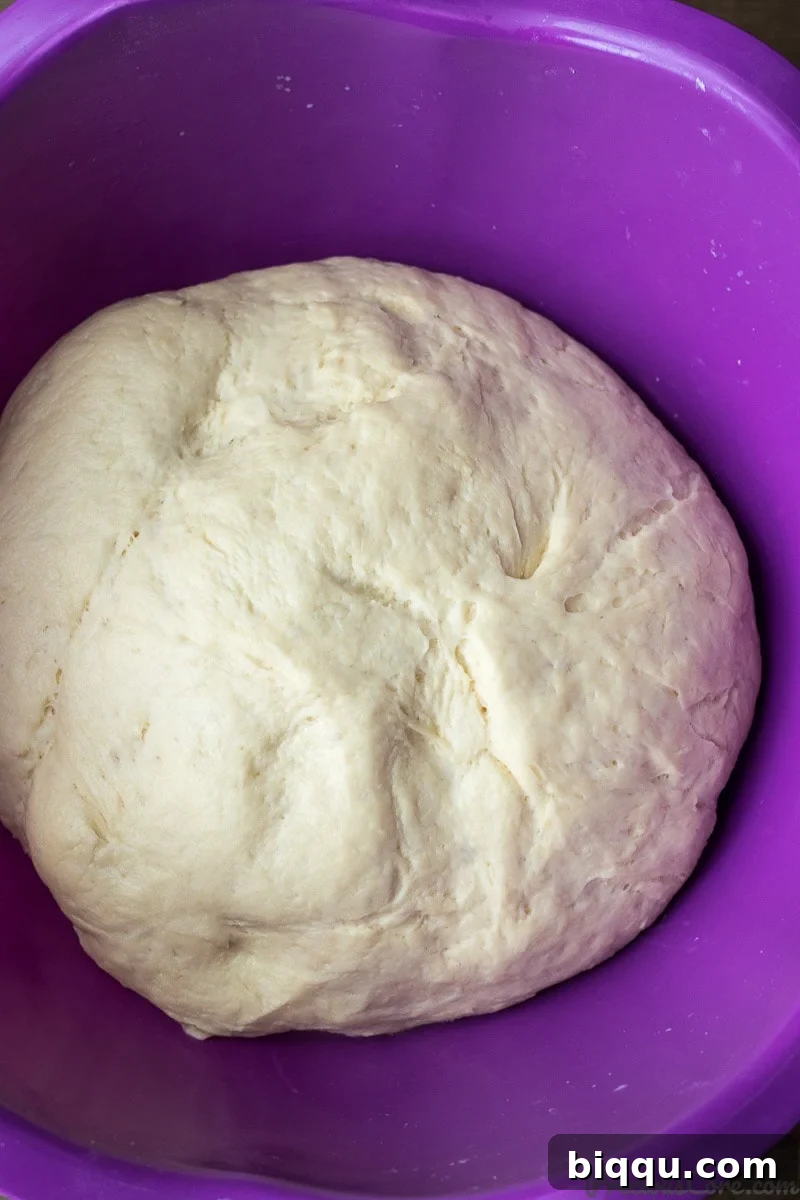
Next, introduce the sugar, salt, melted butter, and the egg to the activated yeast mixture, whisking everything until well combined. This creates a flavorful wet base. Finally, gradually add the flour, mixing it in with a sturdy wooden spoon until a cohesive dough forms. This dough will be soft and pliable. Once mixed, cover the dough with plastic wrap and let it rise in a warm place for approximately one hour, or until it has delightfully doubled in size. This first rise is essential for developing flavor and creating that signature airy texture.
The Art of the Twist: Shaping Your Doughnuts
After the dough has beautifully risen, gently punch it down to deflate it. This step releases the gas built up during fermentation and prepares the dough for shaping. Transfer the dough to a lightly floured surface and divide it into 24 equal pieces. A simple method is to first cut the dough in half, then each half in half again (to get four pieces), and then cut each of those pieces in half twice more to yield 8 pieces. Finally, cut each of these 8 pieces into 3, resulting in 24 perfectly sized portions for your twisted doughnuts.
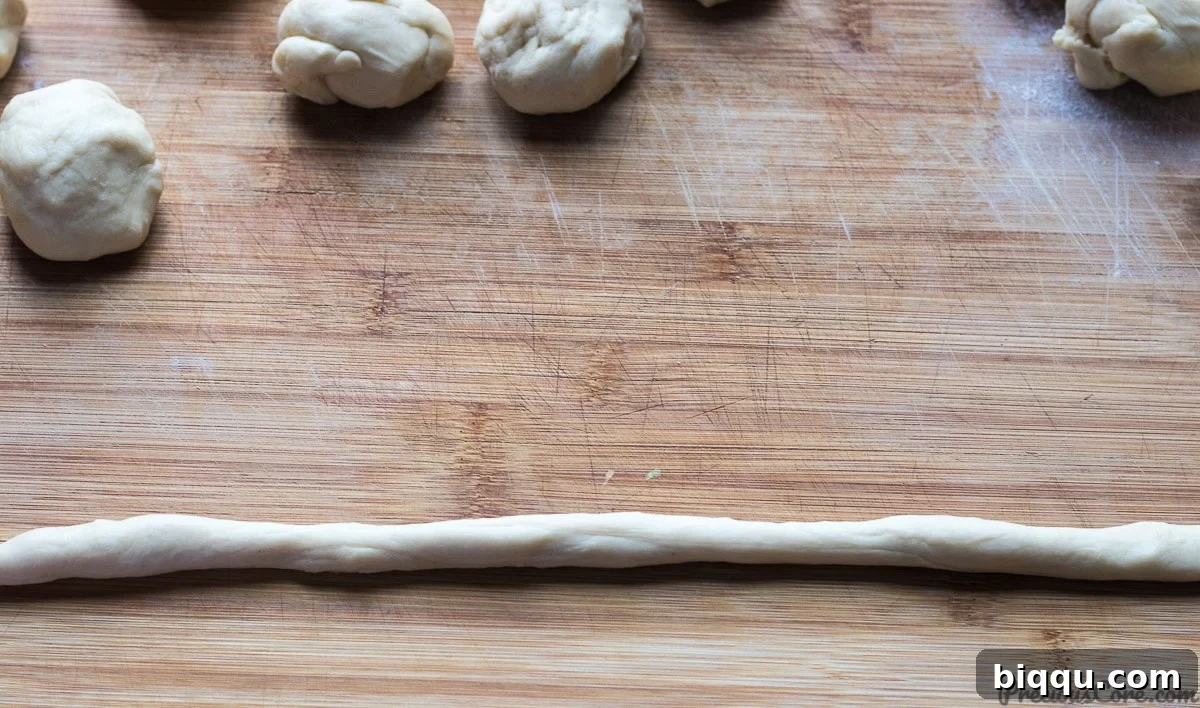
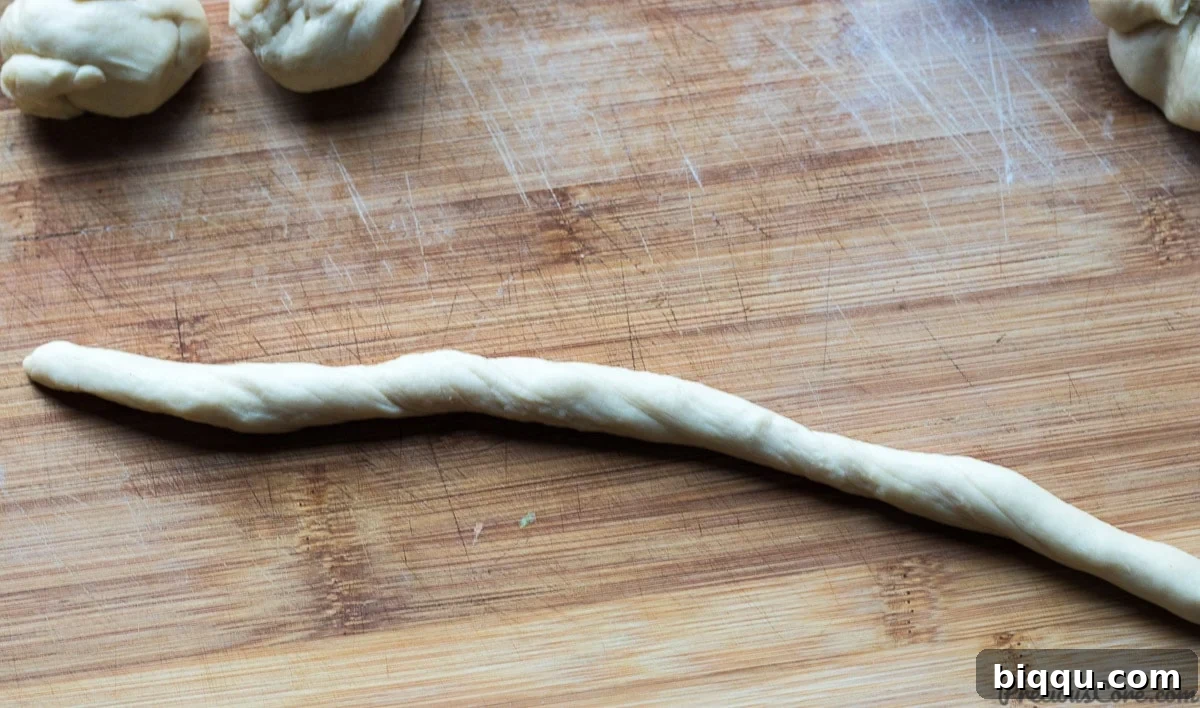
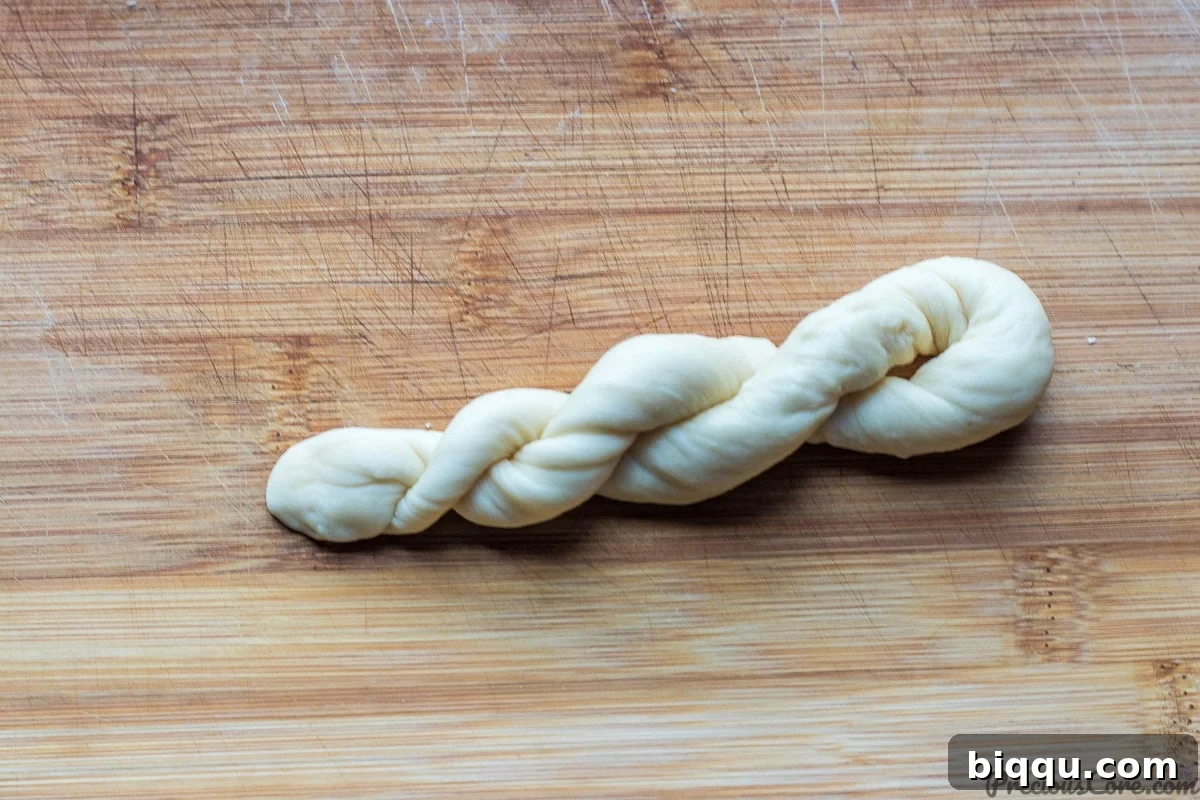
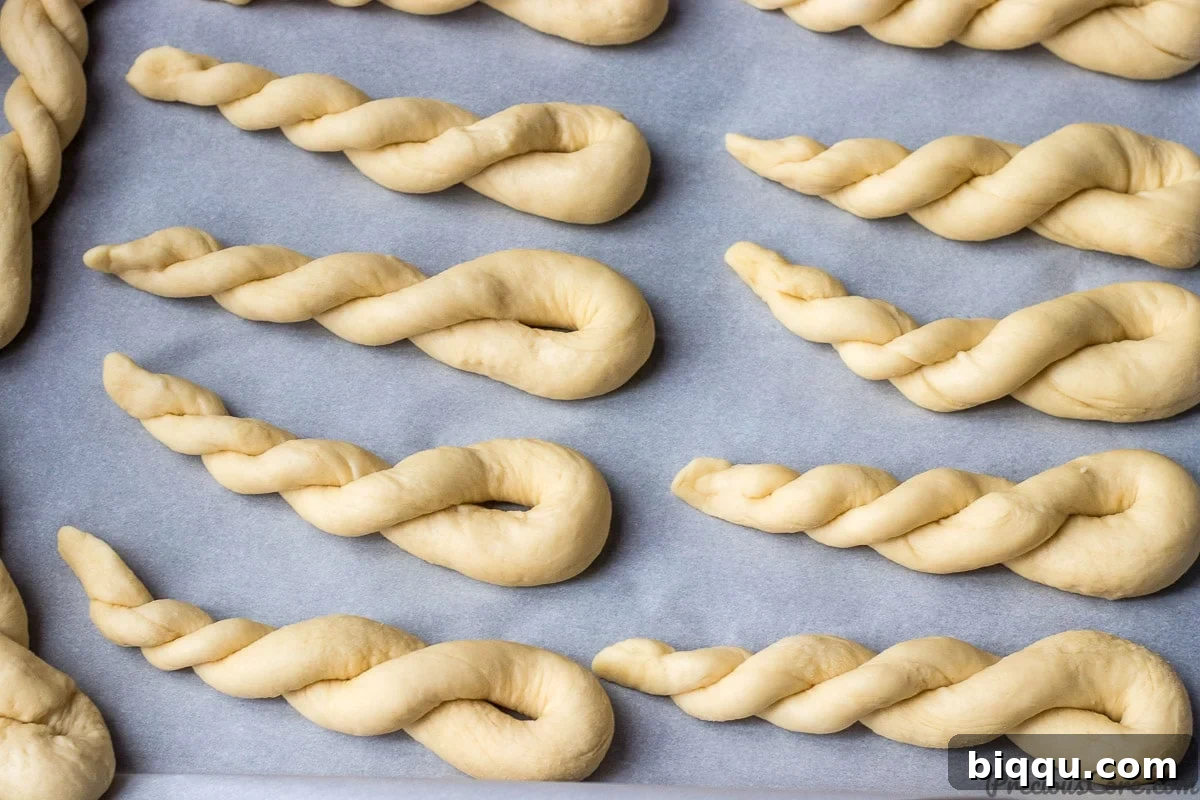
To create the distinct twisted shape, take one piece of dough and roll it out into a rope, roughly 13 inches long. Using both hands, gently roll both ends of the rope in opposite directions. Imagine moving one hand upwards and the other downwards as you roll. This action creates tension within the dough. Continue to hold the rope up and twist it with both hands in opposite directions until it forms 3-4 distinct twists. Once twisted, firmly press the ends together to seal them, preventing them from unraveling during frying. Place your perfectly twisted doughnut on a large tray or chopping board, and repeat this enjoyable process with the remaining dough.
For those who find the twisting technique a bit challenging, don’t fret! You can simply shape the dough into small, one-inch balls. While a quicker alternative, note that these balls will require a slightly longer frying time to ensure they are cooked through compared to their twisted counterparts.
The Golden Fry: Bringing Your Doughnuts to Perfection
Once all your twists are formed, allow them a final short rest to rise for another twenty minutes. This secondary rise, known as proofing, ensures they achieve maximum fluffiness. Halfway through this resting period, remember to flip them gently to allow the other side to rise evenly. Simultaneously, begin heating your frying oil. You’ll want your oil to reach about 350 degrees Fahrenheit, which usually takes about 8-10 minutes over high heat. Once it reaches temperature, reduce the heat to medium-low to maintain a steady frying temperature. This prevents the doughnuts from browning too quickly on the outside while remaining raw on the inside.
Carefully place the twisted doughnuts into the hot oil, ensuring not to overcrowd the pan. Frying in batches (around 6 at a time in a standard wok) allows for even cooking and temperature maintenance. Fry them until they turn a beautiful golden brown on one side, then flip them over to cook the other side to the same perfect hue. The entire frying process for each doughnut should take approximately 4 minutes. Once golden, remove them from the oil and place them on paper towels to absorb any excess oil. This ensures they remain light and crispy, not greasy.
The Sweet Finish: Coating and Enjoying
The final, irresistible step is to coat your warm doughnuts. While still hot, you can place them in a paper bag with granulated sugar (and a dash of cinnamon for an extra layer of flavor) and gently shake to coat them evenly. The warmth of the doughnuts helps the sugar adhere beautifully, creating a glistening, sweet crust. I insist: you absolutely must try some while they are still warm. The combination of the warm, fluffy interior and the sweet, slightly crunchy coating is simply divine!
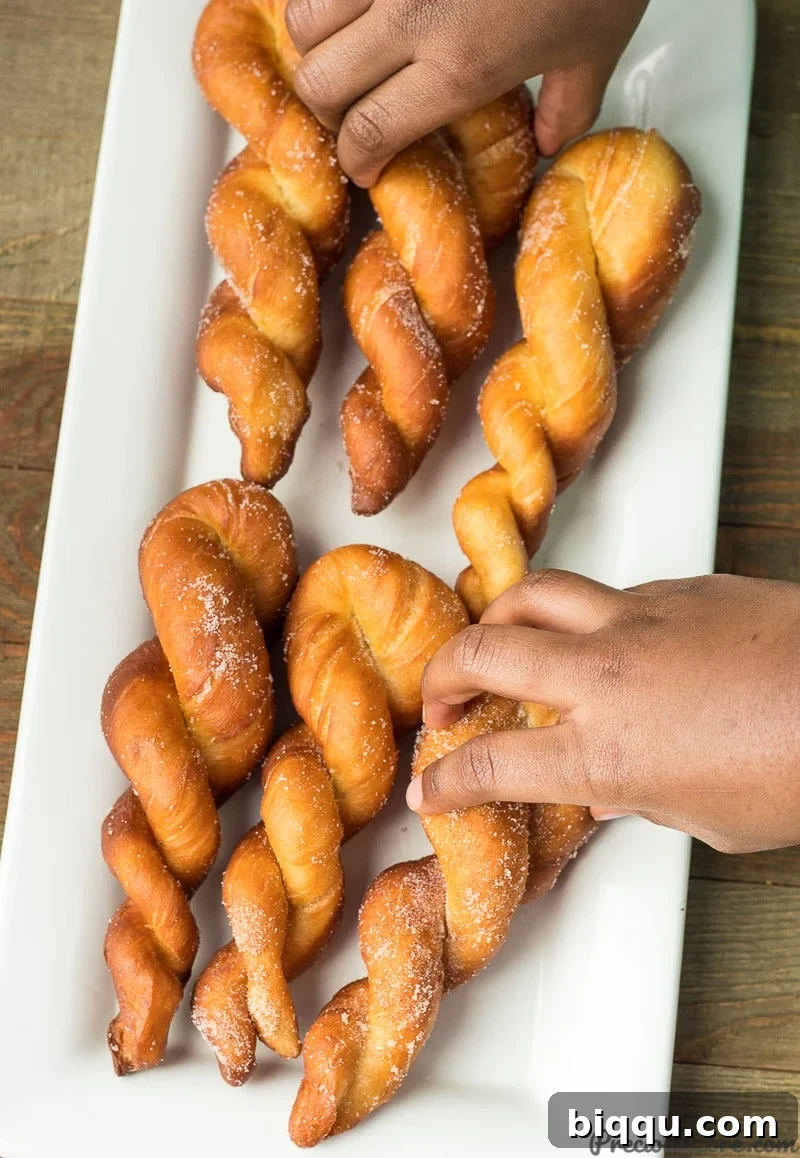
This recipe, which I’ve carefully adapted and refined from one of my favorite YouTube cooks, Maangchi, has been rigorously tested. I’ve successfully adjusted the ingredients to precise gram measurements, making it incredibly easy to follow for those who prefer to measure by weight. For instance, you’ll need 500 grams (or half a kilogram) of all-purpose flour, which conveniently translates to 4 cups. This flexibility ensures accuracy and ease of preparation whether you measure in grams or cups. You can find all the detailed measurements in the full recipe card below. But first, let’s delve deeper into what makes an “African Doughnut” so special!
What Defines an “African Doughnut”? Exploring Diverse Deep-Fried Delights
At its heart, an African doughnut is a delectable form of deep-fried dough, a beloved snack or breakfast item found across the vast and diverse continent. The beauty of African doughnuts lies in their incredible variety, with distinct shapes, flavors, and names that reflect the rich culinary traditions of different regions and countries.
For example, while the twisted doughnuts are popular in Sierra Leone and Cameroon, other nations have their own signature styles. Nigerian doughnuts, often recognized for their classic shape, are typically made into rings. In contrast, Cameroonian and Ghanaian doughnuts frequently take the form of small, spherical balls, offering a different textural experience.
Journey to East Africa, and you’ll encounter the widely popular “mandazi,” characterized by their distinctive triangle-like shapes and often infused with a hint of cardamom, offering a fragrant and slightly spicy flavor. Further south, South Africa boasts “koeksisters,” beautifully braided doughnuts that are deep-fried and then drenched in a sweet, sticky syrup, creating a truly indulgent treat. Each of these variations, while sharing the core concept of fried dough, presents a unique culinary identity.
Despite their diverse appearances, all these various forms of African doughnuts share common threads. They are typically made using a similar set of fundamental ingredients: flour, sugar, and a leavening agent like yeast (or sometimes baking powder) for that essential rise. Margarine or butter is often incorporated to enrich the dough, contributing to its tender texture and delicious flavor. While some recipes might be richer, incorporating more ingredients for added depth, others, like the popular Puff Puff, embrace simplicity, relying on just flour, yeast, sugar, and salt for a light and airy result.
African doughnuts, in all their glorious forms, are undeniably a hit at African parties and gatherings, serving as a comforting and universally loved snack. Whether you prefer them twisted, in rings, balls, or triangles, they are a true treat for the senses, embodying warmth, tradition, and pure culinary joy. So go ahead, make these African doughnuts! They are perfect for a casual snack at home, a delightful breakfast, impressing your guests, or bringing to picnics and potlucks. They are truly epic in every way, promising satisfaction and smiles.
Don’t forget to also check out our Puff Puff recipe, another quintessential West and Central African snack that’s equally delicious and easy to make!
Watch the Magic Unfold: A Step-by-Step Video Tutorial
Sometimes, seeing is believing, especially when it comes to mastering new recipes. To guide you through every step of making these incredible African Twisted Doughnuts, I’ve prepared a detailed video tutorial. You can watch me make them live in the video below. Visualizing the dough preparation, the intricate twisting technique, and the frying process can make all the difference in achieving perfect results.
If you haven’t already, I encourage you to SUBSCRIBE to my YouTube channel. By subscribing, you’ll stay updated with all my latest recipes, cooking tips, and culinary adventures, ensuring you never miss out on another delicious creation.
African Doughnuts – Twisted Doughnuts
Print Recipe
Ingredients
- 4 cups all purpose flour (500g or 1/2 kg)
- 2 1/2 teaspoons active dry yeast (1 oz sachet)
- 12 oz evaporated milk (354ml or 1 1/2 cups)
- 3 tablespoons butter – melted
- 3 tablespoons granulated sugar
- 1 teaspoon salt (not heaped)
- 1 egg
- Oil for frying Corn oil, canola oil or vegetable oil will work well here.
Instructions
-
Heat the milk until it is just slightly warm to the touch, approximately 110 degrees Fahrenheit (I typically heat it for 1 minute in the microwave).
-
Add the active dry yeast to the warm milk and let it rest for 2 minutes to activate. Then, whisk in the sugar, salt, melted butter, and egg until thoroughly combined. Finally, gradually add the flour and mix with a wooden spoon until a smooth dough forms. Cover the dough with plastic wrap and let it rise in a warm place for about 1 hour, or until it has doubled in size.
-
Gently punch down the risen dough to deflate it. Transfer it to a lightly floured board and divide it into 24 equal pieces. (A helpful tip: start by cutting the dough into two, then cut each piece into two again to form 8 pieces. Finally, cut each of these 8 pieces into 3, resulting in 24 even portions.)
-
Take one piece of dough and roll it out into a 13-inch rope. To create the twist, roll the rope in opposite directions using both hands (move one hand upward and the other downward as you roll). Hold the rope up and continue twisting until it forms 3-4 distinct twists. Press the ends together firmly to seal them. Place the twisted doughnut on a large tray or chopping board. Repeat this process for the remaining dough pieces.
-
Allow the shaped twisted doughnuts to rise for approximately twenty minutes. Halfway through this second rise, gently flip them to the other side to ensure both sides rise evenly. At this halfway mark, also begin heating your frying oil in a deep pot or wok over high heat.
-
Once the oil reaches about 350 degrees F (or after 8-10 minutes of heating), reduce the heat to medium-low. Carefully place the twisted doughnuts into the hot oil, being careful not to overcrowd the pan (I typically fry 6 doughnuts at a time in my wok).
Fry until the doughnuts turn a beautiful golden brown on one side, then flip them to cook the other side to the same golden hue. Once both sides are golden brown, remove them and place them on paper towels to absorb any excess oil. The total cooking time per batch is usually about 4 minutes.
-
For an irresistible finish, if desired, combine 2 tablespoons of granulated sugar and 1/2 teaspoon of cinnamon in a paper bag. Place the hot doughnuts into the bag and shake gently to coat them evenly. This simple step adds an incredible layer of flavor and sweetness!
Notes
2. These African doughnuts freeze exceptionally well. To store, place them in a Ziploc bag and freeze. When you’re ready to enjoy them, simply remove and allow them to thaw completely before eating. If you prefer them warm, microwave for about a minute; however, be aware that warming them will melt the sugar coating. Avoid warming for much longer than a minute, as this can cause them to become hard.
3. Nutritional information provided is calculated per individual doughnut.
Nutrition
Additional Info
If you make this recipe, please take a moment to rate it below and share a picture with me on Facebook or tag me on Instagram. I’d absolutely love to see your delicious creations!
Pin this recipe to save for later:
You are stronger than you think, braver than you think, and more capable than you can ever imagine. Never stop believing in yourself!