

There’s a special kind of magic that happens in the kitchen when you decide to bake bread from scratch. It’s a journey from simple ingredients to a warm, fragrant loaf that fills your home with an irresistible aroma. For me, that journey often starts with my beloved homemade milk bread recipe – a recipe I’ve been eager to share with you all, especially on my YouTube channel. While there are countless bread varieties to explore, I firmly believe this milk bread is the perfect starting point for anyone, whether you’re a seasoned baker or just beginning your culinary adventures.
This isn’t just another bread recipe; it’s a foundation, a confidence-builder. If you’ve ever felt intimidated by baking yeast bread, this is your invitation to conquer that fear. This recipe is designed to be straightforward, forgiving, and incredibly rewarding. Regardless of your experience level, gender, or previous baking mishaps, I promise you, **YOU CAN** master this homemade milk bread.

Why This Homemade Milk Bread Will Become Your Favorite
The proof, as they say, is in the pudding – or, in this case, in the countless glowing testimonials from those who have successfully followed this very recipe. My heart swells with joy every time I receive pictures of your beautiful homemade loaves! It’s truly inspiring to see so many embracing the art of bread making.
I recently guided a friend through the process, and guess what? She now bakes this bread almost every week! She often doubles, triples, or even quadruples the recipe because a single batch simply vanishes too quickly. I highly recommend you do the same. These loaves are so incredibly delicious, soft, and fluffy that they won’t last long, no matter how many you make!
Unbeatable Texture and Flavor
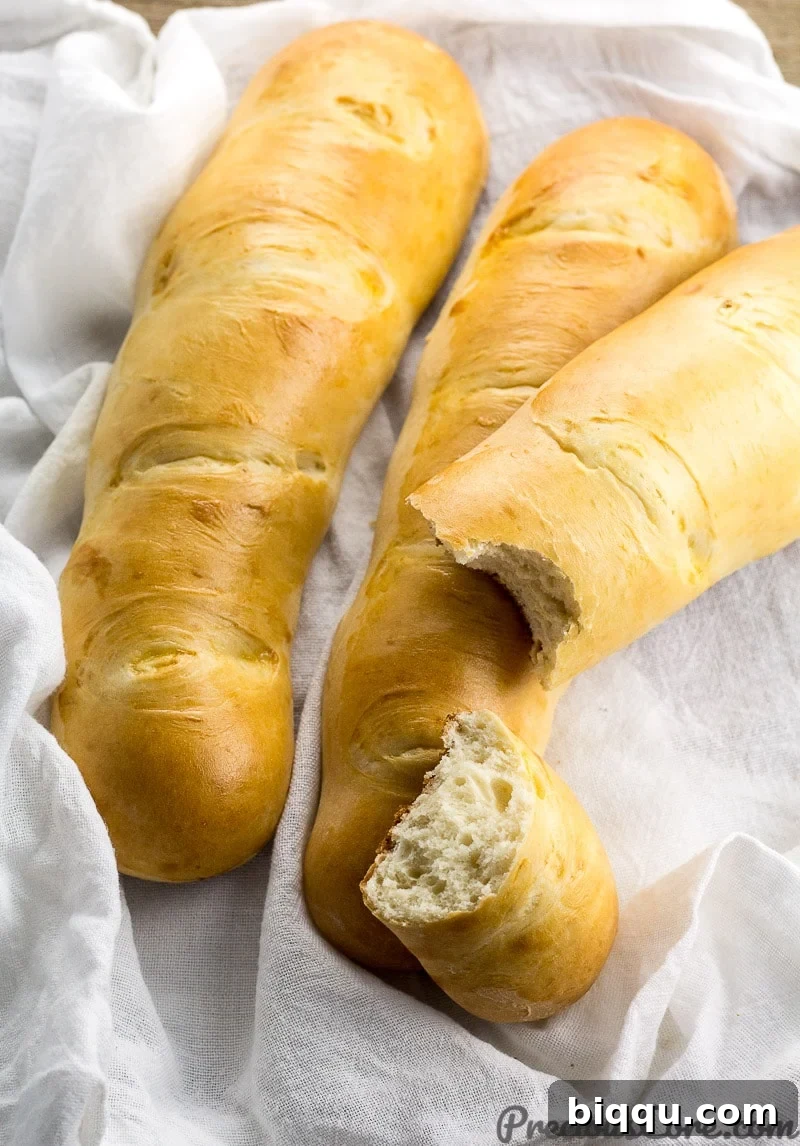
Imagine biting into a slice of bread that is incredibly soft, delicately milky, and wonderfully fluffy. That’s exactly what you get with this homemade milk bread. Enjoy it plain, fresh from the oven, as a delightful accompaniment to any meal, or elevate your everyday sandwich. The versatility of this bread makes it a household staple.
The Healthier, Happier Choice: Homemade vs. Store-Bought
Once you realize that crafting your own bread at home isn’t complex, it becomes an exciting and fulfilling endeavor. These days, I find it incredibly challenging to buy industrial bread. The reason is simple: even the so-called “healthy” versions are often laden with an extensive list of ingredients – sometimes over 20! Many of these are preservatives, artificial flavors, and chemicals designed for shelf-life, not your well-being. In stark contrast, a truly delicious homemade bread requires only about 5-10 wholesome ingredients.

This is where homemade milk bread truly shines! It’s not just a recipe; it’s a lifestyle choice, a rescue mission for your taste buds and your health. I bake a significant amount of bread at home, and among all my bread recipes, this milk bread is hands down the one I bake most often. Its simplicity, deliciousness, and consistent results make it an absolute winner.
Embark on Your Baking Journey: Tips for Success
Ready to get started? Before you dive in, here are a few encouraging words and tips to ensure your baking experience is a resounding success:
- **Embrace the Process:** Baking bread is a sensory experience. Enjoy the feel of the dough, the warmth of the rising process, and the incredible aroma that fills your kitchen.
- **Measure Accurately:** Especially for baking, precision in measuring ingredients is key. Use proper measuring cups and spoons. If you don’t have them, consider this your sign to get some – they are essential kitchen tools!
- **Patience is a Virtue:** Yeast needs time to work its magic. Don’t rush the rising process; allow the dough to double in size for optimal texture.
- **The Right Temperature:** The warmth of your water for activating yeast is crucial. Aim for around 105-115°F (40-46°C). Too hot, and it kills the yeast; too cold, and it won’t activate properly.
So, gather your ingredients, watch the video, and prepare to create something truly wonderful. Enjoy the process, and savor every bite, my friends!
Watch How to Make Homemade Milk Bread: A Visual Guide
Seeing the process in action can make all the difference, especially for new bakers. This video breaks down each step, making it even easier to follow along and achieve perfect results with your homemade milk bread.
For more delicious recipes and baking tutorials, be sure to click here and subscribe to my YouTube channel. Don’t miss out on future culinary inspiration!

Homemade Milk Bread
Pin Recipe
Rate
Print Recipe
Ingredients
- 3 cups all-purpose flour (375g), plus 1/4 cup for dusting and rolling
- 1 teaspoon active dry yeast
- 1 cup warm water (110 degrees F / 43 degrees C)
- 1/4 cup evaporated milk (60 ml)
- 4 tablespoons granulated sugar
- 1/2 teaspoon salt
- 3 tablespoons unsalted butter (melted)
- 1 large egg, for egg wash
Instructions
-
In a spacious mixing bowl, gently combine the warm water, active dry yeast, and granulated sugar. Stir until the sugar and yeast begin to dissolve and activate (a few minutes). Then, pour in the evaporated milk and the melted butter. Whisk all the wet ingredients together thoroughly to ensure they are well combined. Gradually add the all-purpose flour and salt, mixing with a wooden spoon or spatula until a sticky dough forms.
-
Lightly flour a clean work surface or a large cutting board. Transfer the sticky dough onto the floured surface. Sprinkle the top of the dough with a bit more flour and begin to knead gently. Continue to sprinkle additional flour as needed, just enough to prevent the dough from sticking excessively to your hands and the surface. It’s crucial to avoid adding too much flour, as this can result in a dense, hard bread rather than the desired soft and fluffy texture. Knead until the dough becomes smoother and more elastic, typically for about 5-7 minutes.
-
Once kneaded, divide the dough into four equal portions. Lightly flour your board again. Take one piece of dough and roll it out into an oval or rectangular shape, approximately ten inches wide. Starting from one of the longer ends, tightly roll the dough towards the opposite end. Tuck in the edges as you roll to create a neat loaf shape. Place the formed loaf onto a baking tray that has been lightly greased or lined with parchment paper. Using a sharp knife or a dough scraper, make four shallow diagonal cuts across the top of the bread. Repeat this shaping process with the remaining three pieces of dough.
For a visual demonstration of how to perfectly form these beautiful loaves, please refer to the accompanying video.
-
Find a warm, draft-free place for your loaves to rise. A great tip for creating an ideal rising environment is to turn your oven on for just 2 minutes, then switch it off. Place the covered baking tray with your loaves inside the slightly warmed, but now off, oven. Let them rise for approximately one hour, or until they have visibly doubled in size. This crucial step is what gives your milk bread its airy, light texture.
-
While the loaves are rising, preheat your oven to 350 degrees F (180 degrees C). Once the loaves have doubled in size, gently beat the remaining egg in a small bowl to create an egg wash. Generously brush the tops and sides of each risen loaf with the egg wash; this will give them a beautiful golden-brown color and a lovely sheen. Transfer the baking tray to the preheated oven and bake for 15 minutes, or until the loaves are perfectly golden brown and cooked through. Allow to cool slightly on a wire rack before slicing and enjoying the fresh, soft goodness!
Notes
Nutrition
Additional Info
Pin this recipe:
There’s truly no limit to the creativity and satisfaction that can be found in your own kitchen. Whether you’re baking luscious bread, whipping up your own creamy spreads, or crafting any dish your heart desires, the possibilities are endless. Just believe in your abilities, gather your ingredients, and give it a try. There’s an unparalleled joy and wholesome goodness that comes with homemade food!
This journey of making homemade milk bread is more than just following a recipe; it’s an act of self-care, a way to connect with the food you eat, and a delightful skill to master. So, roll up your sleeves, embrace the floury mess, and prepare to be amazed by the delicious, soft, and milky bread you’re about to create. Happy baking!