
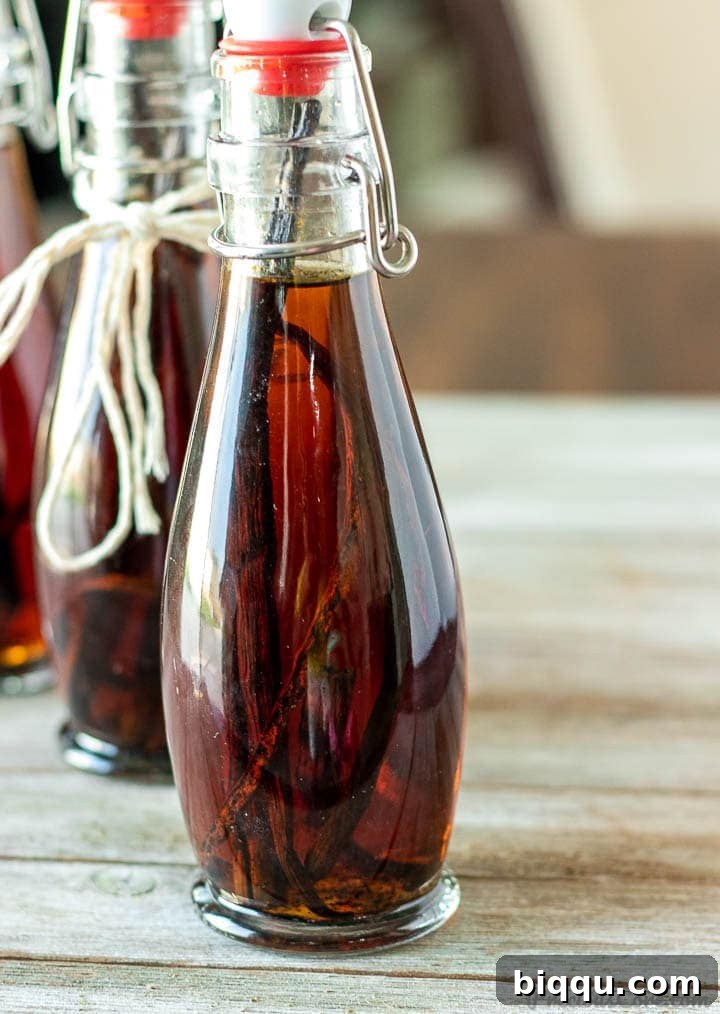
Unleash the Magic: Your Ultimate Guide to Crafting Exquisite Homemade Vanilla Extract
Step into a world where your desserts don’t just taste good, they taste extraordinary. Homemade Vanilla Extract is a game-changer, offering a depth of flavor that store-bought varieties simply cannot match. Elevate your cakes, cookies, frostings, and countless other culinary creations with this simple yet profound ingredient. What’s even better? You only need two core ingredients to create this liquid gold!
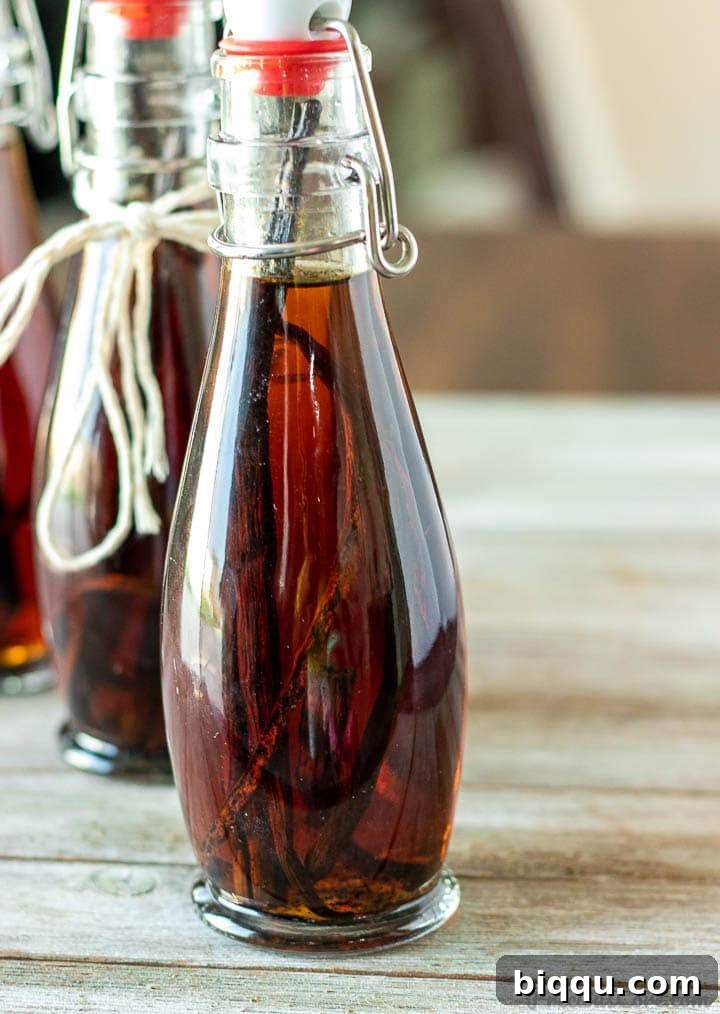
The secret to incredible baking often lies in the quality of your ingredients, and vanilla extract is no exception. While browsing through online culinary communities and sharing snippets of my kitchen adventures, many of you expressed immense interest in the process of making vanilla extract from scratch. Your enthusiasm has led us here, to a comprehensive guide that promises to transform your pantry and your baking.
Crafting your own vanilla extract is more than just a recipe; it’s a rewarding experience that yields a superior product. There are numerous compelling reasons why every home baker should consider embarking on this delightful DIY journey.
Why Embrace the Art of Homemade Vanilla Extract?
Beyond the simple satisfaction of making something yourself, homemade vanilla extract offers tangible benefits that will truly enhance your culinary endeavors and even your gifting strategy.
1. Experience a Superior Flavor Profile
Prepare for an aromatic revelation! Homemade vanilla extract boasts an unbelievably intense and complex flavor that mass-produced versions can only dream of. The prolonged infusion process allows the vanilla beans to fully release their rich, nuanced essences into the alcohol, creating a product with unparalleled depth. This translates directly into baked goods that are a thousand times more flavorful and aromatic, leaving a lasting impression on anyone who tastes them.
2. A Cost-Effective Culinary Investment Over Time
While the initial outlay for quality vanilla beans might seem like a commitment, homemade vanilla extract proves to be significantly cheaper in the long run. Think of it as a sustainable kitchen practice. Once your first batch is ready, you can continue to “top off” your bottles with more alcohol, allowing the same vanilla beans to infuse new liquid for months, even years. This continuous replenishment drastically reduces the need to constantly purchase expensive store-bought extracts, saving you a considerable amount over time. It’s an investment that keeps giving back.
3. The Ultimate Thoughtful & Personalized Gift
Looking for a unique, heartfelt gift? Homemade vanilla extract fits the bill perfectly! Pour your meticulously crafted extract into charming bottles, adorn them with a personalized label and a ribbon, and you have a special, gourmet present that speaks volumes. It’s ideal for holidays, housewarmings, hostess gifts, or simply as a token of appreciation for the food lovers in your life. Few gifts are as universally loved and genuinely appreciated as a bottle of exquisite homemade vanilla.
4. A Fun and Engaging Culinary Project
Let’s be honest: some kitchen tasks are chores, but making vanilla extract is genuinely enjoyable. The anticipation of watching the extract develop its color and fragrance over time, the simple process of combining ingredients, and the joy of using your own creation make it a rewarding project. It’s a low-effort, high-reward activity that brings a touch of magic to your kitchen.
5. Control Over Ingredients and Purity
When you make your own vanilla extract, you have complete control over the quality of the ingredients. You can choose premium, organic vanilla beans and a good quality alcohol, ensuring your extract is free from artificial flavors, colors, or preservatives often found in commercial products. This purity translates to a cleaner, more authentic vanilla flavor in your cooking.
Essential Ingredients for Crafting Your Own Vanilla Extract
The beauty of homemade vanilla extract lies in its simplicity. You only need two primary ingredients, but choosing the right ones can make all the difference in the final product’s quality and flavor.
1. Vanilla Beans: The Heart of Your Extract
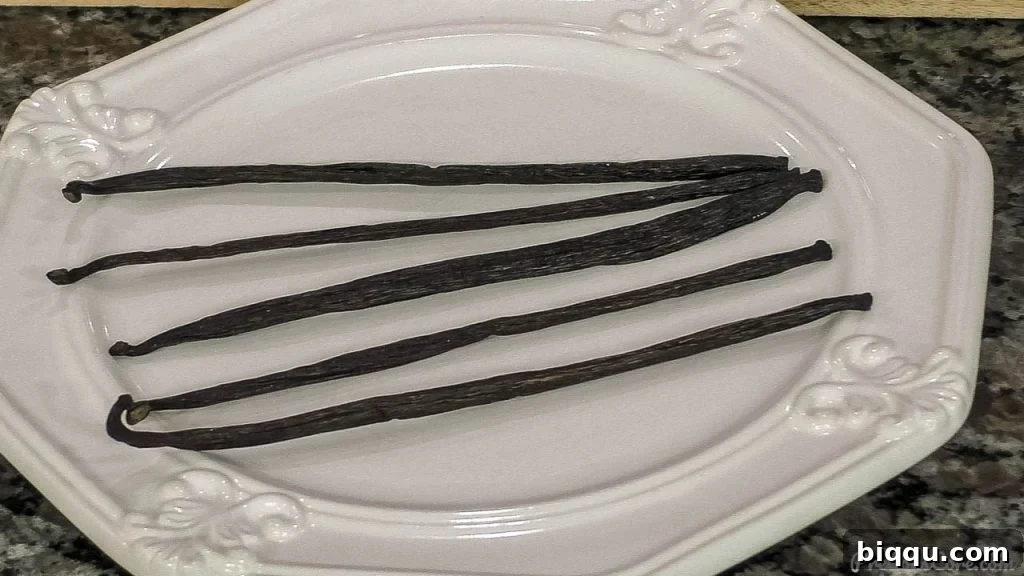
The quality of your vanilla beans is paramount. For extract making, we strongly recommend using Grade B vanilla beans. These beans are often referred to as “extract grade” or “dry” beans because they have a lower moisture content and a more concentrated vanilla flavor compared to Grade A (gourmet) beans. This makes them ideal for infusion, as they impart a richer, more intense flavor over time.
- Madagascar (Bourbon) Vanilla Beans: These are the most common and versatile vanilla beans, known for their classic, rich, creamy, and sweet vanilla flavor with notes of caramel. They yield a beautifully dark and aromatic extract.
- Tahitian Vanilla Beans: Tahitian beans offer a more floral, fruity, and cherry-like aroma, making them excellent for lighter desserts or when you desire a brighter vanilla note.
- Mexican Vanilla Beans: These beans often have a smoky, spicy quality, adding another layer of complexity to your extract.
- Ugandan Vanilla Beans: Similar to Madagascar beans, but often described as even bolder and more robust.
You can find high-quality Grade B vanilla beans from various sources, including online retailers like Amazon.com. Experiment with different origins to discover your favorite flavor profile!
2. Alcohol: The Flavor Carrier
The alcohol acts as a solvent, extracting the flavorful compounds from the vanilla beans. The key is to use an unflavored alcohol to allow the pure vanilla essence to shine through.
- Vodka: An 80-proof (40% alcohol by volume) unflavored vodka is the most common and recommended choice for homemade vanilla extract. Its neutral taste ensures that the vanilla flavor is clean and unadulterated.
- Other Alcohol Options: While vodka is preferred for a classic vanilla taste, you can experiment with other spirits to create unique flavor profiles.
- Rum can lend a sweet, slightly caramelized note.
- Brandy can add a rich, fruity undertone.
- Bourbon can infuse a smoky, oaky warmth.
Be aware that these alternatives have more complex flavors that will influence the final taste of your vanilla extract, creating a more gourmet or specialized product.
Can I Make Vanilla Extract Without Alcohol?
Absolutely! For those who prefer to avoid alcohol, vanilla extract can be made using food-grade glycerin. Glycerin is a plant-based oil, typically derived from vegetables, that also acts as an excellent solvent for vanilla. The resulting extract will have a slightly different consistency and flavor profile but is a fantastic non-alcoholic alternative. Look for vegetable glycerin, often found in health food stores or online.
The Ideal Vanilla Bean to Alcohol Ratio
Achieving the perfect potency is crucial. The generally accepted ratio for making high-quality vanilla extract is approximately 5-6 whole Grade B vanilla beans per 8 ounces (240 ml) of 80-proof alcohol. If you’re working with smaller batches, aim for about 3 beans per 4 ounces (120 ml) of alcohol. This ratio ensures a rich, robust extract that will stand up beautifully in your recipes. For an even more intense, “double-fold” extract, you can increase the bean-to-alcohol ratio.
Best Beans for Homemade Vanilla Extract: A Comparison
Through countless batches, I’ve experimented with both Madagascar and Tahitian beans. While both produce excellent extract, I’ve found that Madagascar beans consistently yield a more intense color and a classic, robust vanilla flavor that many bakers prefer. Tahitian beans, with their unique floral notes, are wonderful for specific applications, but for an all-purpose, deeply flavored extract, Madagascar remains my top choice.
Step-by-Step Guide: How to Make Homemade Vanilla Extract
The process of making vanilla extract is surprisingly simple, requiring more patience than skill. Follow these easy steps, and you’ll be on your way to enjoying homemade deliciousness.
1. Prepare Your Vanilla Beans
Start by preparing your vanilla beans to maximize their flavor release. Using a sharp knife, carefully split each vanilla bean lengthwise from one end to the other, but do not cut all the way through the other side – you want to create a slit. Then, use the dull side of your knife or a small spoon to gently scrape out the tiny, fragrant seeds (the “vanilla caviar”) from the inside of the bean. These seeds are packed with flavor! You can also cut the entire bean in half or into smaller pieces if your bottle opening is narrow. Place both the scraped seeds and the split bean pods into a clean glass jar or bottle with a tight-fitting lid.
2. Combine Ingredients
Carefully pour your chosen alcohol (typically 80-proof vodka) over the vanilla beans in the jar. A small funnel can be very helpful here to prevent spills, especially if your bottle has a narrow neck. Ensure that the vanilla beans are fully submerged in the alcohol. This is crucial for proper extraction and to prevent mold growth.
3. Begin the Infusion Process: Patience is Key
Once the alcohol and beans are combined, securely cover the bottle with its lid and give it a good shake. This initial shake helps to distribute the beans and ensure maximum contact with the alcohol. Store your vanilla extract at room temperature, ideally in a cool, dark place away from direct sunlight. A pantry, cupboard, or even a basement are perfect spots.
For optimal infusion, shake the bottle gently about once per week during the initial months. This helps to circulate the liquid and encourages the extraction process. The vanilla extract will begin to develop its signature color and aroma within a few weeks.
4. When is it Ready?
While technically usable after about 1 month, for a truly developed and robust flavor, it’s highly recommended to let your vanilla extract steep for a minimum of 6 months. Many connoisseurs even suggest waiting a full year. The longer it infuses, the deeper and more complex the vanilla flavor will become. Mark your calendar and resist the urge to use it too soon!
5. Maintaining Your Vanilla Extract & Replenishment
You can use your homemade vanilla extract with the beans still in the jar, or you can strain the beans out before use. Keeping the beans in the bottle will allow the flavor to continue intensifying over time. As you use your vanilla extract, you can “top off” the bottle by adding more vodka to the existing beans. This process can continue for a very long time, essentially giving you an endless supply of vanilla. If you notice the flavor becoming less intense after many refills, simply add a fresh vanilla bean or two to reinvigorate the batch.
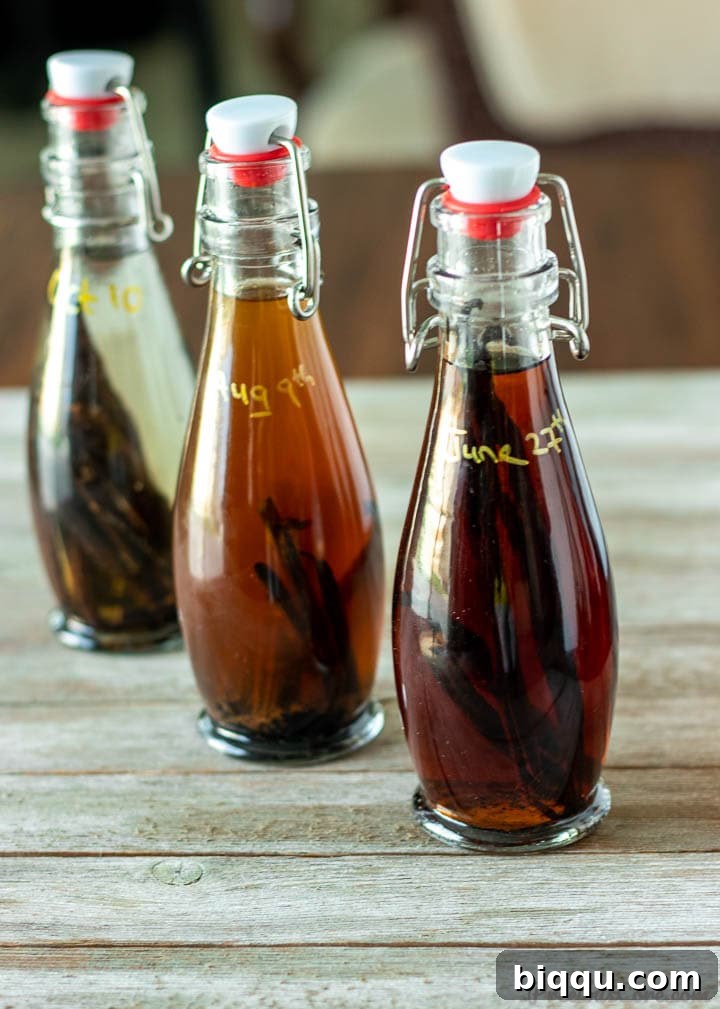
Essential Tools and Ingredients for Your Vanilla Journey
To ensure a smooth and successful vanilla extract making experience, gather these important tools and ingredients:
- High-Quality Madagascar Vanilla Beans
- Fragrant Tahitian Vanilla Beans (for an alternative flavor profile)
- A good quality 80-proof Vodka (or your preferred alcohol base)
- Clean, airtight Glass Bottles or Jars with tight-fitting lids
- A small funnel (for easy pouring)
- A sharp knife (for splitting beans)
- Optional: Vanilla Extract Labels (for gifting or organizing)
Creative Ways to Use Your Homemade Vanilla Extract
Once your liquid gold is ready, the culinary possibilities are endless! Homemade vanilla extract enhances almost any sweet dish, imparting a richer, more authentic flavor.
- Elevating Baked Goods:
- Classic Plain Cake or Sponge Cakes
- Rich Vanilla Pound Cake
- Fluffy Pancakes and Waffles
- Gourmet Chocolate Chip Cookies, Sugar Cookies, or Oatmeal Cookies
- Creamy Frostings, Glazes, and Icings
- Homemade breads like French Bread (a touch of vanilla can add depth to sweet versions)
- Enhancing Desserts and Sweets:
- Dreamy Homemade Vanilla Ice Cream
- Custards, Puddings, and Crème brûlée
- Whipped Cream and Mousse
- Fruit Salads (a few drops can brighten the flavors)
- Homemade Yogurts, like a delicious Yogurt Cake
- Beverage Boosts:
- Coffee, Lattes, and Hot Chocolate
- Smoothies and Milkshakes
Watch How To Make Vanilla Extract
For a visual guide to making your own Homemade Vanilla Extract, check out the video below. Don’t forget to SUBSCRIBE to my YouTube Channel so you never miss out on new recipes and culinary tips!
Subscribe to my channel for more delicious recipes!
Frequently Asked Questions About Homemade Vanilla Extract
How long does homemade vanilla extract last?
Properly made and stored homemade vanilla extract can last indefinitely. Because alcohol is a natural preservative, your extract will remain potent and flavorful for many years, often improving with age. Just ensure the beans remain submerged in alcohol.
Can I use different types of alcohol?
Yes, while unflavored vodka is the most neutral choice, you can definitely experiment with rum, brandy, or bourbon. Each will impart its own unique flavor notes to the vanilla, creating distinct extracts perfect for different recipes.
What’s the best way to store homemade vanilla extract?
Store your vanilla extract in a cool, dark place away from direct sunlight and heat. A pantry or cupboard is ideal. There’s no need to refrigerate it.
Why is my vanilla extract not dark?
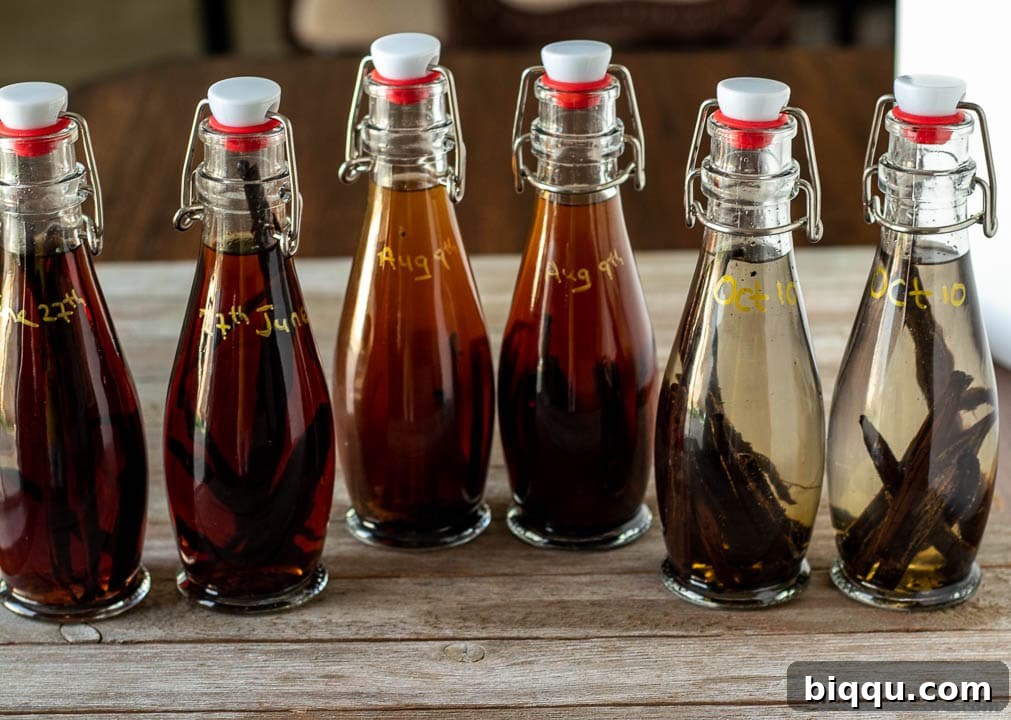
The darkness of your vanilla extract depends on several factors: the type of vanilla beans used (Madagascar beans tend to yield a darker color), the length of the infusion period, and the bean-to-alcohol ratio. Lighter extracts are still potent; color isn’t the sole indicator of flavor strength. Give it more time, and ensure your beans are Grade B for optimal extraction.
More Homemade Recipes to Try
If you enjoyed making your own vanilla extract, you’ll love these other satisfying homemade recipes:
- Rich Homemade Tomato Paste
- Easy Homemade French Bread
- Decadent Homemade Chocolate Ice Cream
- Creamy Homemade Mayonnaise Recipe
If you make this recipe, please consider leaving a star rating below. Your feedback helps others discover delicious recipes, and I always love hearing from you! Thank you!
Homemade Vanilla Extract Recipe
Homemade Vanilla Extract is undeniably superior to any store-bought alternative. This simple recipe shows you how to make your own with just two ingredients!
Prep Time: 10 mins
Total Time: 10 mins (plus 1-6 months infusion)
Yields: 1 (8 oz) bottle
Course: Dessert, Baking Ingredient
Cuisine: Western, Global
Equipment
- Bottles with tight-fitting lids (8 oz capacity recommended)
- Small funnel (optional, but helpful for pouring)
- Sharp knife
Ingredients
- 5-6 Grade B vanilla beans (Madagascar or Tahitian recommended)
- 8 oz (240 ml) 80-proof unflavored vodka
Instructions
- Using a sharp knife, make a slit along the length of each vanilla bean, from one end to the other, without cutting completely through the other side. Scrape the seeds (vanilla caviar) from inside the bean using the dull side of your knife or a small spoon. Cut the vanilla bean in half or into smaller pieces if necessary to fit your bottle. Place both the scraped seeds and the bean pods into a clean glass bottle with a tight-fitting lid.
- Carefully pour the 80-proof unflavored vodka over the vanilla beans in the bottle. A small funnel can make this step much easier, preventing spills. Ensure the beans are fully submerged.
- Securely cover the bottle with its lid and shake well to combine the ingredients.
- Store the vanilla extract at room temperature, away from direct sunlight. Shake the bottle gently about once per week for the first few months to encourage infusion.
- Your vanilla extract will be ready to use after about 1 month, but for a significantly more intense and complex flavor, allow it to steep for at least 6 months before using. For the best flavor, a year is ideal.
- You can use the homemade vanilla extract with the beans still in the jar, or you can strain them out before use. As you use the vanilla extract, you can “top off” the bottle with more vodka to replenish your supply. If the vanilla flavor begins to weaken after many refills, simply add a new vanilla bean or two to the bottle.
Notes
Can I make vanilla extract without alcohol? Yes, you can! Vanilla extract can be made using food-grade glycerin, a plant-based oil, as an alcohol alternative. The process is similar, simply replace vodka with glycerin.
Nutrition Information
(Approximate values per 1 tablespoon serving)
- Calories: 36 kcal
- Carbohydrates: 0.4 g
- Fat: 0.2 g
- Sodium: 0.1 mg
- Potassium: 0.1 mg
- Iron: 0.001 mg
Note: Nutritional information is an estimate and may vary based on specific ingredients and preparation methods.
Tried this recipe?
Mention @preciouscore or tag #PreciousCore on Instagram!