
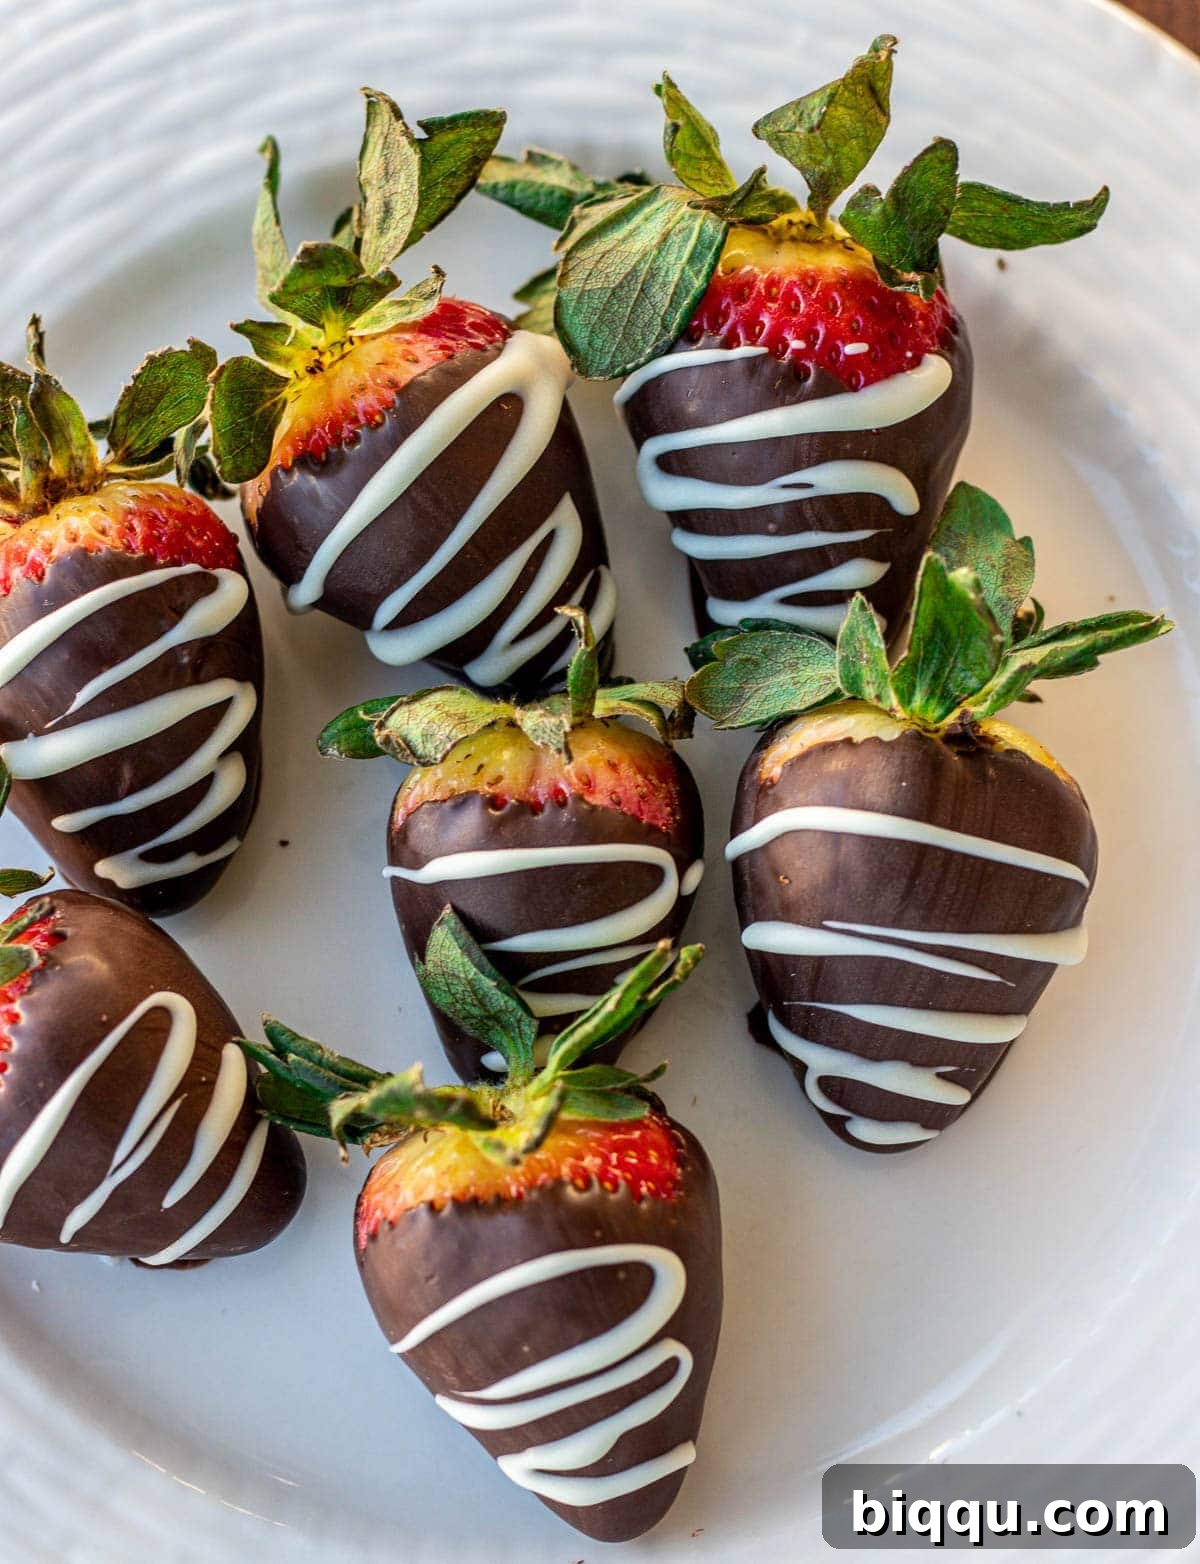
Indulge in a timeless classic that effortlessly combines elegance with simplicity: Easy Chocolate Covered Strawberries. This delightful treat requires just two primary ingredients and a mere 30 minutes of your time, making it the perfect choice for any special occasion. Whether you’re celebrating Valentine’s Day, pampering Mom on Mother’s Day, hosting a bridal shower, or simply craving a sophisticated yet straightforward dessert, these chocolate-dipped delights are guaranteed to impress. Prepare to create a memorable treat that’s both beautiful and unbelievably delicious.
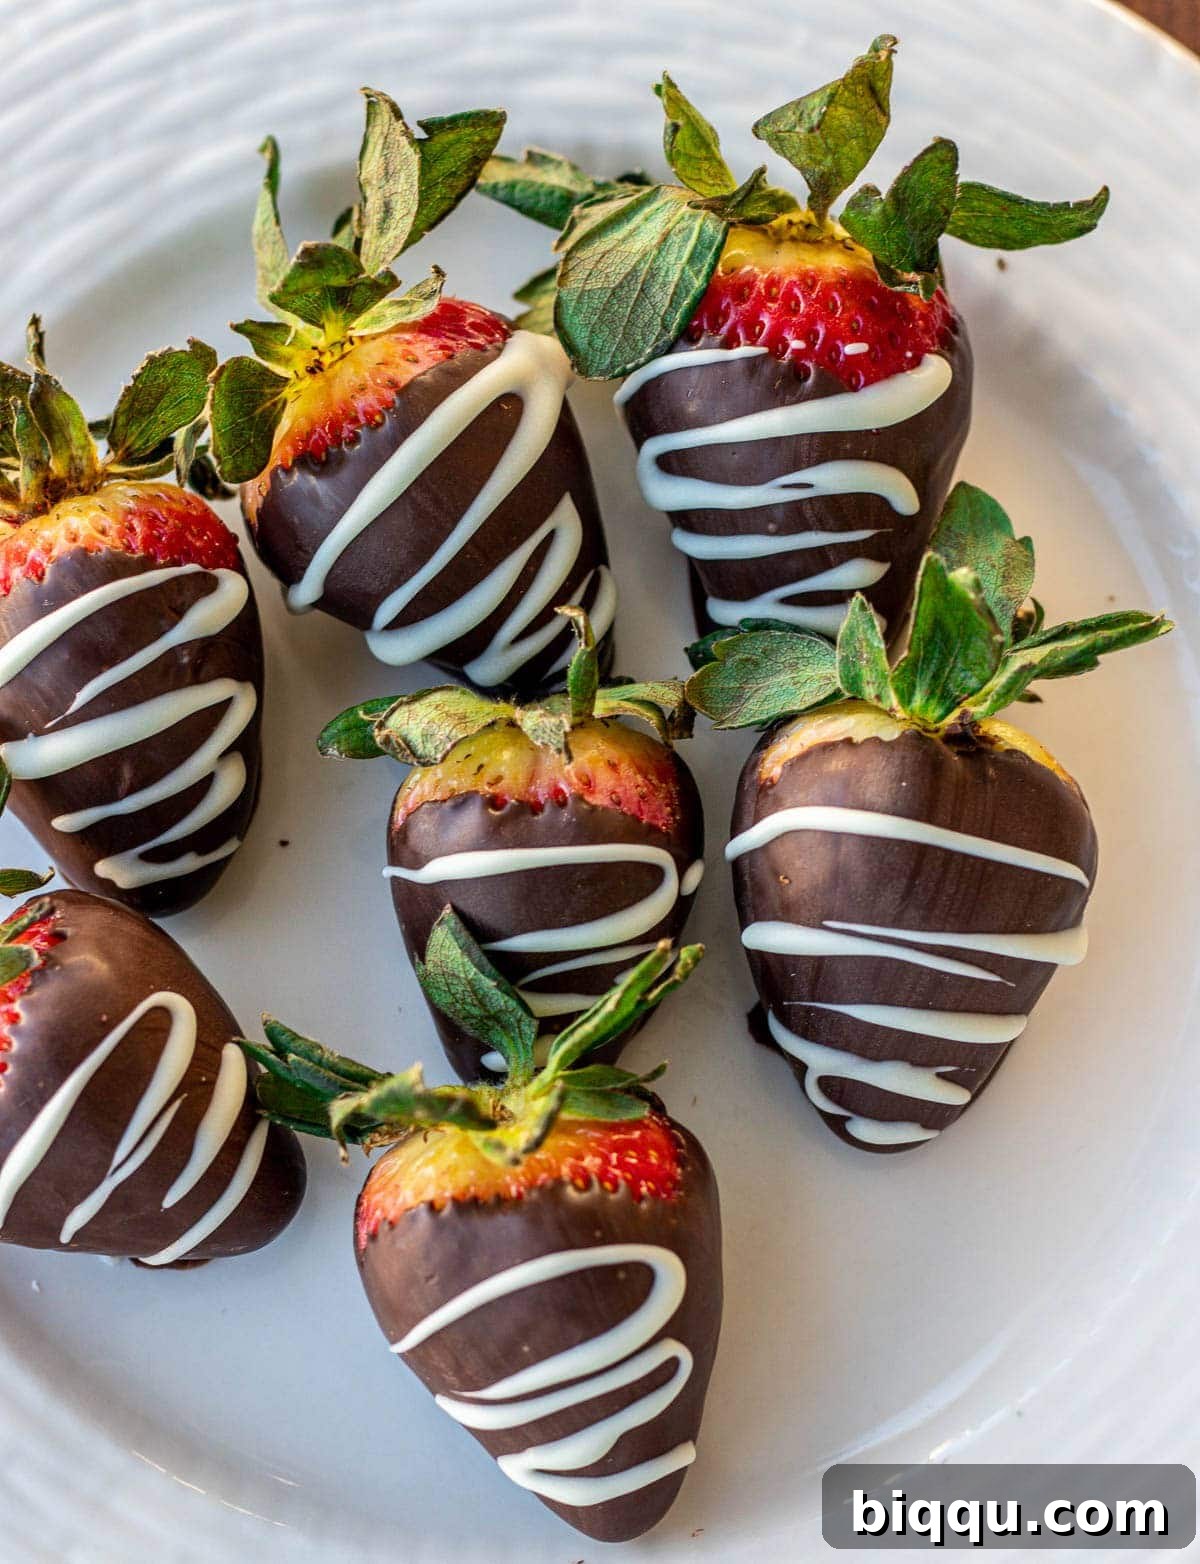
There’s a certain magic that comes with creating something beautiful and delicious with minimal effort. For me and my daughters, that magic often manifests in the form of Easy Chocolate Covered Strawberries. Every year, as Valentine’s Day approaches, our kitchen transforms into a small chocolate factory, filled with the sweet aroma of melting chocolate and fresh berries.
Our approach is wonderfully straightforward. We pick out the plumpest, reddest strawberries we can find, melt our favorite chocolate, dip the berries with care, and let them set. The result is always a batch of perfect, glossy treats that disappear almost as quickly as they’re made. It’s a cherished family tradition that brings so much joy.
Just the other day, my nine-year-old, with a look of genuine surprise, asked, “Mom, you don’t have a chocolate-covered strawberries recipe on your blog?!” Her innocent observation struck a chord, and I realized she was right. How could I have overlooked sharing such a beloved and effortless recipe?
So, consider this my official remedy! In this comprehensive guide, I am thrilled to share my tried-and-true, super easy method for making these irresistible chocolate-covered strawberries. This isn’t just a recipe; it’s an invitation to create joy, whether for a grand celebration or a quiet, sweet moment.
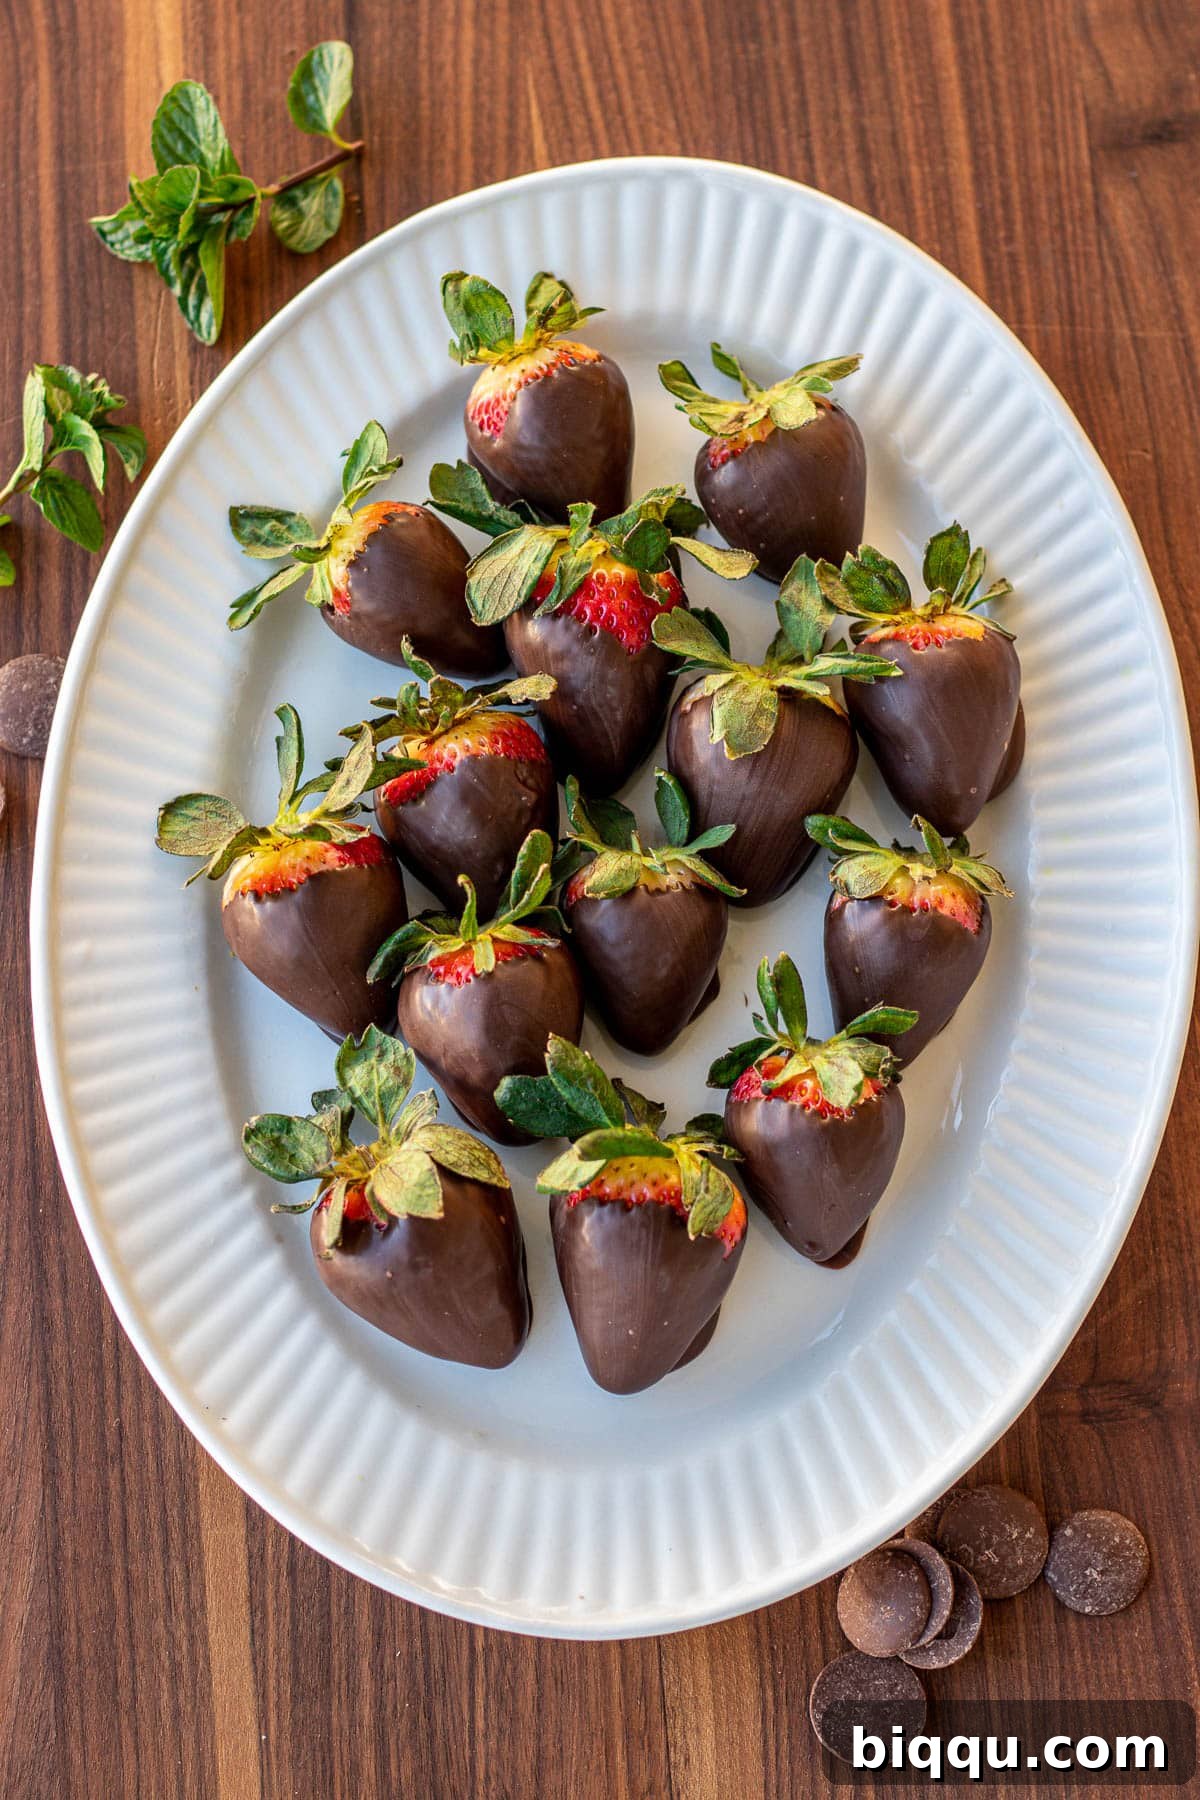
The timing couldn’t be more perfect. My husband, Mr. N, recently surprised us with a bounty of the most exquisite strawberries imaginable. I’m talking about gloriously big, vibrantly red, and incredibly juicy berries, bursting with authentic strawberry flavor. They were, without a doubt, destined for greatness.
Gazing at those perfect berries, I knew it was a sign. A sign that it was time to share one of our absolute favorite confections with you. These berries were practically begging to be enrobed in a luscious chocolate coating. It’s a simple pleasure that never fails to delight, and I can’t wait for you to experience the magic for yourself.
Why You’ll Absolutely Love Making Chocolate Dipped Strawberries
Chocolate-dipped strawberries are more than just a dessert; they are an experience. Here’s why this particular treat deserves a permanent spot in your culinary repertoire:
- Unbelievably Easy & Impressively Elegant: This dessert defies expectations. It’s so straightforward to make, requiring no special equipment, baking skills, or culinary expertise, yet the end result looks incredibly sophisticated and store-bought quality. You’ll be amazed at how easily you can create something so visually stunning. Perfect for those moments when you want to impress without the stress.
- Remarkably Quick Preparation: In today’s fast-paced world, quick recipes are a treasure. Chocolate-dipped strawberries are a true champion of speed. You’ll spend less than 15 minutes of hands-on time, and in under half an hour, you can have a generous batch of beautifully coated strawberries ready to enjoy or serve. This makes them an ideal last-minute dessert for unexpected guests or a spontaneous craving.
- Versatile for Every Special Occasion (and Everyday Indulgence): Few desserts boast such broad appeal. From romantic holidays like Valentine’s Day and anniversaries to heartfelt celebrations like Mother’s Day, birthdays, bridal showers, or even baby showers, chocolate-dipped strawberries are always a welcome addition. They also make a thoughtful hostess gift or a simple, elegant treat to brighten an ordinary day.
- A Delightful Balance of Flavors: The combination of fresh, juicy strawberries and rich, decadent chocolate is a match made in heaven. The natural sweetness and slight tartness of the fruit perfectly cut through the richness of the chocolate, creating a harmonious flavor profile that is utterly addictive. It’s a dessert that feels indulgent yet refreshing, offering a hint of fresh fruit in every bite.
- Infinitely Customizable: While delicious in their simplest form, chocolate-dipped strawberries are also a fantastic canvas for creativity. Easily customize them with different types of chocolate (dark, milk, white), drizzles, sprinkles, crushed nuts, or even a dash of sea salt. This versatility means you can tailor them to any taste preference or theme, adding another layer of fun to the preparation process.
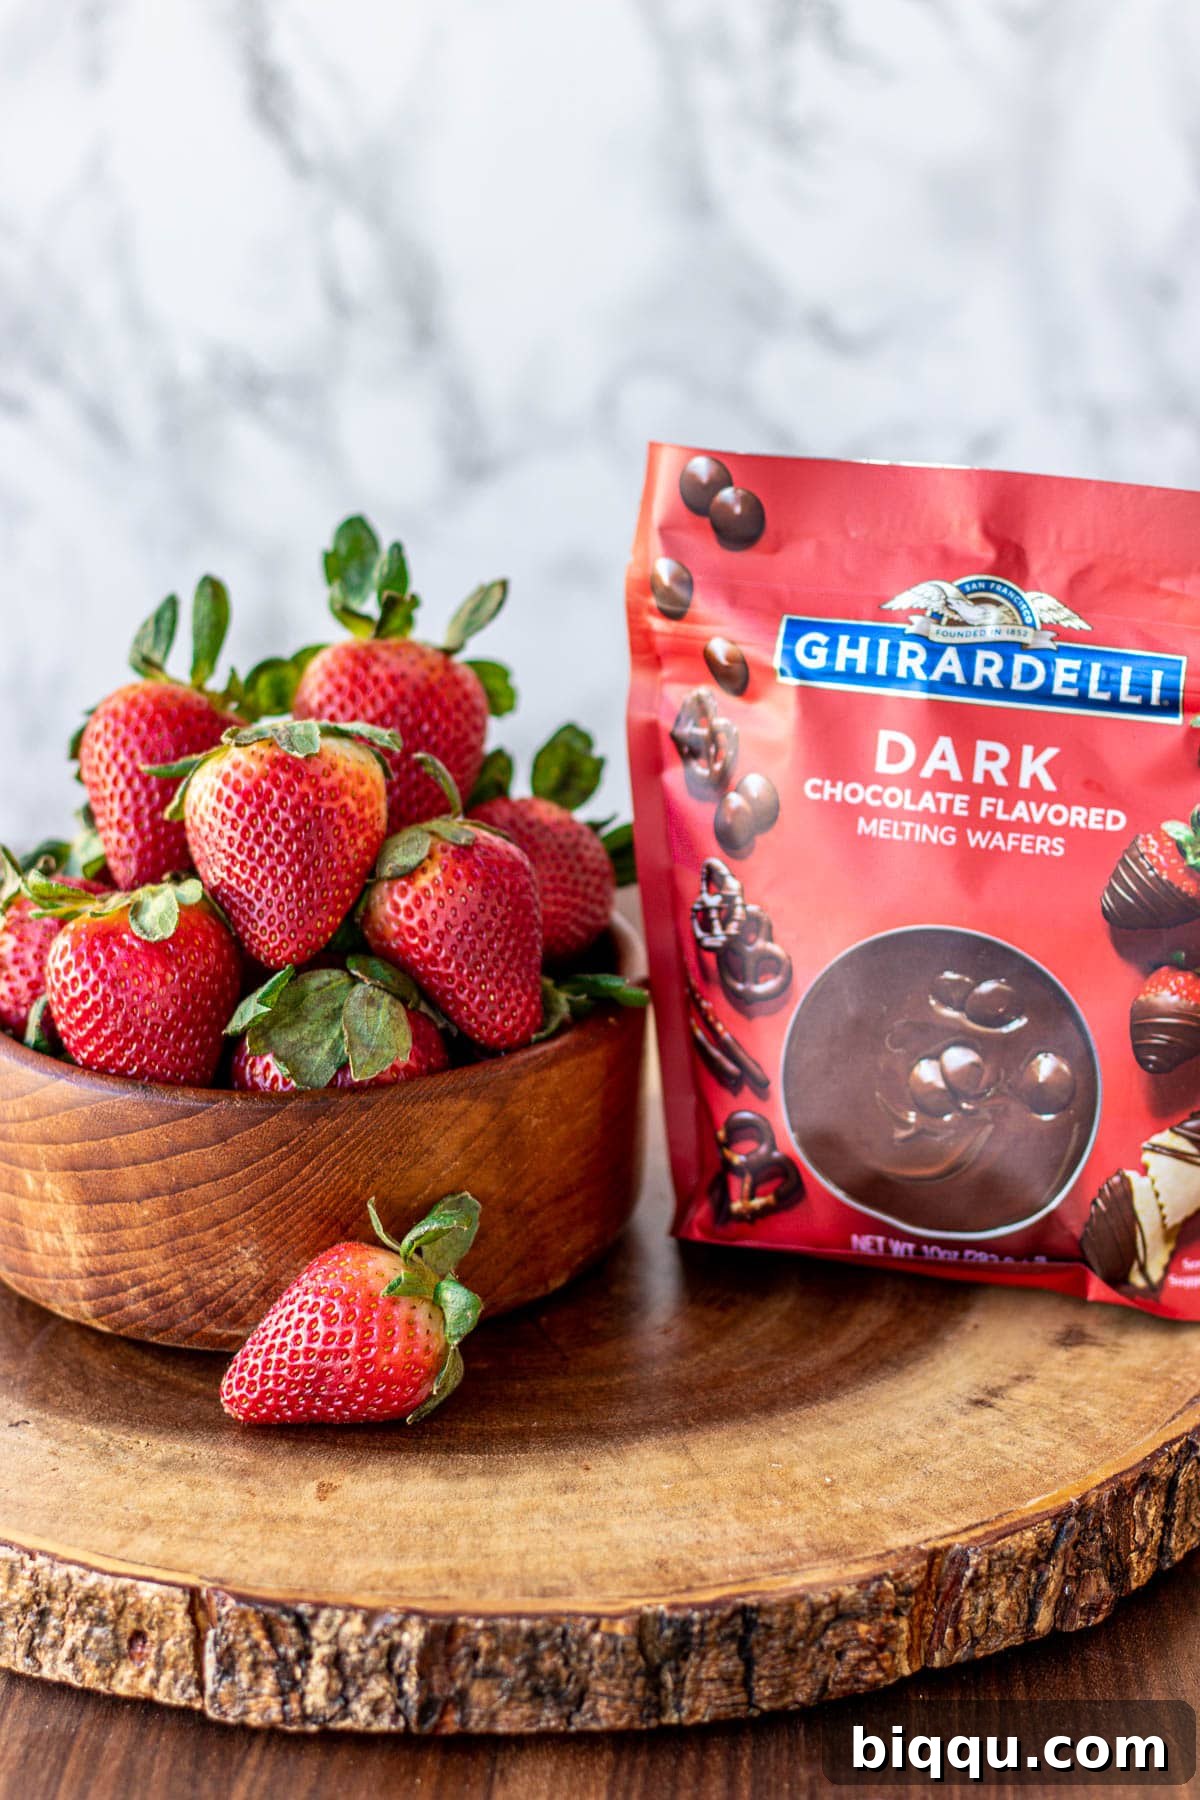
Essential Ingredients for Effortless Chocolate Covered Strawberries
Crafting these delectable treats requires minimal ingredients, emphasizing quality over quantity. Here’s what you’ll need for perfect results:
Fresh Strawberries: The star of the show! Prioritize selecting the reddest, largest, and firmest strawberries you can find. Look for berries with a vibrant, uniform red color, plump texture, and a sweet, fragrant aroma. The redder the strawberry, the more intense its natural flavor, which creates an exquisite contrast with the chocolate. Bigger berries also provide a more substantial bite and are easier to dip. For an extra touch, consider organic strawberries for their potentially richer taste. Avoid any berries that are bruised, soft, or have white spots, as these indicate they aren’t at their peak freshness.
Melting Chocolate: The type of chocolate you choose significantly impacts the final texture and flavor. While nearly any melting chocolate will work, some options offer a superior finish. I highly recommend using Ghirardelli Dark Chocolate Flavored Melting Wafers. These wafers are specifically designed for melting, ensuring a silky-smooth consistency that coats strawberries beautifully and sets with a lovely glossy finish. Other excellent choices include Baker’s Semi-Sweet Chocolate Premium Baking Bar, which you’ll need to chop finely before melting, or even high-quality chocolate chips (though these tend to yield a slightly thicker coating). You can experiment with dark chocolate for a rich, intense flavor, semi-sweet for a balanced taste, milk chocolate for a sweeter, creamier profile, or white chocolate for a delicate, contrasting touch. For vibrant colors or specific dietary needs, high-quality candy melts (compound chocolate) are also a viable option, known for their ease of melting and smooth texture.
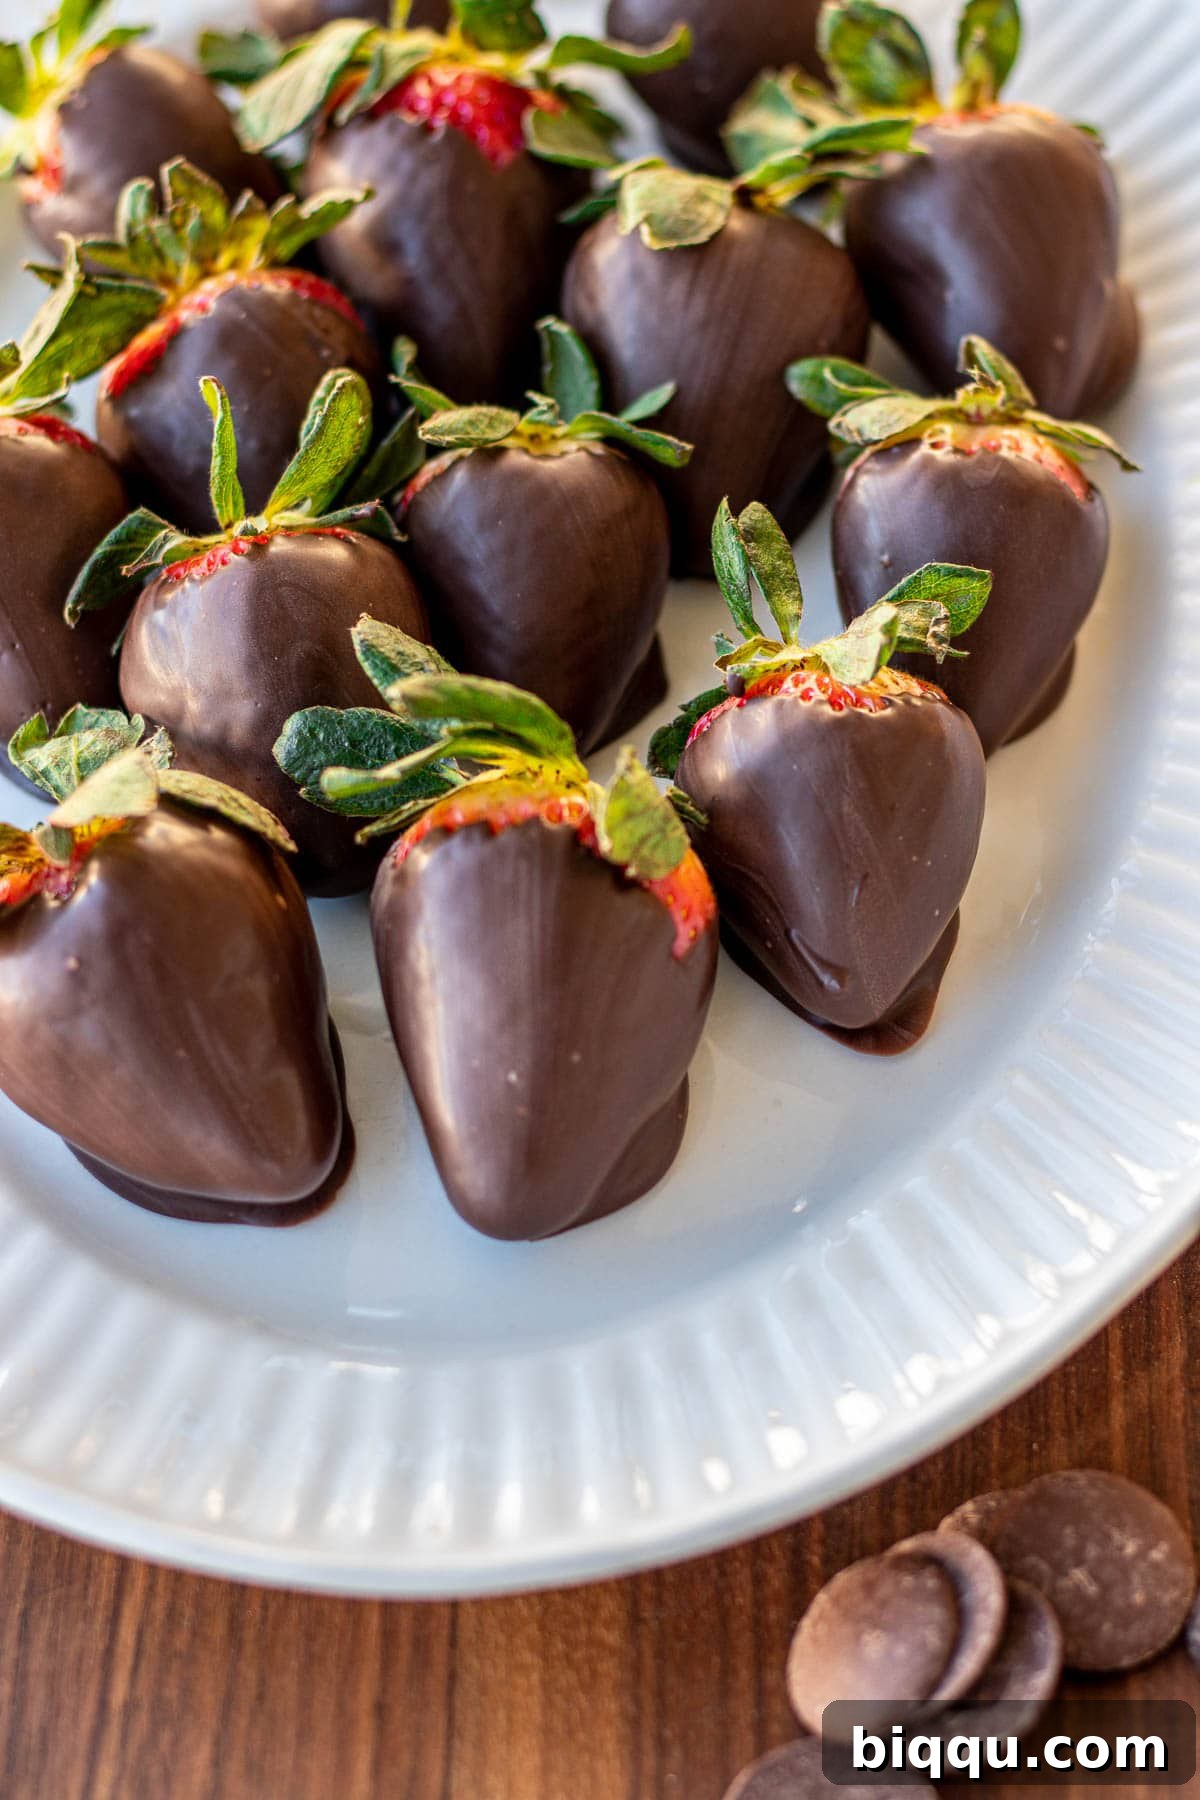
Simple Steps: How to Make Chocolate Covered Strawberries with Ease
Creating these delightful treats is a straightforward process, broken down into a few manageable steps. Follow these instructions for perfect results every time:
Step 1: Thoroughly Clean and Dry Your Strawberries.
This is arguably the most crucial step for achieving perfectly coated strawberries. Begin by gently rinsing your strawberries under cool running water to remove any dirt or debris. For an extra layer of cleanliness and to potentially extend their freshness, consider giving them a quick vinegar bath: combine 8 cups of water with half a cup of white vinegar in a large bowl, soak the strawberries for about 10 minutes, then drain and rinse again with fresh water. The absolute key here is to pat each strawberry thoroughly dry with paper towels. Any residual moisture will cause the chocolate to seize or create a bumpy, uneven coating that won’t adhere properly. If time allows, you can wash them a few hours ahead and let them air dry completely on a paper towel-lined baking sheet, or even dry them overnight in the refrigerator.
Step 2: Expertly Melt Your Chosen Chocolate.
Achieving a smooth, consistent melted chocolate is essential for a beautiful finish. You have two excellent methods to choose from:
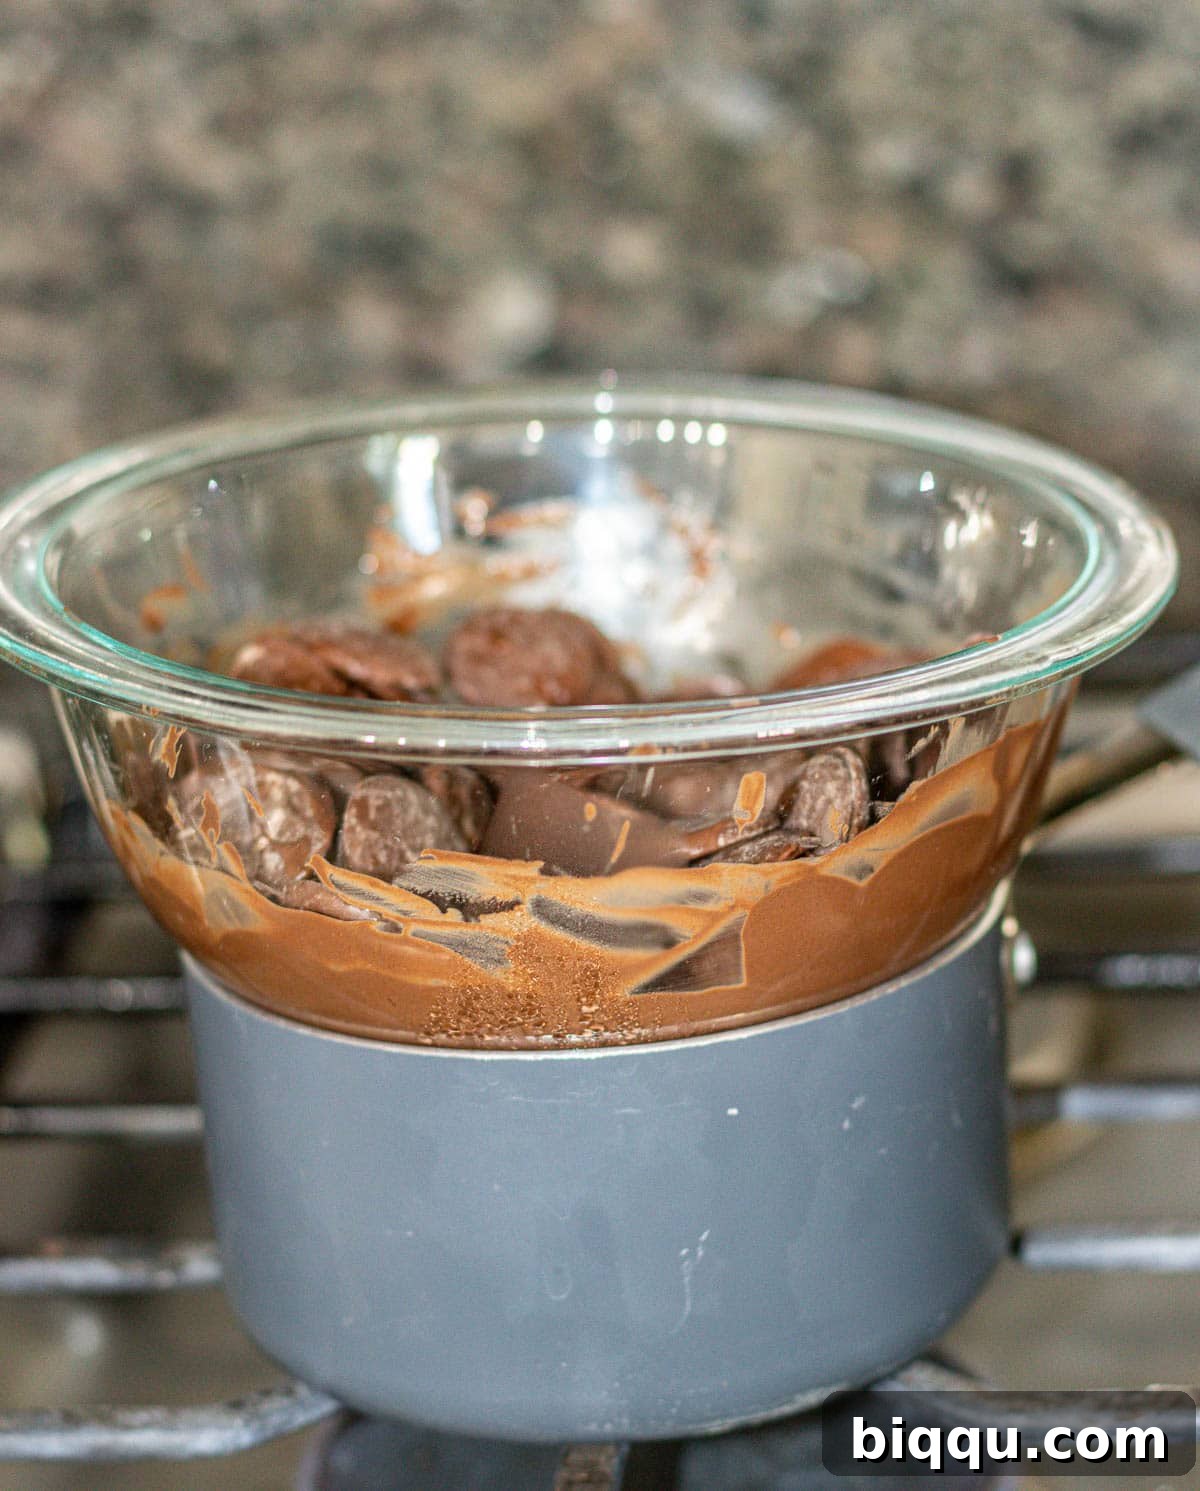
Double Boiler Method (Stovetop): This method provides gentle, even heat, reducing the risk of burning the chocolate. Place a small pot on medium heat, filling it with about 2 inches of water. While the water heats, place your chocolate (wafers, chips, or finely chopped bar) into a small, heatproof mixing bowl that fits snugly over the pot without touching the water. Once the water begins to simmer gently (avoid a rolling boil, which can generate too much steam), place the bowl with the chocolate on top of the pot. Stir continuously with a spatula until the chocolate is completely melted and smooth. Remove the bowl from the heat as soon as it’s melted to prevent overheating.
Microwave Method: This is the quickest option, but requires careful attention to prevent burning. Place your chocolate in a microwave-safe bowl. Heat on high for 30-second intervals, removing and stirring thoroughly after each interval. Chocolate retains its shape even when melted, so stirring is crucial to gauge its consistency. Continue heating and stirring until the chocolate is smooth and has a dripping consistency. It should be warm to the touch but not hot. Overheating will cause it to burn and become grainy.
Tip: If your melted chocolate seems a little too thick, you can stir in a tiny amount (1/2 teaspoon per cup of chocolate) of neutral oil, like coconut oil or vegetable oil, to thin it slightly for a smoother dip. Just be cautious not to add too much, or the chocolate won’t set properly.
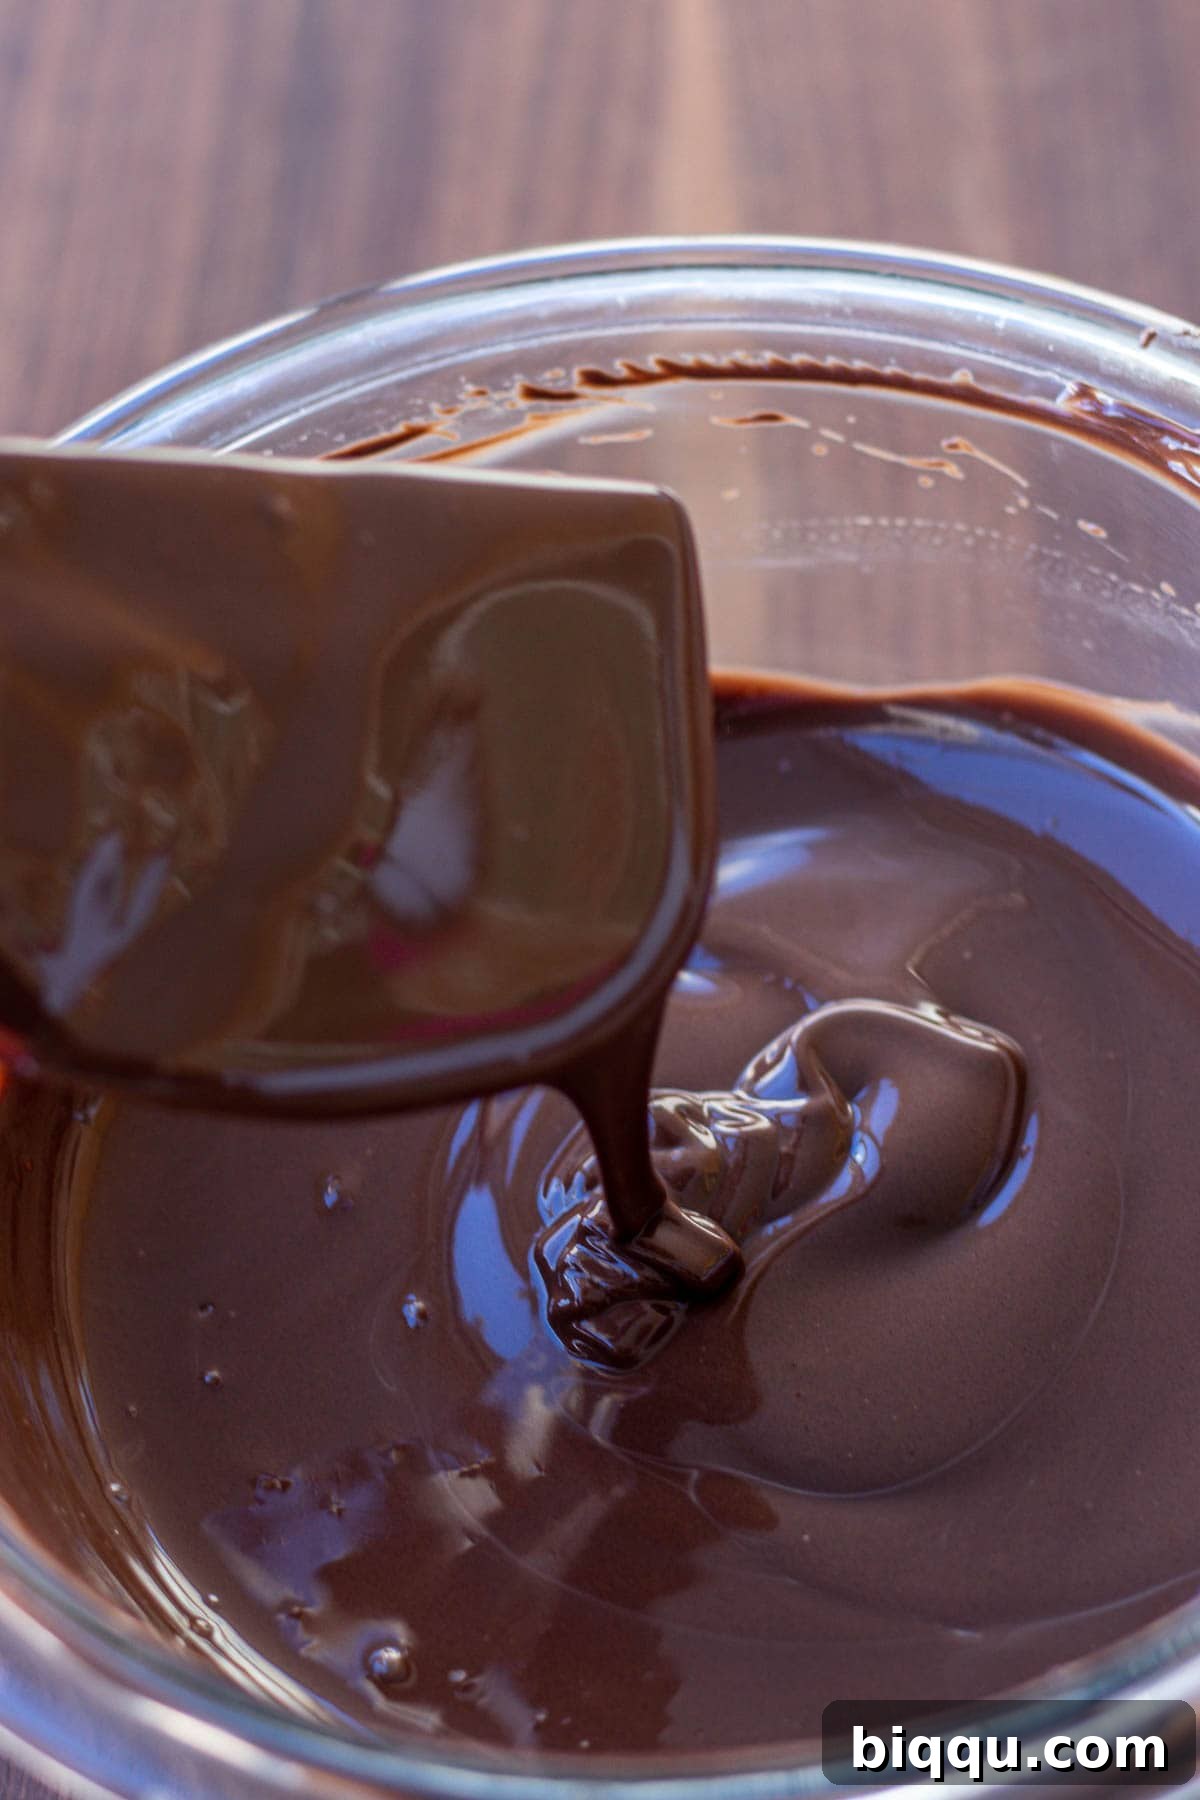
Step 3: Elegantly Dip the Strawberries.
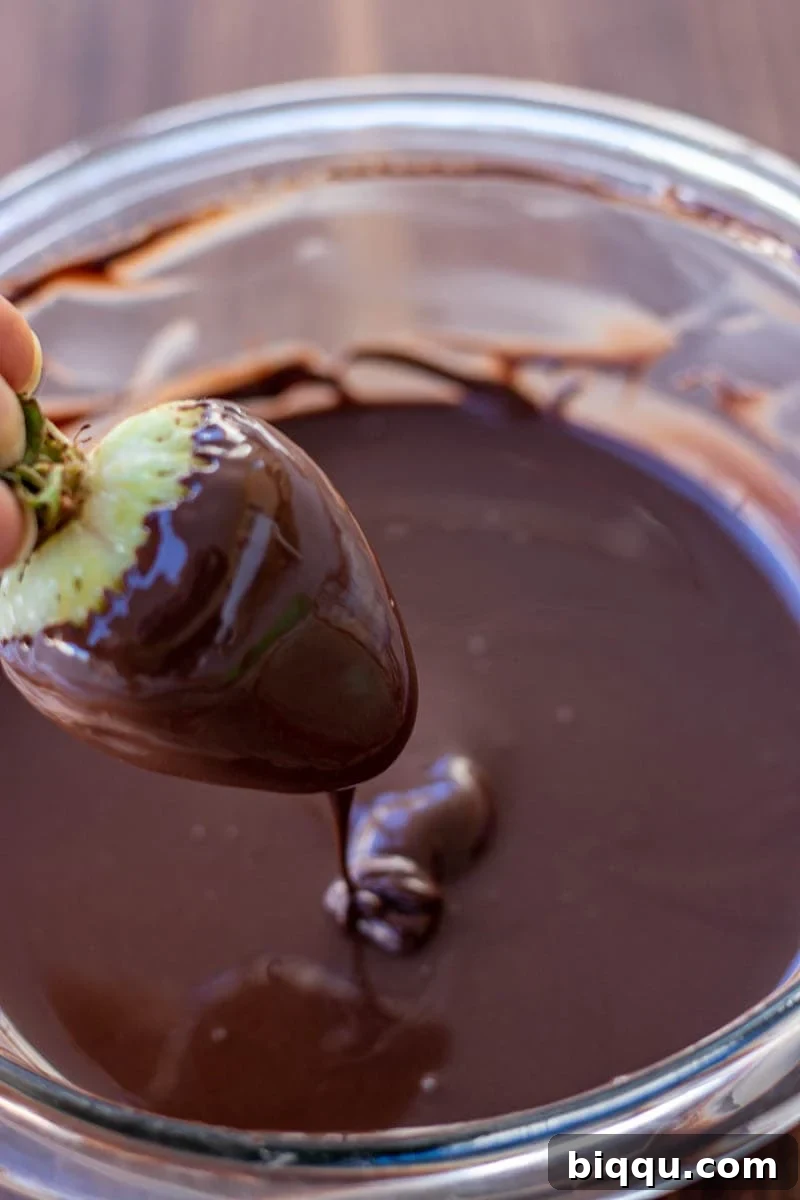
Prepare a baking sheet by lining it with parchment paper or a silicone mat – this prevents sticking. Hold a strawberry firmly by its green leaves or stem. Dip the berry into the melted chocolate, swirling it gently to ensure a complete and even coating. Allow any excess chocolate to drip off by gently tapping the strawberry against the edge of the bowl. For a fully encased berry, you may need to dip it a couple of times. Be sure to leave a small collar of green at the top for aesthetic appeal and to maintain a clean eating experience.
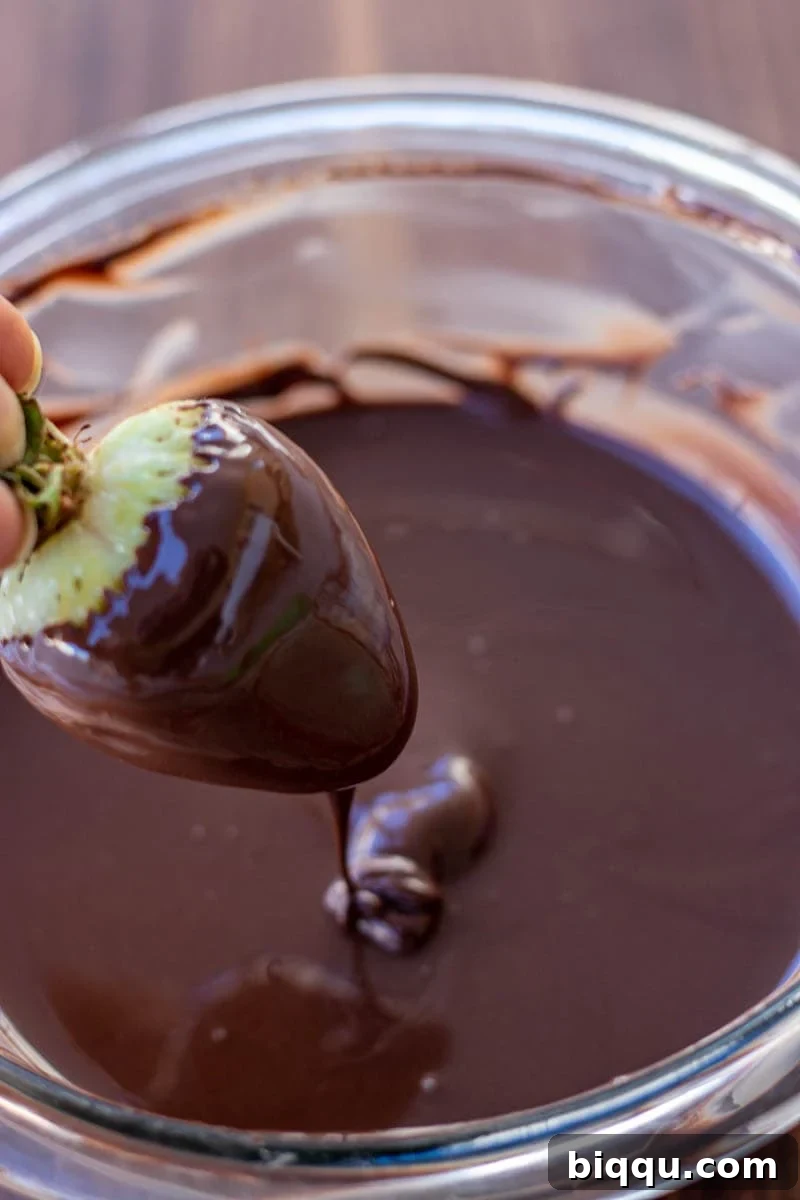
Step 4: Place and Prepare for Setting.
Carefully place each chocolate-dipped strawberry onto your prepared baking sheet. Ensure there is enough space between each berry so they don’t touch, allowing the chocolate to set evenly without smudging. Repeat this process with all remaining strawberries.
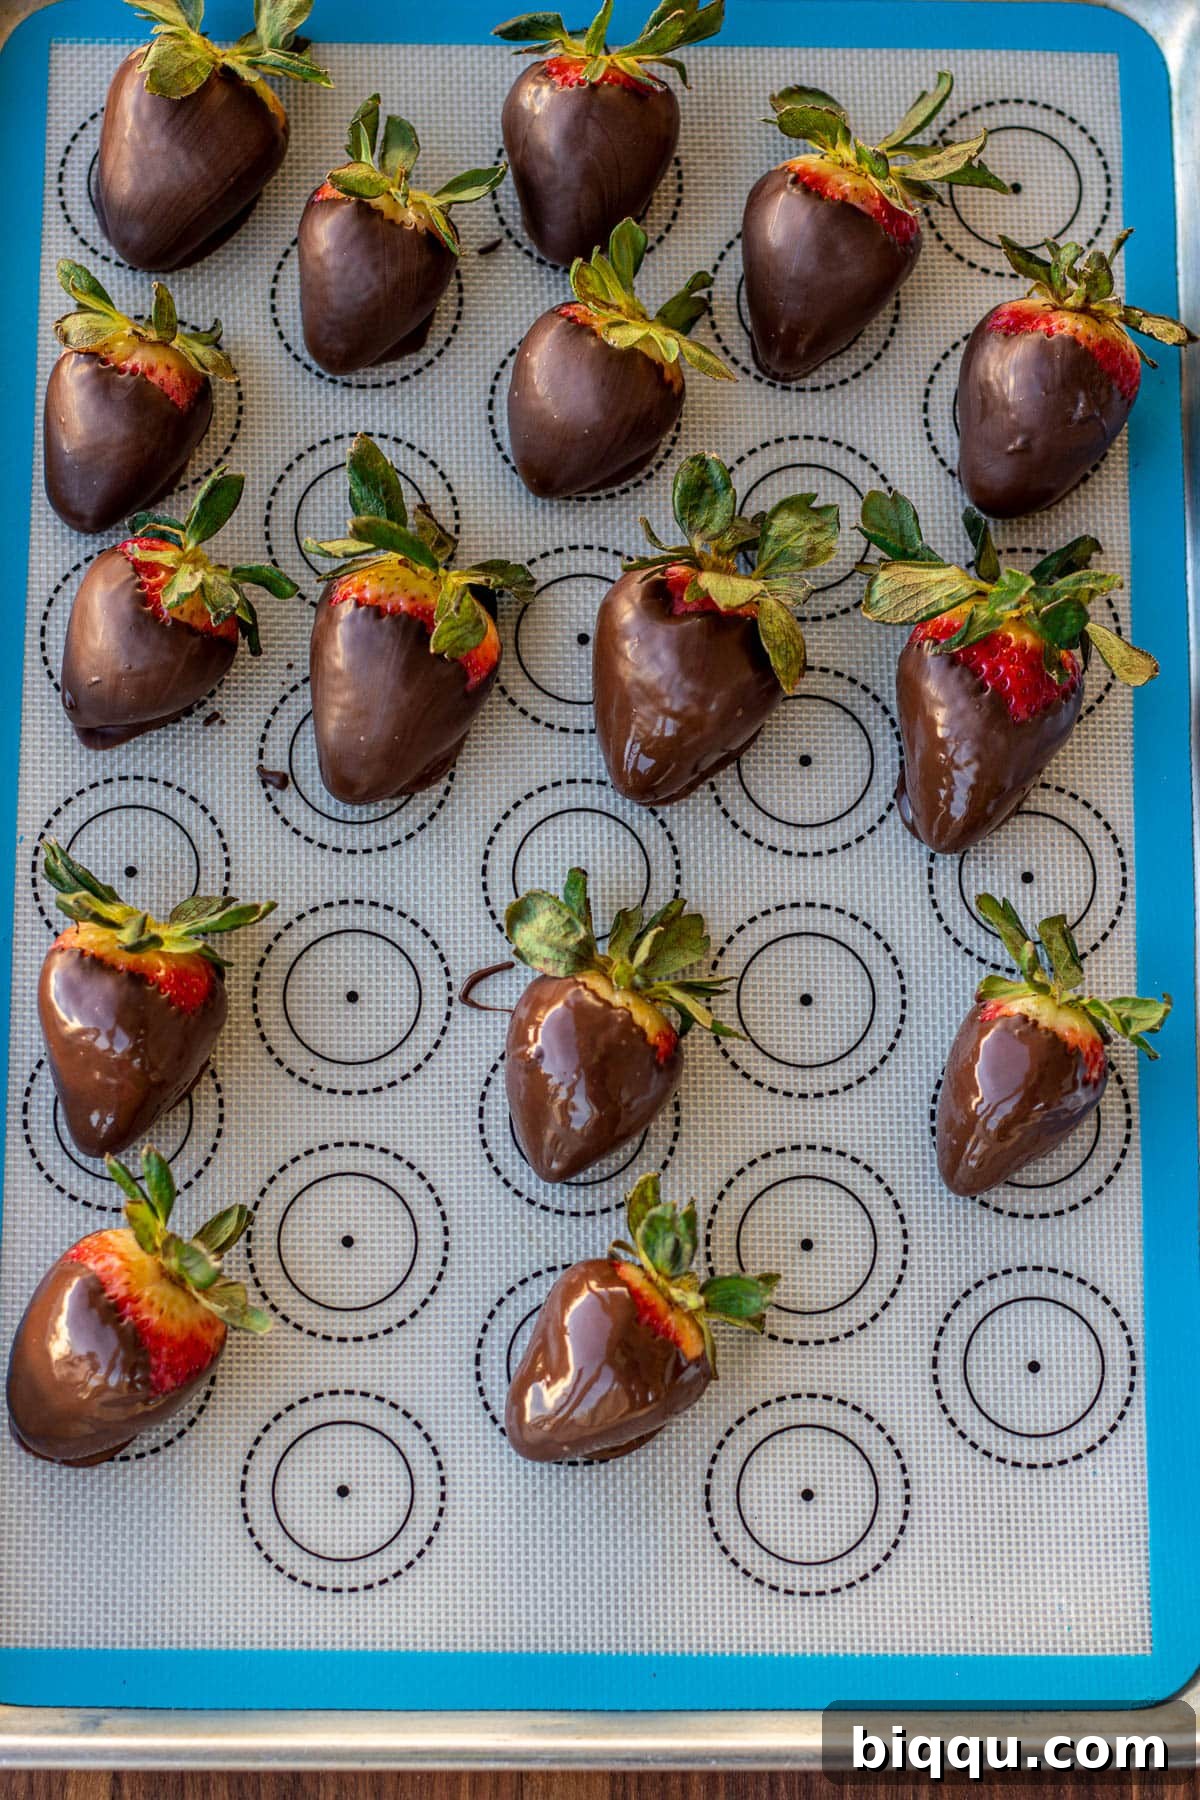
Step 5: Allow the Chocolate to Set.
Let the chocolate-covered strawberries set at room temperature until the chocolate hardens completely and achieves a matte or slightly glossy finish. This usually takes about 20-30 minutes, depending on the ambient temperature and humidity. To expedite the setting process, you can carefully transfer the baking sheet to the refrigerator for about 10-15 minutes. Avoid leaving them in the fridge for too long, as condensation can form, affecting the chocolate’s appearance and texture.
And just like that, you’ve created truly magnificent, easy chocolate-covered strawberries, ready to be enjoyed!
Optional Drizzle for an Extra Flourish: Once the initial chocolate coating has fully set, you can add an elegant drizzle. Melt a small amount of white chocolate or a contrasting chocolate type using either the double boiler or microwave method. Using a fork or a butter knife, gently drizzle the melted chocolate over the set strawberries in a zig-zag pattern. Allow the drizzle to set completely (either at room temperature or in the fridge for a few minutes) before serving.
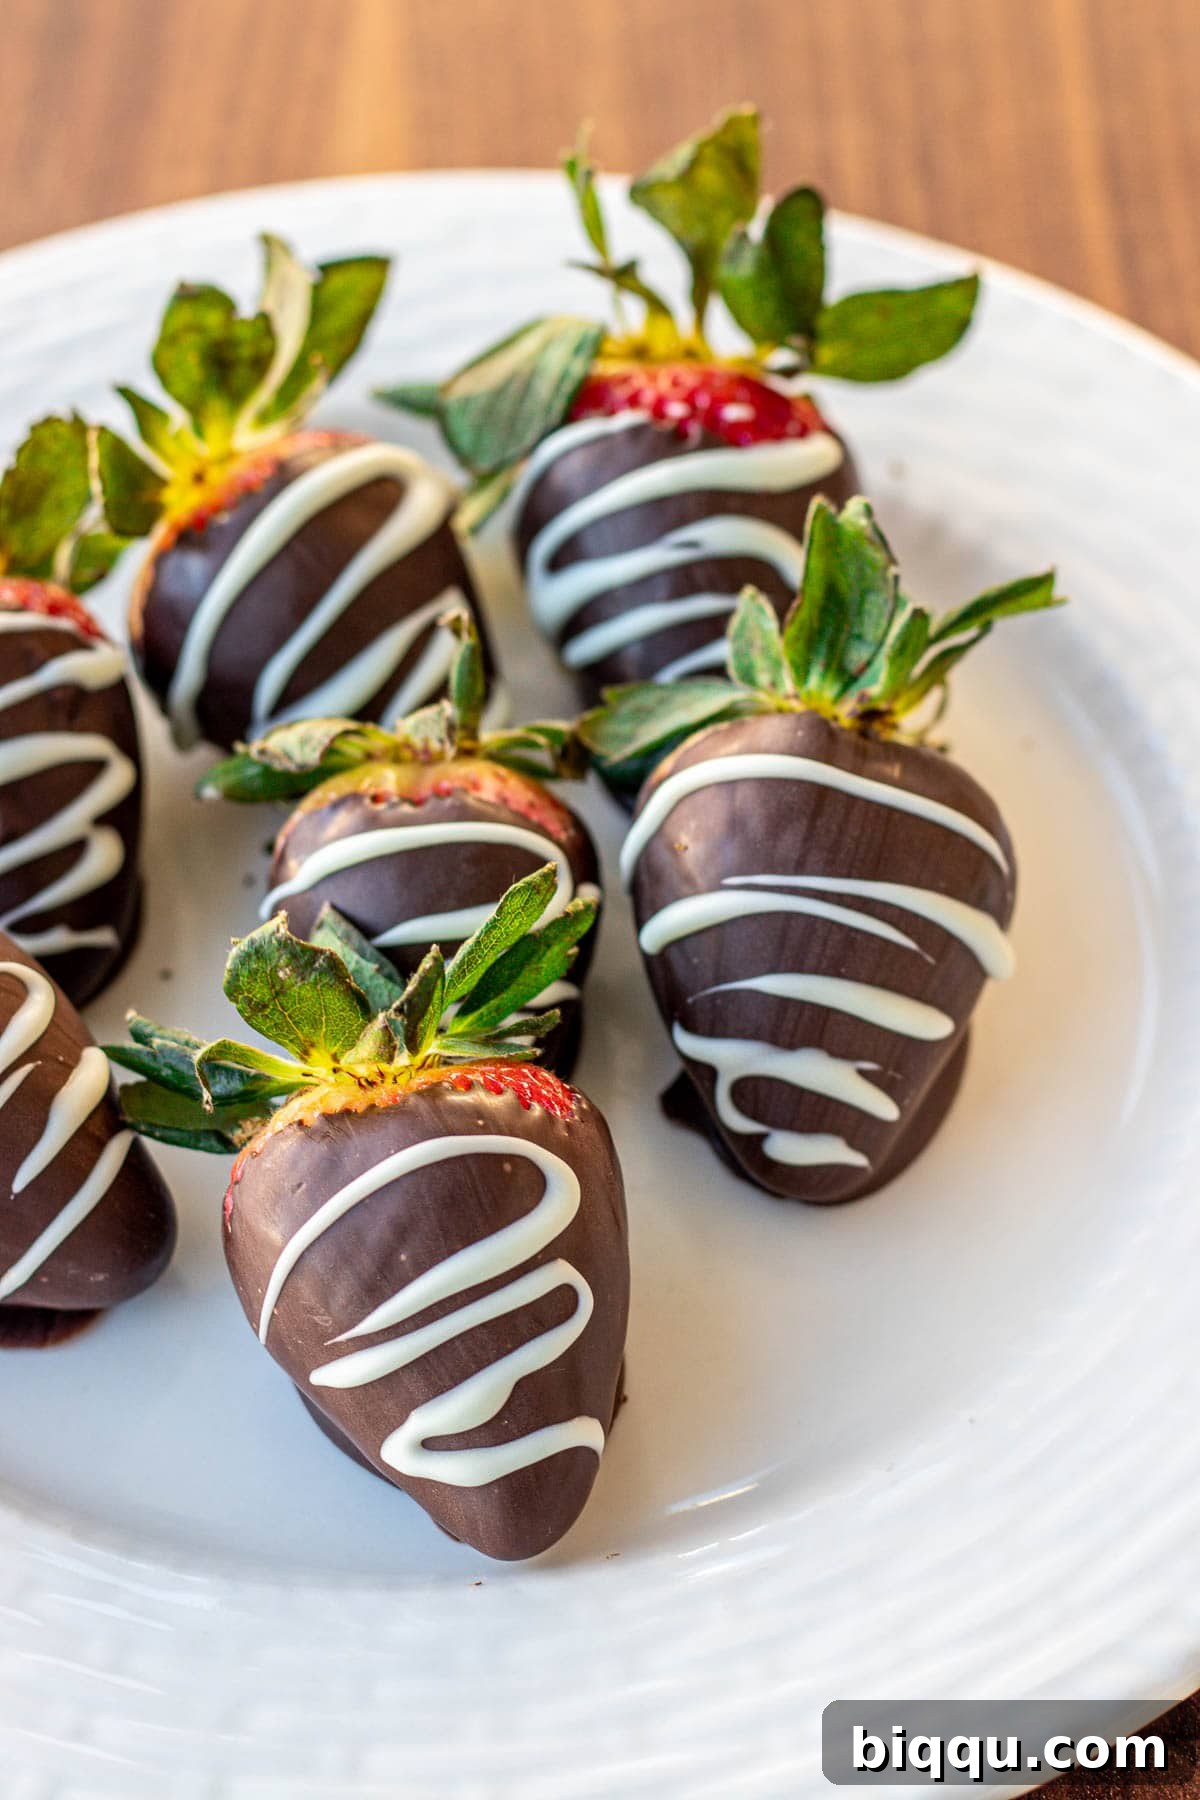
Top Tips for the Most Exquisite Chocolate Covered Strawberries
Elevate your homemade chocolate-dipped strawberries from simply good to absolutely unforgettable with these expert tips:
- Optimal Strawberry Cleaning: For the cleanest berries and potentially extended shelf life, wash your strawberries using a gentle vinegar solution. In a large mixing bowl, combine 8 cups of cool water with half a cup of white vinegar. Submerge the strawberries and let them soak for about 10 minutes. Drain them thoroughly in a colander, then give them a final rinse under fresh running water. This helps remove pesticides and molds.
- The Golden Rule: Perfectly Dry Strawberries: This cannot be stressed enough – strawberries must be absolutely bone dry before dipping. Any trace of moisture will cause the chocolate to “seize” (turn lumpy and unworkable) and prevent it from adhering smoothly. The quickest method is to gently pat each strawberry dry, one by one, with paper towels. For advanced planning, wash them the night before and let them air dry on a paper towel-lined baking sheet in the refrigerator.
- Beware of Water Contact with Chocolate: When melting chocolate, especially using the double boiler method, ensure no water or steam comes into contact with the chocolate. Even a single drop can cause the chocolate to seize, transforming it into a grainy, un-dippable mess. Use a bowl that fits snugly over your pot to minimize steam escape.
- Timely Topping Application: If you plan to add toppings like sprinkles, crushed nuts (like peanuts or almonds), toasted coconut flakes, or even sea salt, do so immediately after dipping each strawberry, while the chocolate is still wet and pliable. This ensures the toppings stick securely as the chocolate cools and hardens.
- Drizzle with Patience: For white chocolate drizzles or additional layers of chocolate, wait until the first coating of chocolate on the strawberries has fully set and hardened. Applying a drizzle too early will cause the colors to bleed or the coating to smudge, ruining the pristine appearance.
- Enjoy Peak Freshness: Chocolate-covered strawberries are undeniably at their best when enjoyed on the same day they are made. The flavors are freshest, and the chocolate retains its perfect snap. While they can be stored in an airtight container in the refrigerator for 1-2 days, prolonged storage can lead to the strawberries releasing moisture, causing the chocolate to become sticky or the fruit to soften.
- Temperature Matters: Ensure your melted chocolate is not too hot. It should be warm enough to be liquid and smooth, but not scalding. Chocolate that is too hot can “cook” the strawberries, making them mushy, and it will also take longer to set.
- Deep and Narrow for Dipping: Use a deep, narrow bowl for your melted chocolate. This allows you to dip the entire strawberry easily without needing a large volume of chocolate, reducing waste and making the process cleaner.
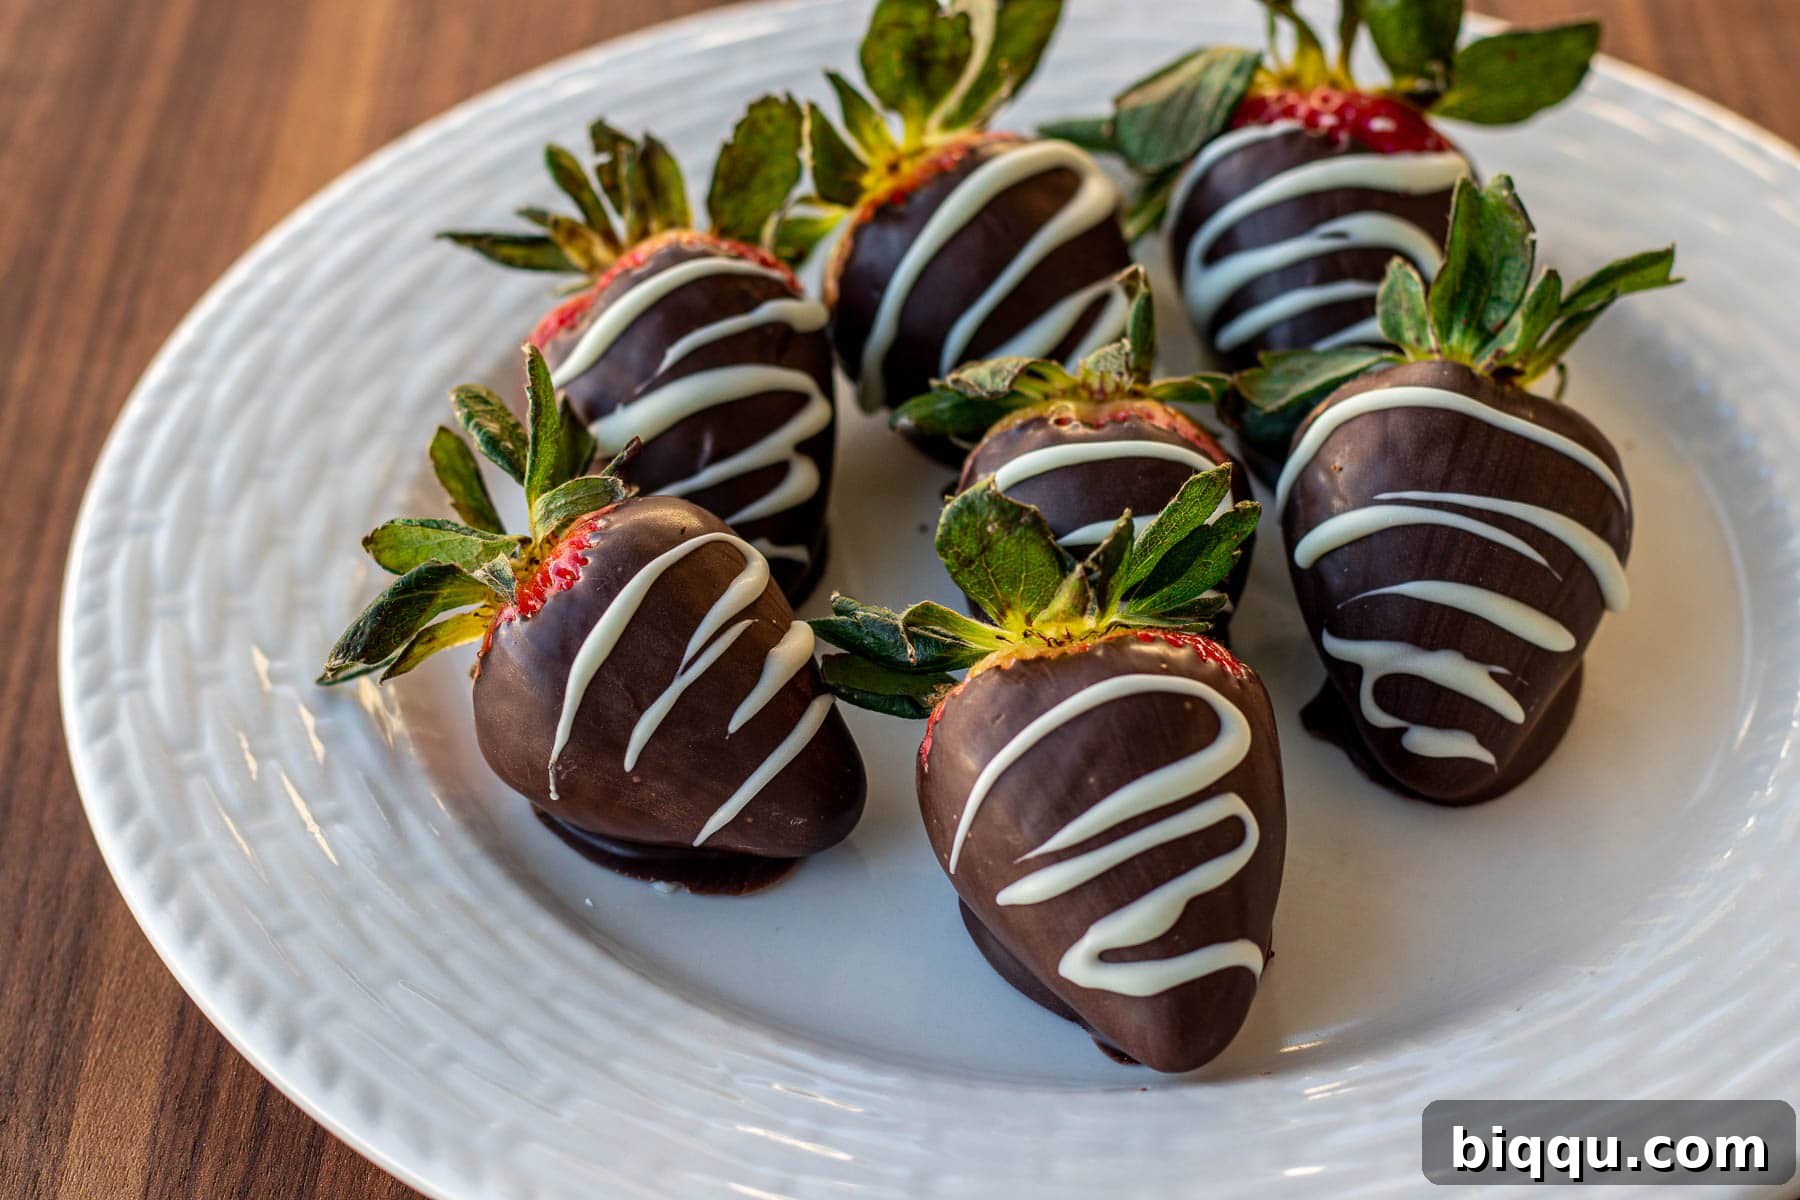
Delightful Variations to Personalize Your Treat
While the classic chocolate-covered strawberry is perfect on its own, don’t hesitate to get creative with these delicious variations:
- Nutty Indulgence: Immediately after dipping a strawberry in chocolate (while still wet), roll it in finely crushed nuts such as peanuts, almonds, pistachios, or hazelnuts. This adds a wonderful crunch and a sophisticated flavor dimension.
- Tropical Twist with Coconut: For a taste of the tropics, coat your freshly dipped strawberries in toasted coconut flakes. The lightly browned coconut adds a lovely texture and subtle sweetness that pairs beautifully with chocolate and strawberry.
- Festive Sprinkles: Add a playful touch with colorful sprinkles! These are especially fun for birthday parties, holiday celebrations, or themed events. Apply them right after dipping, ensuring they adhere to the still-wet chocolate.
- Elegant White Chocolate Drizzle: Once your primary chocolate coating has fully set, melt some white chocolate (or even a contrasting color candy melt) and drizzle it artfully over the strawberries. Use a fork or a piping bag with a very small hole for fine lines.
- Vibrant Candy Melts: Beyond traditional chocolate, experiment with different colored candy melts. These compound chocolates come in a rainbow of hues, allowing you to create vibrant, themed strawberries for parties, baby showers, or specific events.
- Zesty Flavor Burst: Before the chocolate sets, sprinkle a tiny pinch of orange or lemon zest over a few dipped strawberries. The citrus oils provide a bright, aromatic counterpoint to the richness of the chocolate.
- A Hint of Sea Salt: For a gourmet touch, sprinkle a tiny amount of flaky sea salt (like Maldon) over dark chocolate-dipped strawberries while the chocolate is still wet. The salt enhances the chocolate’s depth and provides a delightful savory contrast.
- Edible Glitter or Dust: For an extra dose of glamour, lightly dust your finished, set chocolate-covered strawberries with edible glitter or pearl dust. This adds a shimmering, luxurious finish perfect for formal events.
- Chocolate Covered Strawberry Bouquet: Elevate your presentation by transforming your berries into a stunning edible bouquet. This involves carefully inserting skewers into the strawberries before dipping and then arranging them in a vase or decorative container. Find tutorials on how to make a chocolate-covered strawberry bouquet online.
Decoding Your Chocolate Choices: What Kind Should You Use?
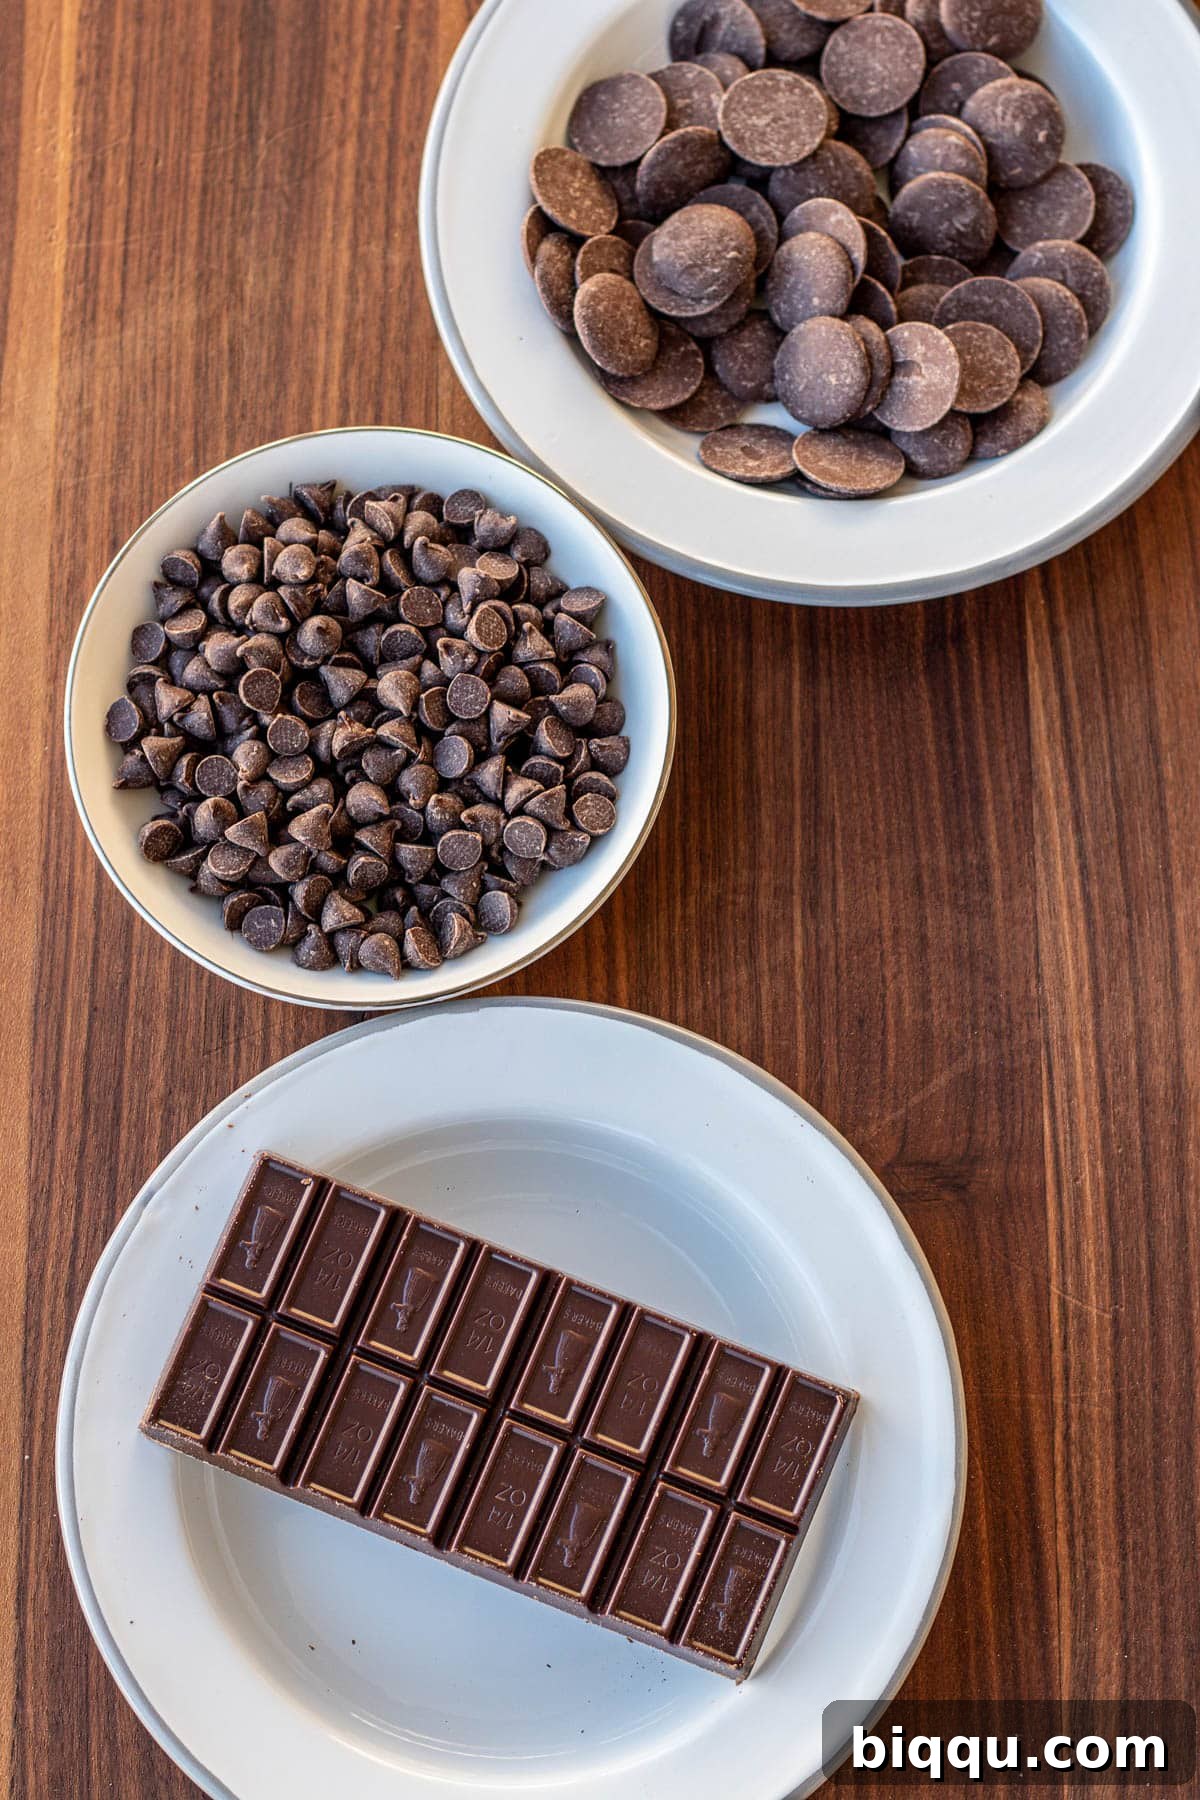
The type of chocolate you select is a critical factor in the success and final presentation of your easy chocolate-covered strawberries. While the core principle remains simple (melt and dip!), understanding the characteristics of different chocolates can help you achieve your desired outcome:
- Chocolate Chips: These are a popular and readily available option. However, chocolate chips contain stabilizers that help them maintain their shape during baking. When melted, these stabilizers often result in a thicker consistency. This can lead to a more rustic, opaque, and less smooth coating on your strawberries. While perfectly delicious, if a sleek, glossy, and thin finish is what you’re aiming for, chocolate chips might not be your top choice. They tend to create a more “homemade” look, which many people appreciate.
- Melting Chocolate Wafers (Couverture Chocolate): This is often the preferred choice for professional-looking chocolate-covered strawberries. Melting wafers (also known as compound chocolate melts or couverture chocolate) are specifically formulated to melt smoothly, evenly, and thinly, resulting in a beautiful, glossy finish when they set. They often contain a higher percentage of cocoa butter or other fats, which contributes to their superior melting properties and snap once hardened. With these, you might notice a slightly thinner coating, so it’s important to ensure the bottoms (where they rest to dry) are also well-covered. In some cases, a second quick dip after the first layer sets can ensure complete coverage and a luxurious, even thickness. Brands like Ghirardelli are excellent examples of high-quality melting wafers.
- Baking Bars (e.g., Semi-Sweet, Dark, Milk Chocolate): High-quality baking bars (like Baker’s Premium Baking Bar) can also yield excellent results. For best melting, these bars should be finely chopped before melting, especially if using the double boiler method. They offer a rich, authentic chocolate flavor and can set beautifully, often with a good snap. Depending on the brand and cocoa content, you might find their melted consistency to be somewhere between chocolate chips and melting wafers. If you’re looking for a specific flavor profile and don’t mind a bit of extra chopping, baking bars are a fantastic option.
- Candy Melts: These are a type of compound chocolate designed for easy melting and vibrant coloring. They are not technically “chocolate” as they often contain vegetable fats instead of cocoa butter, but they are incredibly easy to work with. Candy melts come in a vast array of colors, making them ideal for themed events or when you want to achieve bright, eye-catching strawberries. They melt very smoothly and set quickly without needing tempering. However, their flavor profile is typically sweeter and less complex than real chocolate.
More Indulgent Chocolate Desserts You’ll Love
If you’ve enjoyed making these chocolate-covered strawberries, you’ll surely love exploring these other simple yet satisfying chocolate recipes:
- Easy Homemade Chocolate Ice Cream
- The Easiest Chocolate Chip Cookies
- Classic Easy Chocolate Cake
- Irresistible Chocolate Bread

Easy Chocolate Covered Strawberries
10
20
30
6 servings
Print Recipe
Ingredients
- 1 pound large strawberries (approx. 16-18 strawberries)
- 10 oz melting chocolate (e.g., Ghirardelli Dark Chocolate Flavored Melting Wafers)
Instructions
-
Rinse And Dry The Strawberries. Rinse the strawberries thoroughly and pat dry with paper towels. It’s important to pat them dry one at a time to ensure they are completely dry and ready for immediate use. Alternatively, you can let them air dry or dry overnight in the fridge.
-
Melt The Chocolate. Use the double boiler method: Place a small pot with about 2 inches of water on medium heat. Place chocolate in a small mixing bowl (such as a Pyrex bowl) that fits over the pot. Let the water simmer (do not boil) then place the bowl with chocolate on top. Stir with a spatula until the chocolate melts smoothly.
Alternately, melt the chocolate in the microwave: Place chocolate in a microwave-safe bowl and heat on high for 30 seconds at a time. Remove and stir after each interval until completely melted and smooth. Stop heating immediately once melted to prevent burning.
-
Dip The Strawberries Into The Chocolate. Hold a strawberry by its leaves and dip it into the melted chocolate, swirling to coat completely. You may need to dip a few times to ensure full coverage. Place each dipped strawberry on a tray lined with parchment paper or a silicone mat. Repeat for all strawberries.
-
Let The Strawberries Set. Allow the chocolate-dipped strawberries to set at room temperature for about 30 minutes until the chocolate hardens and appears matte. For a quicker set, place them in the refrigerator for about 15 minutes.
-
Serve. Serve and enjoy the chocolate-covered strawberries on the same day for optimal freshness and taste.
Notes
2. If adding nuts or sprinkles, apply them immediately after dipping the strawberries into the chocolate, while the chocolate is still wet.
3. For white chocolate drizzles or additional chocolate layers, wait until the first coating of chocolate has fully set. Then, allow the drizzle to set before serving.
4. Refer to the full blog post for extensive tips and variations.
Nutrition
Carbohydrates: 19g |
Protein: 1g |
Fat: 6g |
Saturated Fat: 5g |
Polyunsaturated Fat: 0.1g |
Monounsaturated Fat: 0.03g |
Sodium: 22mg |
Potassium: 116mg |
Fiber: 2g |
Sugar: 16g |
Vitamin A: 9IU |
Vitamin C: 44mg |
Calcium: 12mg |
Iron: 0.3mg
Additional Info
Dessert
Western
128
Tried this recipe?
Mention @preciouscore or tag #PreciousCore!
*This post contains affiliate links.