
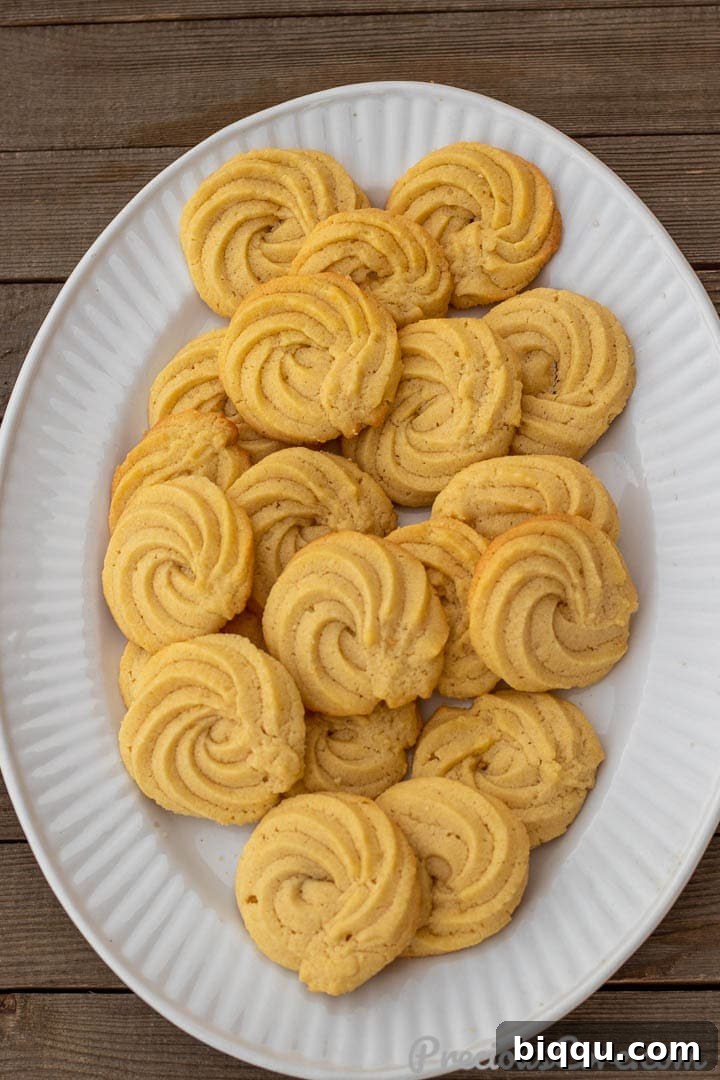
Unlock the secret to baking the most exquisite Danish Butter Cookies right in your own kitchen! This exceptional recipe delivers cookies that are irresistibly buttery, wonderfully crisp, and packed with a rich flavor that surpasses even the beloved store-bought varieties from the iconic blue tin. Best of all, they’re surprisingly simple to prepare, requiring just four essential ingredients to create pure culinary magic.
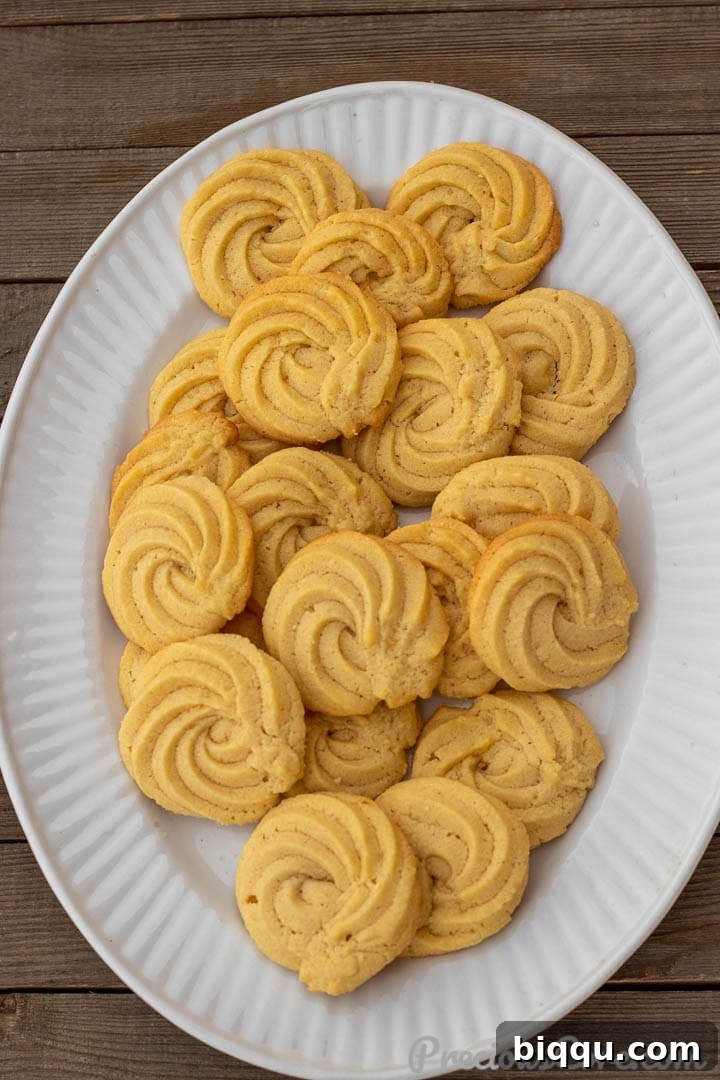
These traditional Christmas cookies are not merely a holiday staple; they are a delightful treat perfect for any occasion. Whether you’re celebrating the festive season, hosting a gathering, or simply want to share a heartwarming homemade dessert with friends and family, these butter cookies are guaranteed to impress. Their timeless appeal and exquisite taste make them a universally cherished confection.
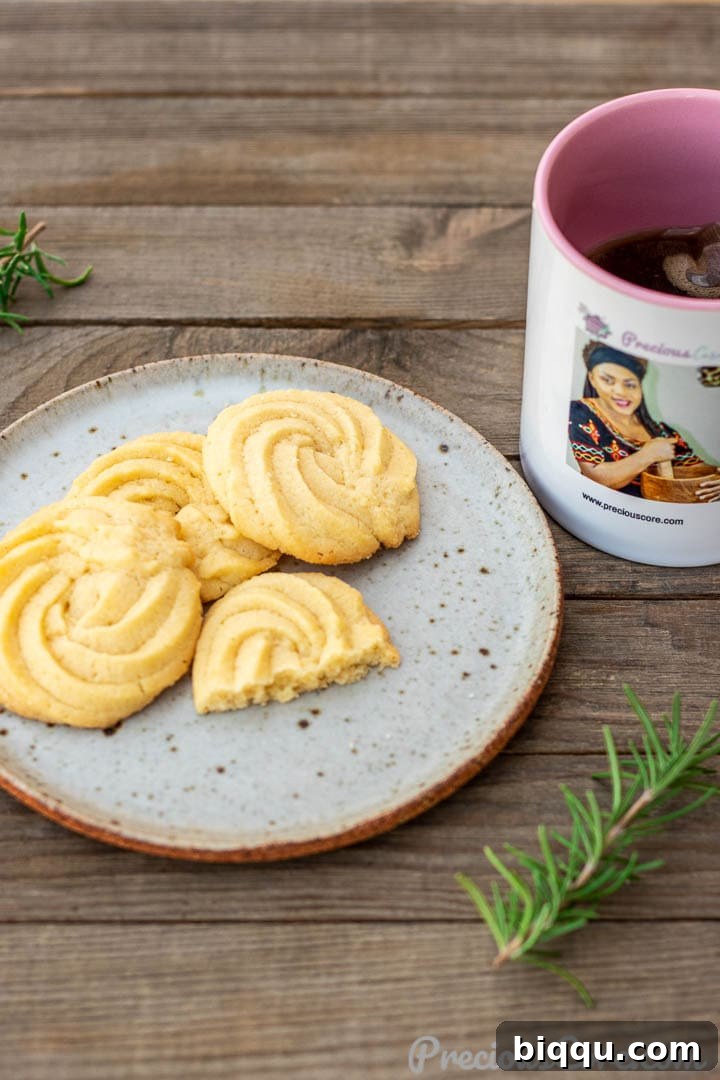
There’s a unique charm to cookies that stand on their own, needing no elaborate adornment to shine. These homemade Danish butter cookies are precisely that kind of treat. Their inherent richness and delicate texture are utterly satisfying on their own. Imagine unwinding with a perfectly crisp butter cookie alongside a steaming cup of tea, a comforting glass of milk, or your favorite coffee – it’s the ideal way to elevate an afternoon or simply indulge in a moment of pure bliss. These cookies confidently boast their buttery goodness without the need for fancy icing, intricate decorations, or any additional frills. However, if you desire an extra touch of indulgence, a quick dip in melted chocolate and a sprinkle of festive embellishments can add an exciting twist and visual flair.
My family, especially my children, absolutely adore these Danish cookies! They’ve become a frequent request in our household, and I find myself baking batches regularly. I wouldn’t be surprised if our freezer soon becomes a treasure trove of these delectable homemade cookies, ready for any craving or unexpected guest. If you appreciate the simplicity and rich flavor of this butter cookie recipe, you’ll also love our classic shortbread cookies and refreshing lemon shortbread cookies. And for chocolate lovers, don’t miss our incredibly easy chocolate chip cookies!
Table of Contents
- Why You’ll Love This Recipe
- What Are Danish Butter Cookies?
- Ingredients for Danish Butter Cookies
- How To Make Danish Butter Cookies
- Creative Variations
- Essential Baking Tools
- Expert Tips for Perfect Cookies
- Mastering Butter Cookie Piping
- Frequently Asked Questions
- More Irresistible Cookie Recipes
- Watch the Recipe Video
- Danish Butter Cookies Recipe Card
Why You’ll Love This Homemade Danish Butter Cookie Recipe
There are countless reasons to fall in love with making your own Danish Butter Cookies. Here’s why this recipe stands out:
- They Make the Perfect Thoughtful Gift! Imagine the joy of presenting a beautifully packaged tin of these homemade delights to neighbors, teachers, or friends during the holiday season or as a thoughtful thank-you. These delicious Danish butter cookies are more than just a treat; they’re a gesture of warmth and care. Their exquisite taste and charming appearance make them an unforgettable gift that truly comes from the heart. Pair them with a steaming mug of your favorite tea for an ultimate cozy experience.
- Taste and Texture Reminiscent of Classic Shortbread. This easy recipe is a carefully adapted version of our popular Homemade Shortbread Cookies, enhanced with a few key additions. We’ve incorporated egg for a richer, more pliable dough and a touch of vanilla extract to elevate the flavor profile. Unlike traditional shortbread which often uses powdered sugar for a melt-in-your-mouth feel, this recipe opts for granulated sugar, providing a delightful subtle crispness and texture that makes these cookies truly unique.
- A Fantastic Baking Project for Kids! Looking for a fun, interactive kitchen activity? This Danish butter cookie recipe is an absolute winner for baking with children. The process of creaming butter and sugar, mixing the dough, and especially piping the beautiful swirls is incredibly engaging and rewarding for little hands. It’s a wonderful way to create lasting memories, teach basic baking skills, and enjoy a delicious reward together.
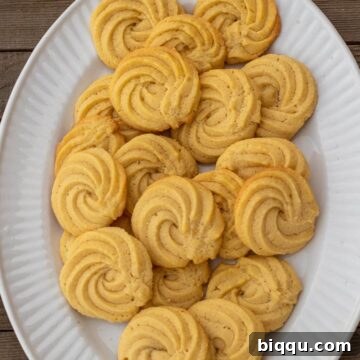
- Visually Stunning and Perfect for Any Table. The iconic swirls and golden hue of Danish butter cookies make them incredibly appealing. Their elegant appearance means they’ll look stunning on any dessert platter, holiday table, or cookie exchange. I personally baked these for Thanksgiving in 2022, and they were an absolute sensation, earning rave reviews from everyone who tried them!
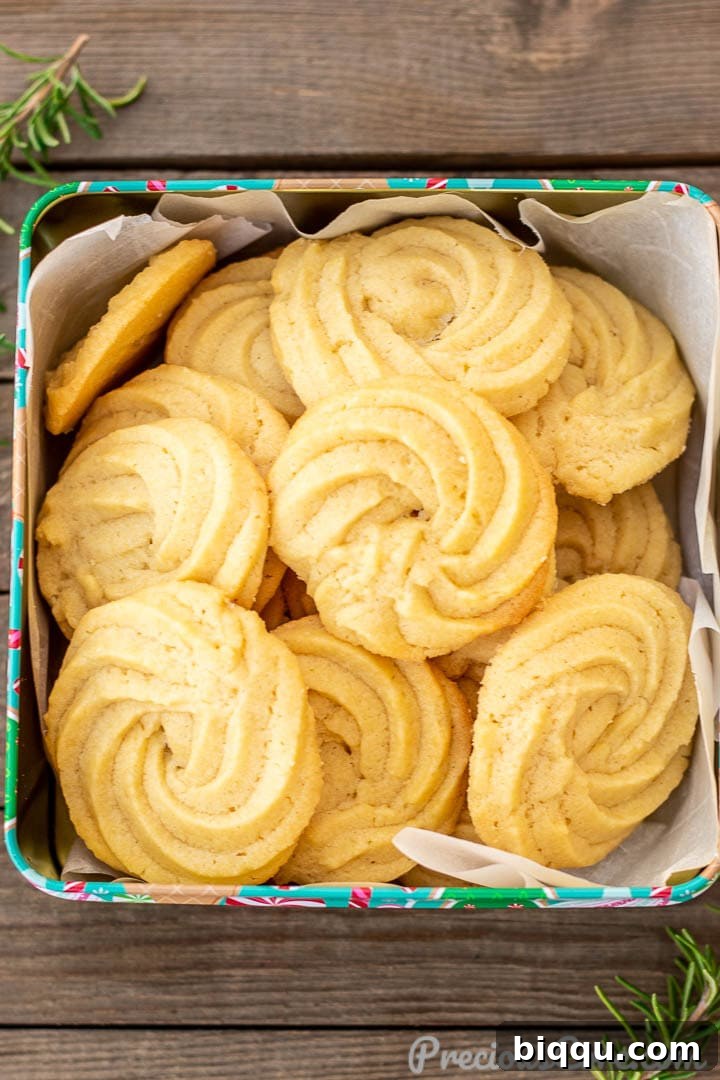
What Exactly Are Danish Butter Cookies?
Danish Butter Cookies are internationally recognized and beloved confections, most famously associated with the round blue tins from brands like Royal Dansk Cookies, which are commonly found in stores worldwide. These delicate, crisp, and wonderfully buttery cookies are a testament to simple ingredients yielding extraordinary flavor. With this recipe, you have the opportunity to perfectly replicate that cherished store-bought taste, or even enhance it, right from your own oven.
As their name proudly declares, the star ingredient in any authentic Danish Butter Cookies recipe is, without a doubt, butter. It’s the generous quantity and high quality of butter that give these cookies their signature rich flavor and melt-in-your-mouth texture. Their distinct butteriness is not just a characteristic; it’s the very essence of what makes them so special.
Historically, Danish Butter Cookies are believed to have originated from a small, traditional bakery nestled in a charming village in Denmark. The “Danish” in their name unequivocally points to their origins in this beautiful Scandinavian country. While enjoyed year-round globally, these delightful buttery cookies hold a particularly special place during the Christmas season in both North America and Europe, often served as part of festive celebrations and shared as gifts.
Mastering the Simple Ingredients for Danish Butter Cookies
Creating your own batch of irresistible Danish Butter Cookies begins with understanding the role of each key ingredient. You’ll be delighted to find that the foundation of this recipe relies on just four simple items: butter, sugar, egg, and flour. However, the addition of a high-quality vanilla extract and a pinch of salt are crucial for elevating the flavor and achieving a perfectly balanced profile. Here’s a detailed look at each component:
- 1. High-Quality Butter: The Heart of the Cookie. This is where you absolutely cannot compromise. The quality of your butter will profoundly impact the final taste and texture of your cookies. I wholeheartedly recommend using European-style, grass-fed butter, such as Kerrygold. Its higher fat content and richer flavor translate directly into a superior cookie. Since butter makes up a significant portion of these cookies (you’ll need a full cup for the complete recipe), investing in good butter is key to achieving that authentic, deep buttery flavor. Ensure it’s softened to room temperature for optimal creaming.
- 2. Granulated Sugar: For Texture and Sweetness. While some butter cookie recipes might call for powdered sugar, we opt for granulated sugar here. This choice contributes to a slightly crisper texture and a beautiful golden-brown edge during baking, adding another layer of delightful complexity to each bite. It provides just the right amount of sweetness without being cloying.
- 3. One Large Egg: The Binding and Enriching Agent. A single large egg plays a crucial dual role in this recipe. Firstly, it adds a wonderful richness to the cookie dough, contributing to its tender interior. Secondly, and perhaps most importantly for piped cookies, the egg enhances the dough’s pliability, making it much easier to pipe smoothly and elegantly out of a pastry bag. Without the egg, the dough would be considerably stiffer and more challenging to work with.
- 4. Premium Vanilla Extract: The Aromatic Essence. To truly enhance the already incredible butter flavor, a good quality vanilla extract is essential. Its warm, sweet notes complement the butter beautifully, rounding out the cookie’s overall taste. For an even more intense vanilla experience, you could substitute the extract with an equal amount of vanilla bean paste. A little goes a long way in making the flavor shine.
- 5. All-Purpose Flour: The Structural Foundation. You’ll need good quality all-purpose flour, also known as plain flour, for these cookies. It provides the necessary structure without making the cookies tough. It’s crucial to use all-purpose flour and avoid substitutes like cake flour, as cake flour has a lower protein content and will result in a significantly different texture that isn’t ideal for these crisp butter cookies.
- 6. A Pinch of Salt: The Flavor Balancer. Salt is not just for savory dishes; it’s a powerhouse ingredient in baking! A small amount of salt is vital for balancing the sweetness of the sugar and enhancing all the other flavors, particularly the rich butter. If you’re using unsalted butter (which is recommended for better control over salt content), adding a ¼ teaspoon of salt is especially important. Salt truly makes baked goods taste better and more complex.
For the complete list of ingredients with precise measurements, please refer to the detailed recipe card below.
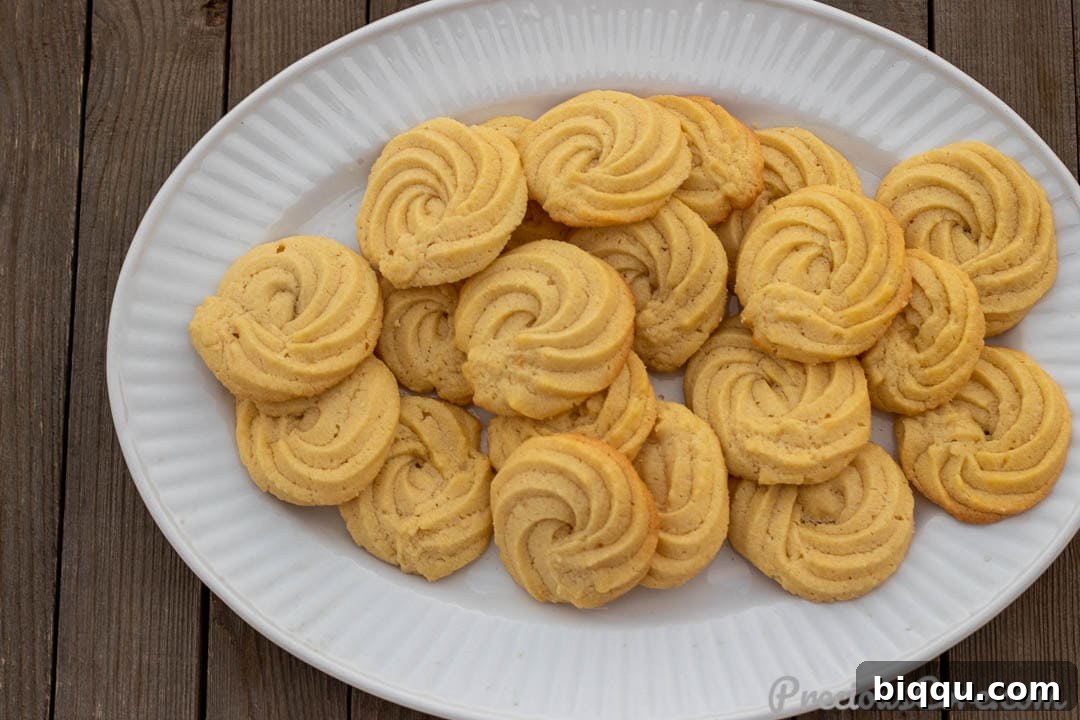
Step-by-Step Guide: How To Make Danish Butter Cookies
Creating these delightful Danish Butter Cookies is a straightforward process, but paying attention to each step ensures perfect results every time. Follow these detailed instructions to bake your own batch of buttery, crisp perfection:
- Prepare Your Baking Sheets and Oven: Begin by preheating your oven to 350°F (180°C). Line two large baking sheets with parchment paper. This prevents sticking and promotes even baking. Avoid using aluminum foil, as parchment paper is significantly better for non-stick baking and ensures the bottom of the cookies don’t over-brown.
- Cream Butter and Sugar Until Fluffy: In a large mixing bowl, combine the softened, room-temperature butter and granulated sugar. You can use a sturdy whisk for a good arm workout, an electric mixer with a paddle attachment for ease, or a hand mixer. Start creaming on low speed to incorporate the ingredients, then gradually increase to medium-high speed, beating until the mixture becomes visibly light, fluffy, and pale yellow. This process incorporates air, which contributes to the cookies’ delicate texture.
- Incorporate Egg and Vanilla Extract: Add the large egg and vanilla extract to the creamed butter and sugar mixture. Continue to beat until these ingredients are fully combined and the mixture is smooth. Scrape down the sides of the bowl with a rubber spatula to ensure everything is evenly mixed.
- Add Flour and Salt to Form Dough: Gradually add the all-purpose flour and salt to the wet ingredients. Mix on a low-medium speed, especially if using a stand mixer, to prevent the flour from flying out of the bowl. Continue mixing just until the dough comes together and a soft, cohesive dough forms. Be careful not to overmix, as this can develop too much gluten and result in tough cookies. Periodically scrape the sides and bottom of the bowl to ensure all ingredients are well incorporated.
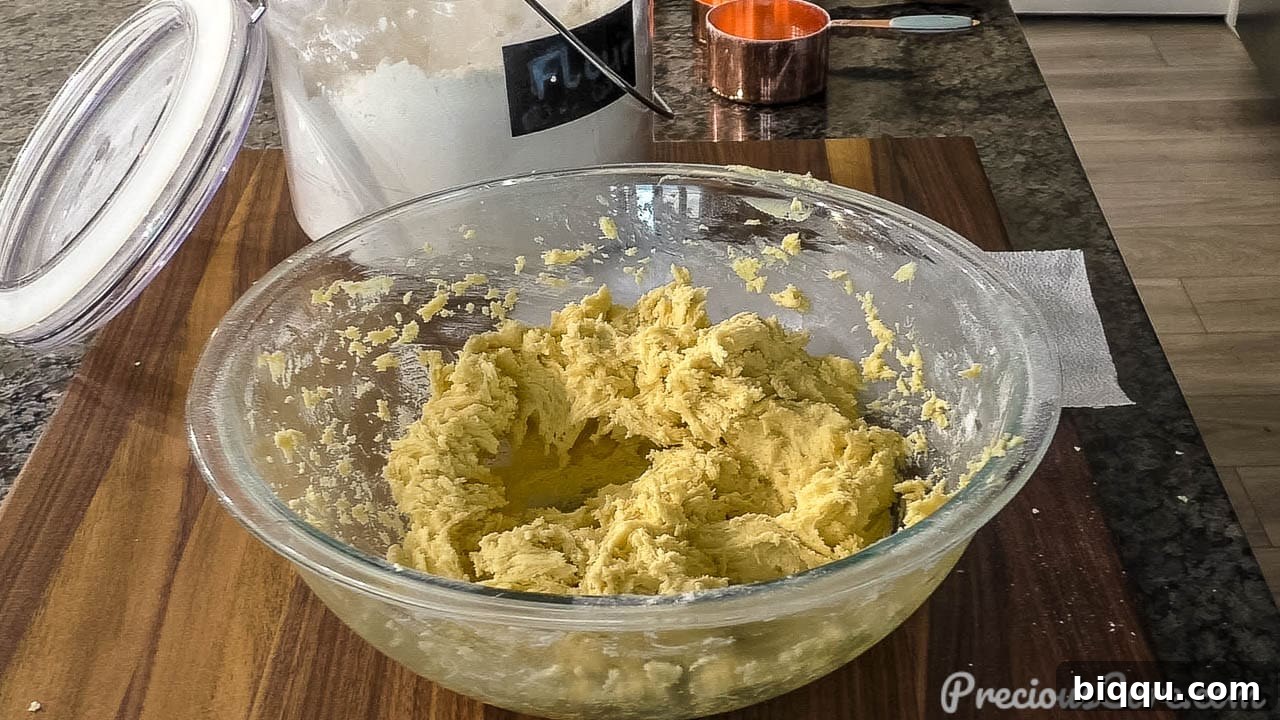
- Prepare for Piping: Transfer the prepared cookie dough into a sturdy pastry bag fitted with your chosen large piping tip. For classic Danish butter cookie shapes, a large open star tip (like Ateco #826) or a large closed star tip (like Ateco #849 or Wilton 1M) works best, creating beautiful swirls and ridges. Ensure the bag is securely filled to avoid bursting.
- Pipe Cookies Onto Baking Sheets: Pipe the dough onto the prepared baking sheets, forming 1-2 inch circles, rosettes, or S-shapes with intricate swirls. Leave at least one inch of space between each cookie to allow for slight spreading during baking. Consistency in size and shape will help them bake evenly.
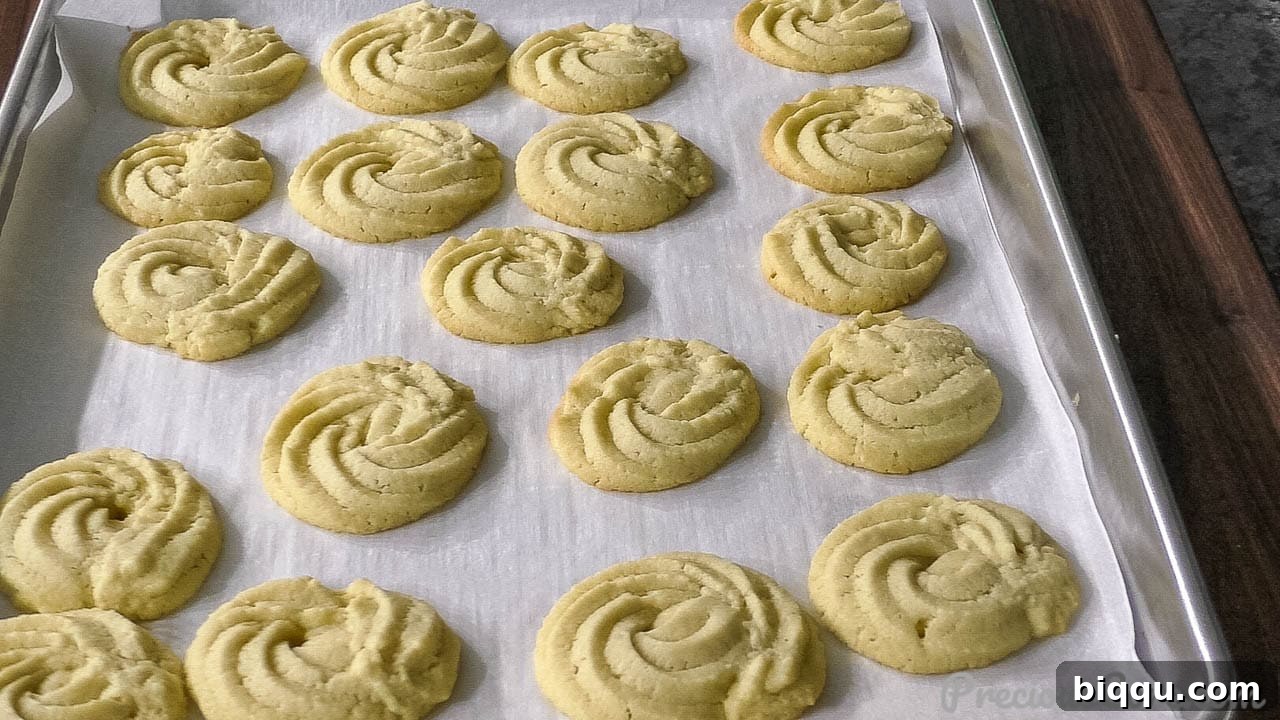
- Bake Until Golden Brown: Place the cookie sheets with the unbaked cookies into your preheated 350°F (180°C) oven. Bake for approximately 12 to 15 minutes, or until the edges are lightly golden brown. Baking one sheet at a time often yields the most consistent results. Keep a close eye on them, as baking times can vary slightly depending on your oven and the size of your cookies. Avoid using a higher temperature oven, as this can cause the edges to burn before the centers are fully cooked.
- Cool and Serve: Once baked, remove the cookies from the oven and allow them to cool completely on the baking sheet for a few minutes. This allows them to firm up. You can then carefully transfer them to a wire cooling rack to finish cooling to room temperature.
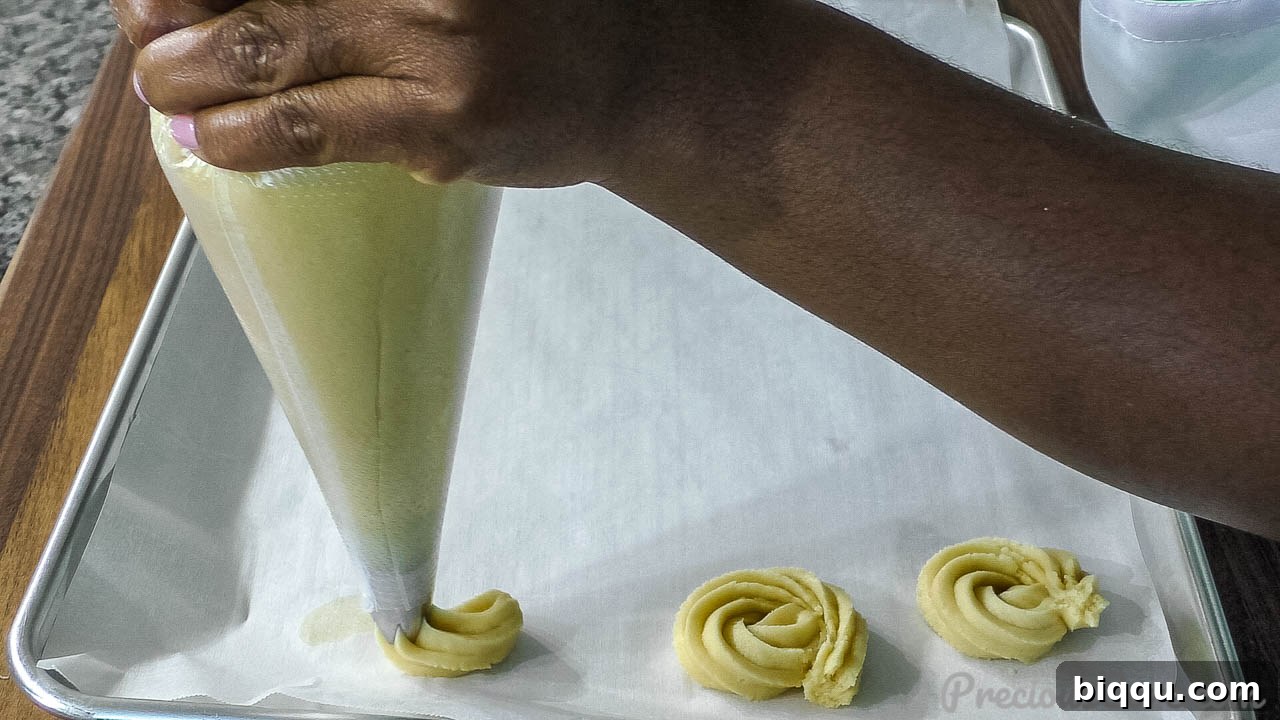
Chef’s Tip for Success: The consistency of your butter is paramount for easy piping. Ensure your butter is truly softened to room temperature, but definitely not melted. Butter that is too cold will result in a stiff dough that’s difficult to pipe, potentially tearing your pastry bag. Butter that is too warm or melted will yield a greasy dough that won’t hold its shape.
Creative Variations to Elevate Your Danish Butter Cookies
While classic Danish Butter Cookies are perfect as they are, don’t hesitate to get creative with these delicious variations:
- Crunchy Sugar Garnish: For an extra layer of texture and sparkle, lightly sprinkle some coarse sugar (like turbinado or sparkling sugar) over the unbaked cookies before they go into the oven. As the cookies bake, the sugar will caramelize slightly, creating a beautiful crunch and shimmering finish.
- Elegant Decorations: Once your cookies have cooled, the possibilities for decoration are endless! Experiment with festive sprinkles for a pop of color, or melt down some high-quality chocolate – whether it’s rich dark chocolate, creamy milk chocolate, or sweet white chocolate. Drizzle elegant lines or patterns over the baked cookies for a fancier presentation. For best results, place the cookies on a wire rack with parchment paper underneath to catch any drips, ensuring a clean finish.
- Flavorful Baking Extracts: Unleash your inner flavor artist by swapping or combining different baking extracts. Instead of or in addition to vanilla, try a hint of almond extract for a delicate marzipan-like note, or lemon extract for a bright, zesty twist. Other delicious options include orange, peppermint (especially for holidays), or even a touch of rum extract for a sophisticated flavor profile.
- Citrus Zest: For a burst of fresh flavor, finely grate the zest of half a lemon or orange into your dough along with the vanilla extract. The citrus oils will infuse the cookies with a delightful aroma and subtle tang.
- Spices: A pinch of ground cinnamon, nutmeg, or even cardamom can add a warm, complex note, especially perfect for fall or winter baking.
If you enjoy experimenting with flavors, you might also love our Cinnamon Chocolate Chip Cookies!
Essential Baking Tools for This Recipe
Having the right tools can make all the difference in ensuring a smooth and enjoyable baking experience for your Danish Butter Cookies:
- For creating those signature swirls, I highly recommend using this open star piping tip by Ateco (Ateco #826). Its wide opening is perfect for the thick butter cookie dough.
- To keep things tidy and easy to manage, I also used these disposable piping bags. They offer convenience and make cleanup a breeze.
- As an alternative, closed star piping tips (like Ateco #849) also produce beautiful, defined cookie shapes and can be used interchangeably with open star tips.
- Another popular and versatile option for piping these cookies is the Wilton 1M piping tip, known for creating lovely rosette and star shapes.
- A reliable electric hand mixer or a stand mixer with a paddle attachment will make creaming the butter and sugar much easier and more efficient.
- Quality parchment paper is essential for non-stick baking and easy cleanup.
- Sturdy baking sheets that distribute heat evenly are crucial for perfectly golden cookies.
Expert Tips for Achieving Perfect Danish Butter Cookies
To ensure your homemade Danish Butter Cookies are nothing short of perfect, keep these expert tips in mind:
- Proper Storage for Freshness: Once your cookies have completely cooled, store any leftovers in an airtight container at room temperature. This will keep them fresh and crisp for up to 3-4 days. For longer storage, see the freezing tips below.
- Freeze Dough for Future Baking: Planning ahead? You can prepare the cookie dough in advance! Simply pipe the unbaked cookies onto a parchment-lined baking sheet and place the entire tray in the freezer until the cookies are firm (about 30-60 minutes). Once firm, transfer them to a freezer-safe airtight bag or container, wrapping them tightly in plastic wrap first to prevent freezer burn. You can bake them directly from frozen; just add a couple of extra minutes to the baking time. This is perfect for having fresh cookies on demand!
- Effortless Doubling of the Recipe: This recipe scales beautifully! If you’re baking for a larger crowd, hosting a party, or simply want more cookies (who doesn’t?), feel free to double all the ingredients. When making multiple batches, consider using different star piping tips for each batch to create a delightful variety of shapes and add visual interest to your cookie platter.
- Alternative Shaping Methods: If you don’t own a piping bag and tips, or simply prefer a different approach, you can still make these delicious cookies!
- Cookie Press: A cookie press is an excellent alternative for forming various intricate shapes with minimal effort. Simply load the dough into the press and press out cookies onto your baking sheet.
- Small Cookie Scoop: For a more rustic, drop-cookie style, use a small cookie scoop to portion out the dough. After scooping, gently press down on each dough ball with the back of a spoon or your fingertips to slightly flatten it.
- Spoon and Knife: As a last resort, you can simply scoop spoonfuls of dough and use another spoon or a knife to push them onto the baking sheet. While they won’t have the classic piped look, they’ll still be incredibly delicious!
- Don’t Overbake: Danish butter cookies are meant to be pale golden with slightly darker edges. Overbaking will make them tough and less buttery. Start checking for doneness at the minimum baking time suggested.
- Chill if Dough is Too Soft: If your kitchen is very warm and the dough becomes too soft to pipe easily, pop the piping bag into the refrigerator for 10-15 minutes to firm it up slightly.
Mastering Butter Cookie Piping for Beautiful Shapes
Piping butter cookies might seem intimidating at first, but with a few simple techniques, you’ll be creating stunning shapes in no time. The key is in the consistency of your dough and a steady hand. Follow these tips for the best-piped cookies:
- Room Temperature Butter is Non-Negotiable: As mentioned, ensuring the butter used in your cookie dough is perfectly softened to room temperature is the single most important factor for easily pipeable dough. If the butter is too cold, the dough will be too stiff and difficult to squeeze through the piping tip, putting strain on your hands and potentially tearing the bag.
- Double Your Piping Bags for Strength: Especially if you are using disposable piping bags, it’s a good practice to double them up. The butter cookie dough can be quite dense, and a single bag might burst under pressure. Doubling the bags provides extra reinforcement and prevents messy accidents.
- Simple Swirls for Classic Circles: For effortlessly elegant circular butter cookies, simply hold your piping bag perpendicular to the baking sheet. Start at a central point and apply even pressure, moving the tip in a continuous circular motion to form a neat spiral or swirl. Release pressure to stop piping when your desired size is reached.
- Creating Beautiful Rosettes: To pipe charming rose-like cookies, begin at a central point on your baking sheet. Apply steady pressure and pipe a tight swirl outwards, then continue piping around the initial center, overlapping slightly, to create the appearance of rose petals. Leave a small, unpiped hole in the very center if you wish for a classic Danish cookie look.
- “S” Shapes: For classic “S” shaped cookies, apply pressure and pipe an ‘S’ shape on the baking sheet. Ensure the curves are distinct and the dough flows smoothly.
- Even Pressure is Key: No matter the shape, maintaining even and consistent pressure on the piping bag throughout the piping process is vital. This ensures that your cookies are uniform in thickness and height, leading to even baking.
- Practice Makes Perfect: Don’t be discouraged if your first few cookies aren’t perfect. Piping takes a little practice. You can even practice on a piece of parchment paper without the intention of baking, then scrape the dough back into the bag.
Frequently Asked Questions About Danish Butter Cookies
While Danish butter cookies and shortbread cookies share many similarities in their rich buttery flavor and crumbly texture, there are subtle but important differences. Shortbread typically has a more crumbly, sometimes drier texture because it does not traditionally contain whole eggs or egg yolks. Danish butter cookies, on the other hand, include a whole egg, which gives them a slightly softer, yet still crisp, texture and a richer mouthfeel, making the dough more pliable for piping. Both types of cookies are distinguished by their high butter content and the absence of leavening agents like baking powder or baking soda, a characteristic that sets them apart from sugar cookies.
No special piping tip? No problem! You can still make delicious butter cookies. Simply spoon your cookie dough into one corner of a sturdy Ziploc bag or a similar freezer bag. Using your hands, gently push the dough towards the pointed tip of that same corner. With a pair of scissors, snip off about half an inch from the very tip of the bag, creating an opening. Then, pipe the cookie dough into circles or simple shapes onto your prepared baking sheet. While they won’t have the characteristic swirls from a star tip, they will still be wonderfully buttery and equally delicious!
Absolutely! If you prefer using cookie cutters for different shapes, you certainly can. To do so, first, chill your prepared cookie dough in the refrigerator for at least one hour. This makes the dough firm and easier to handle. Then, place the chilled dough between two sheets of parchment paper and roll it out evenly to about a quarter-inch thickness. Use your favorite cookie cutters to cut out shapes, carefully transfer them to your prepared baking sheet, and then proceed with baking as directed.
They are called Danish butter cookies because they are a traditional pastry that originated in Denmark. The name is a direct reference to their country of origin, highlighting their heritage.
More Irresistible Cookie Recipes You Will Love
If you’ve enjoyed baking these delightful Danish Butter Cookies, we’re sure you’ll adore these other cookie recipes that are equally simple and delicious:
- Our Easiest Chocolate Chip Cookies: A timeless classic that never disappoints, perfect for any occasion.
- Classic Shortbread Cookies: For those who love a pure, crumbly, buttery treat with minimal ingredients.
- Tropical Coconut Chocolate Chip Cookies: A delightful twist on the classic, bringing a hint of the exotic to your cookie jar.
- Rich Peanut Butter Cookies: A nostalgic favorite, boasting that irresistible nutty flavor and chewy texture.
- Zesty Lemon Shortbread Cookies: Bright, refreshing, and melt-in-your-mouth, perfect for a sunny day or an afternoon tea.
Watch How To Make Danish Butter Cookies
For a visual guide to making these scrumptious Danish Butter Cookies, watch our step-by-step video tutorial. Seeing the techniques in action can be incredibly helpful!
Subscribe to my channel for more delicious recipes!
SUBSCRIBE
If you try this Danish Butter Cookies Recipe, please consider leaving a comment and a star rating below. Your feedback means the world to me, and I love hearing about your baking successes!
Danish Butter Cookies
15 minutes
15 minutes
30 minutes
Approximately 2 dozen
cookies
Rate This Recipe
Print Recipe
Ingredients
-
1 cup unsalted butter (16 tablespoons or 230g) softened and at room temperature -
1/2 cup granulated sugar (100g) -
1 large egg at room temperature -
2 teaspoons pure vanilla extract -
2 cups all-purpose flour (250g) spooned and leveled to measure -
1/4 teaspoon fine sea salt
Instructions
-
Preheat your oven to 350° F (180° C). Line two large baking sheets with parchment paper to prevent sticking.
-
In a large mixing bowl, using a hand mixer or stand mixer with a paddle attachment, cream together the softened butter and granulated sugar until the mixture is light, fluffy, and pale in color. This usually takes about 2 minutes.
-
Add the large egg and vanilla extract to the creamed mixture. Beat until fully combined and smooth, scraping down the sides of the bowl as needed.
-
Gradually add in the all-purpose flour and salt. Beat on low-medium speed just until the dry ingredients are incorporated and a cohesive dough forms. Be careful not to overmix.
-
Transfer the dough into a sturdy piping bag fitted with your preferred large open star piping tip (such as Ateco #826) or a closed star piping tip (like Ateco #849 or Wilton 1M).
-
Pipe the cookies onto the prepared baking sheets, forming 1-2 inch swirl circles, rosettes, or S-shapes. Ensure you leave at least one inch of space between each cookie to allow for slight spreading.
-
Bake one sheet of cookies at a time in the preheated oven for approximately 12 to 15 minutes, or until the edges are lightly golden brown. Start checking for doneness around the 12-minute mark, especially if you’ve made smaller cookies. Larger cookies may require a few extra minutes.
-
Allow the freshly baked cookies to cool completely on the baking sheet for several minutes to firm up before handling. You can then transfer them to a wire rack to finish cooling if desired.
-
Serve your homemade Danish Butter Cookies warm or at room temperature. Store any leftover cookies in an airtight container to maintain their crispness and freshness.
Notes
2. To keep your parchment paper from sliding around on the baking sheet, use a small dab of cookie dough in each corner of the baking sheet to “glue” the paper down.
Nutrition
Carbohydrates: 36g |
Protein: 4g |
Fat: 24g |
Saturated Fat: 15g |
Polyunsaturated Fat: 1g |
Monounsaturated Fat: 6g |
Trans Fat: 1g |
Cholesterol: 81mg |
Sodium: 264mg |
Potassium: 50mg |
Fiber: 1g |
Sugar: 13g |
Vitamin A: 739IU |
Calcium: 15mg |
Iron: 2mg
Additional Information
Dessert, Snack, Holiday Cookies
Danish, European, Western
Approx. 188 kcal
Tried this recipe?
Mention @preciouscore or tag #PreciousCore!