
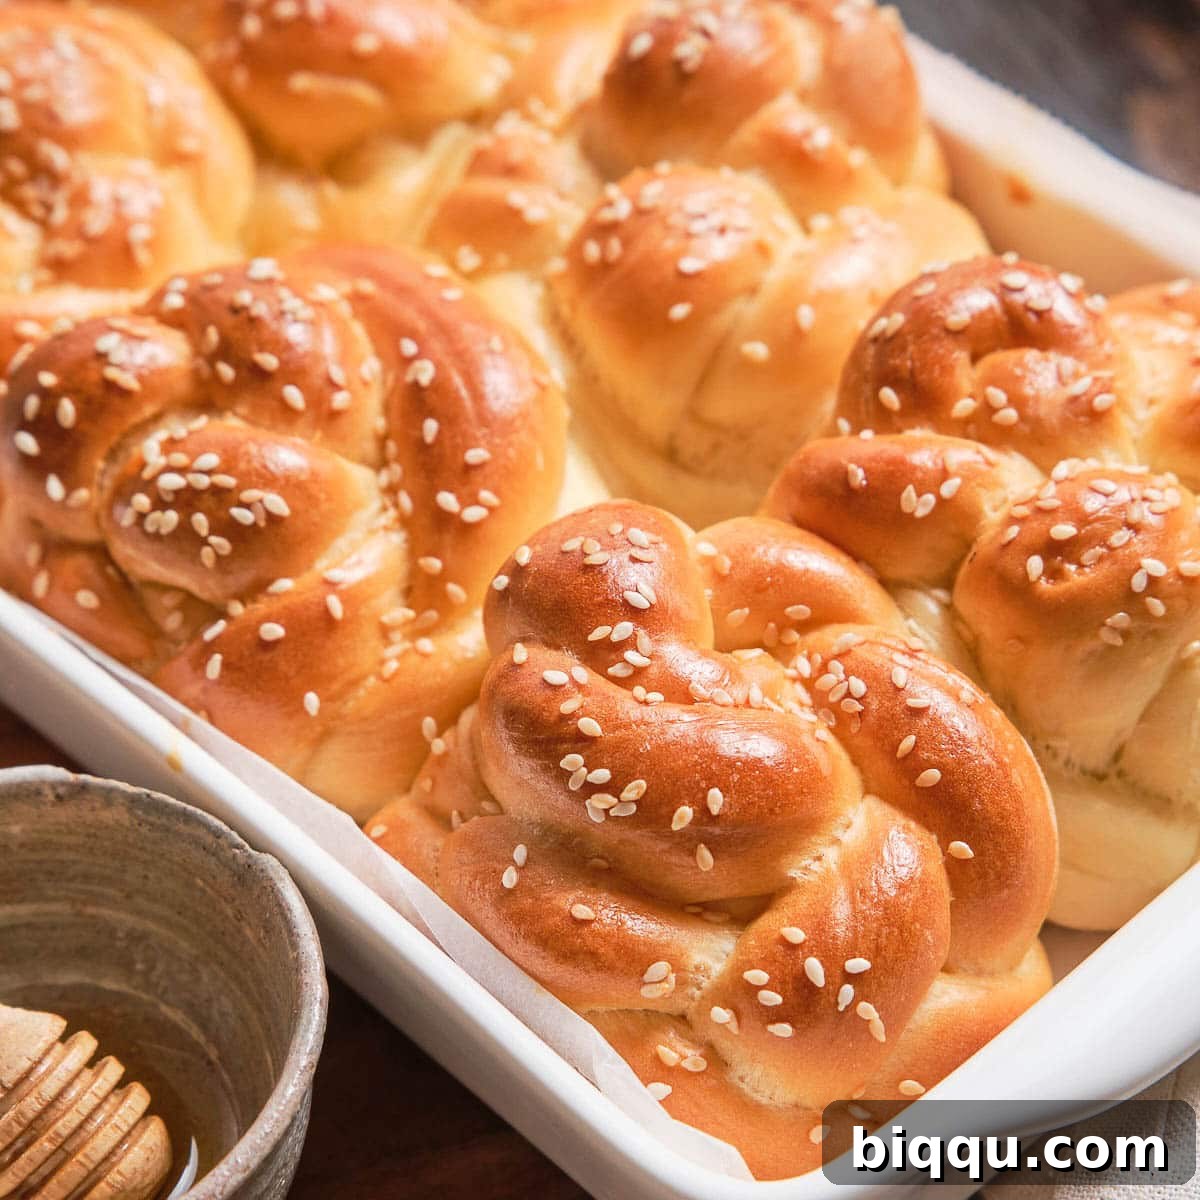
Indulge in the sweet, fluffy embrace of homemade Challah Dinner Rolls, a delightful twist on traditional dinner rolls. These exquisite rolls boast an irresistibly pillowy interior complemented by a beautiful golden-brown crust, making them a standout addition to any meal. Best enjoyed warm, with a generous smear of butter, they offer a truly comforting and memorable culinary experience.
Whether you’re hosting a grand holiday feast for Thanksgiving or Christmas, or simply looking to elevate a weeknight family dinner, these mini challah rolls are the perfect accompaniment. Their charming appearance and rich flavor make them an impressive yet surprisingly easy-to-recreate side dish. As they bake, your kitchen will be filled with the inviting aroma of a professional bakery, promising a treat that delights all senses.
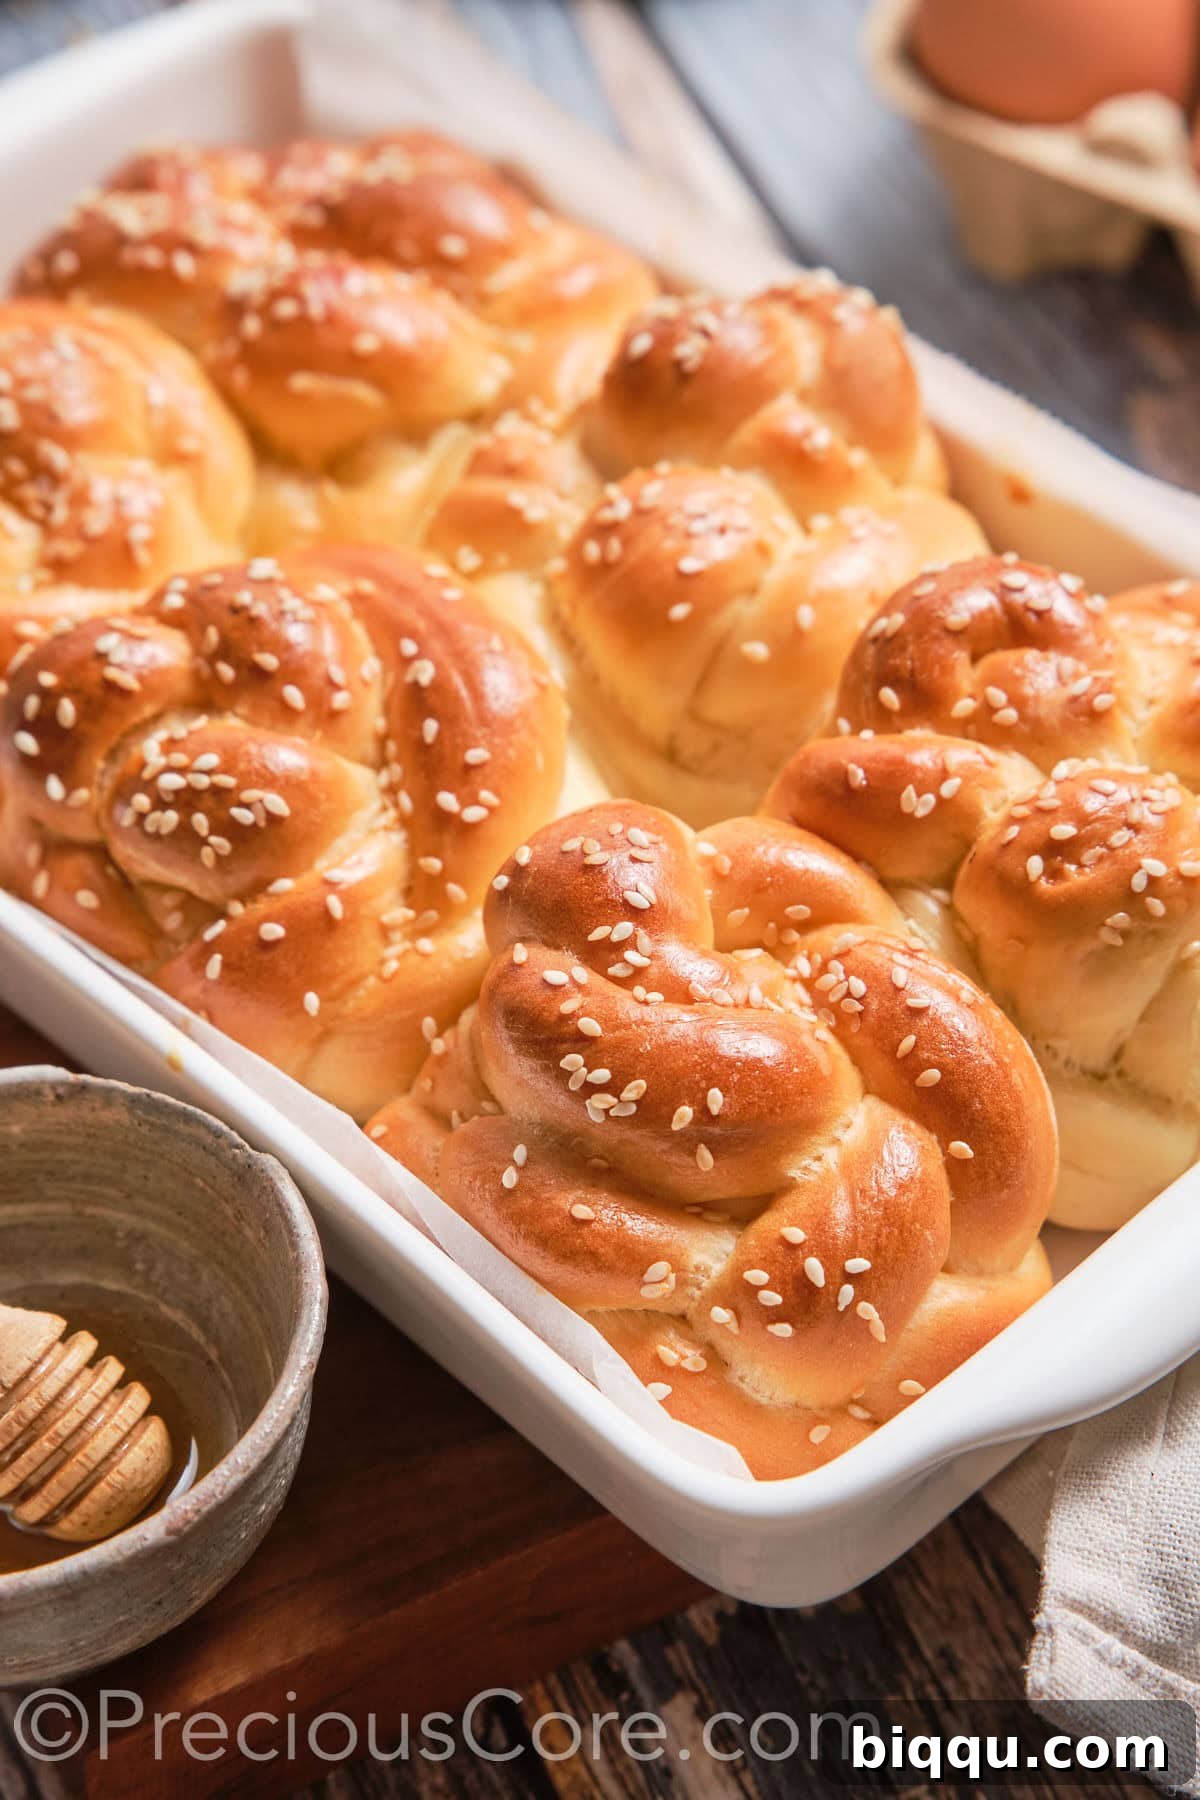
This recipe for challah knot rolls is thoughtfully adapted from a beloved challah bread recipe, perfected over many years. The result is a simple, straightforward process that yields consistently delicious results, suitable for both novice and experienced bakers. Get ready to impress your guests and fill your home with the warmth of freshly baked bread.
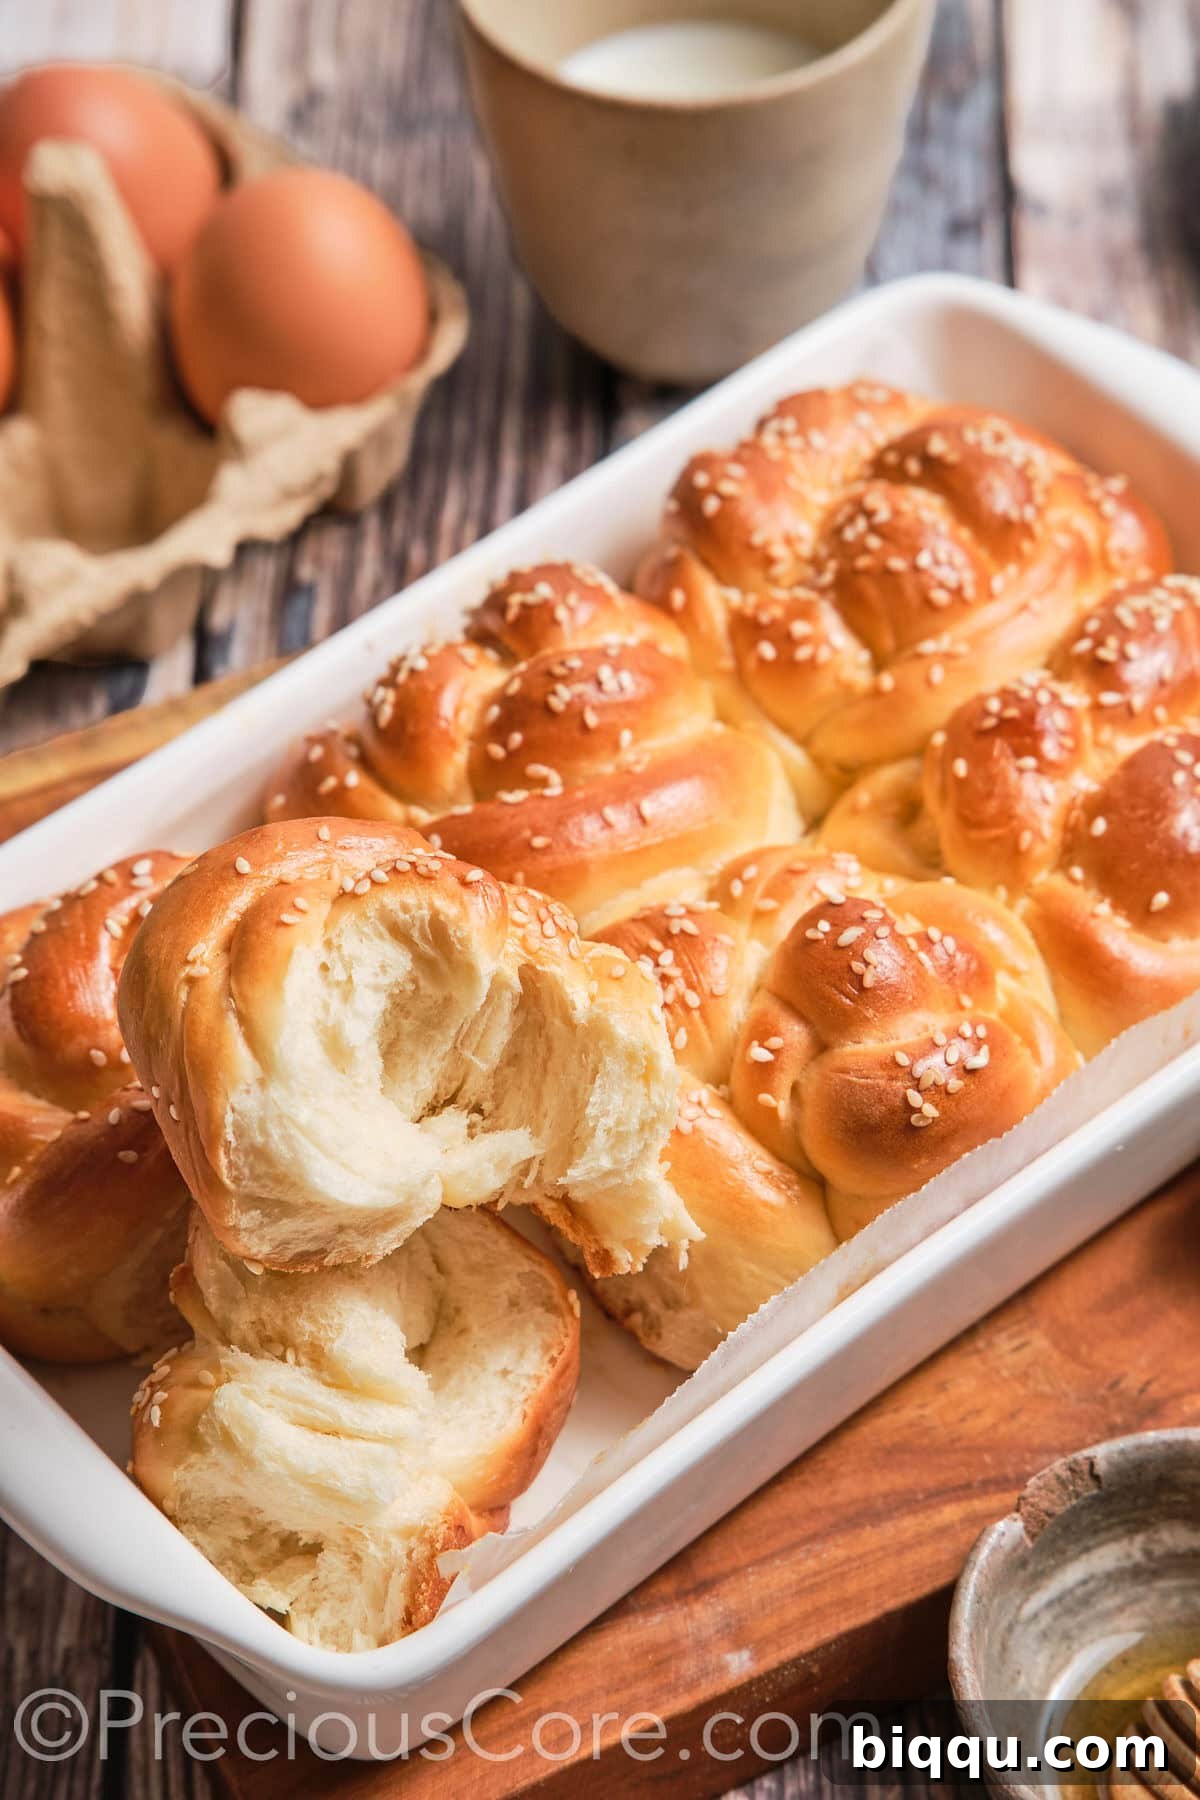
If you’re a fan of baking homemade bread, be sure to explore other popular recipes. You might enjoy my Easy Homemade French Bread, a crusty classic, my incredibly soft Milk Bread, or my other delightful Sweet Dinner Rolls. Each recipe promises the joy of fresh, homemade bread.
Why These Challah Dinner Rolls Are a Must-Try
These challah dinner rolls are not just a side dish; they’re a culinary experience waiting to happen. Here’s why they will quickly become a cherished recipe in your kitchen:
- Effortlessly Simple: Despite their sophisticated appearance, these rolls are remarkably easy to make. With clear, step-by-step instructions and accompanying photos, even beginner bakers can achieve perfect results.
- Wholesome Ingredients: Made with common kitchen staples, you won’t need to hunt for obscure items. The beauty of these rolls lies in transforming simple ingredients into something extraordinary.
- No Special Tools Required: Forget about needing fancy equipment. A mixing bowl, your hands, and a baking sheet are primarily all you’ll need, making this recipe accessible to everyone.
- Incredibly Versatile: While perfect on their own, these homemade rolls are a fantastic base for endless culinary creations. Serve them with Healthy Strawberry Jam for a sweet breakfast, use them to make delectable sandwiches, or even transform them into a luxurious French toast. They pair wonderfully with good-quality butter, soaking up its richness beautifully.
- Impressive Presentation: The iconic braided design gives these rolls an elegant, artisanal look that will surely impress your family and dinner guests. They look like they came straight from a gourmet bakery.
- Comforting Aroma: The process of baking these rolls fills your home with an irresistible, sweet, and yeasty fragrance that embodies warmth and comfort.
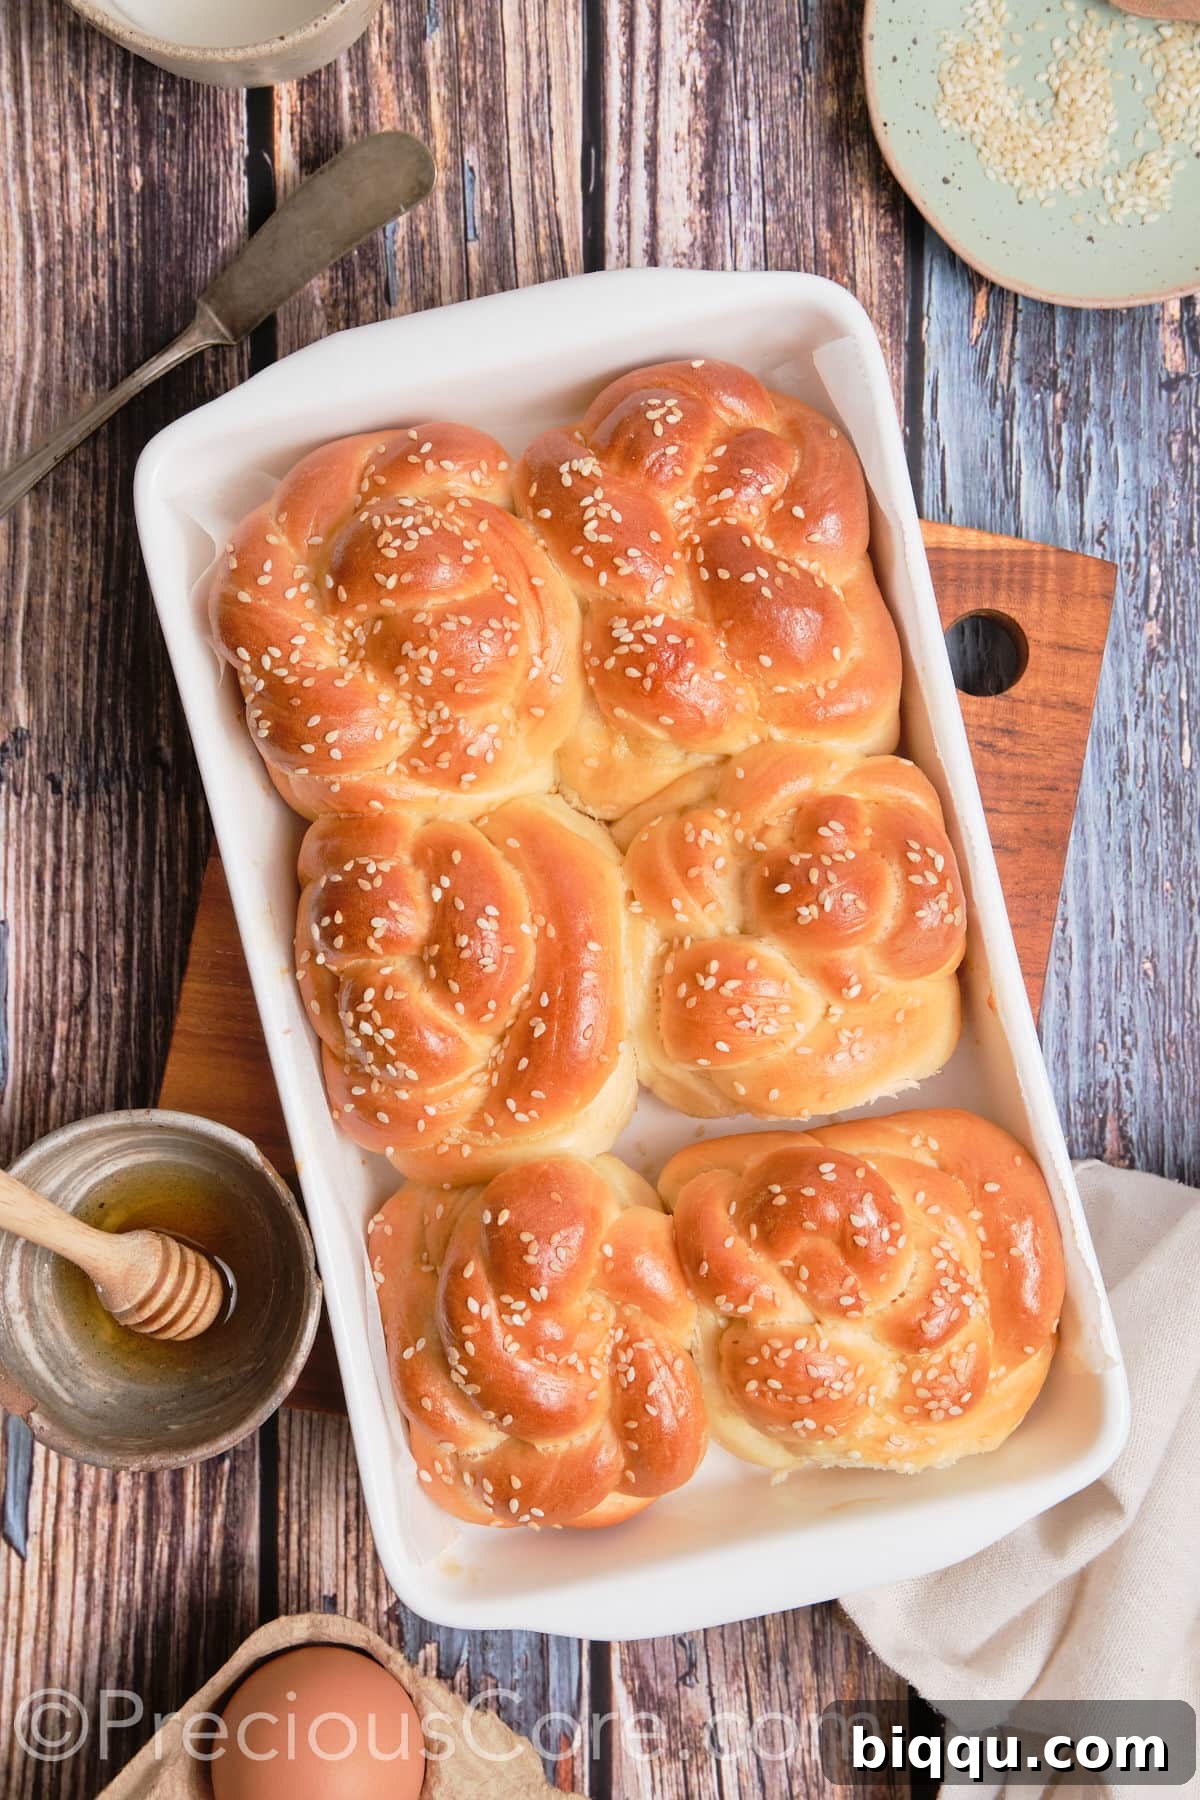
The Art of Braiding Challah Buns
Challah bread holds a special place in many traditions, particularly during Jewish holidays, thanks to its iconic braided shape and rich, slightly sweet flavor. It’s a bread that truly “spells feast” and signifies celebration and gathering. These mini challah rolls are a delightful, individual-sized interpretation of the classic challah, a delicious type of yeast bread celebrated for its tender crumb and beautiful sheen.
Imagine your Thanksgiving bread basket adorned with these cute, personal challah rolls – each guest gets their own perfectly braided treat! Beyond holiday gatherings, they are a fantastic addition to any dinner table, offering a unique and satisfying bread option. And don’t forget the leftovers; they make extraordinary sandwiches the next day, bringing a touch of gourmet to your everyday meals.
While the idea of shaping braided rolls might seem intricate, it’s a relatively straightforward process once you understand the technique. The challah knot rolls are made from a traditional challah dough, which is then divided and formed into small, elegant braided buns. With a little practice and patience, you’ll find the shaping process to be quite enjoyable and therapeutic.
Whether you are planning an elaborate holiday dinner or simply aiming to enhance a casual weeknight meal, this challah dinner roll recipe is one you’ll return to time and again. It’s a versatile recipe that consistently delivers delicious, impressive results, proving that homemade bread can be both accessible and extraordinary.
Essential Ingredients for Perfect Challah Rolls
Like all truly exceptional breads, these challah dinner rolls are crafted from a selection of fundamental ingredients, expertly combined to yield an irresistible and deeply satisfying result. Each component plays a vital role in achieving the rolls’ characteristic flavor and texture. Here’s a closer look at what you’ll need to create this culinary magic:
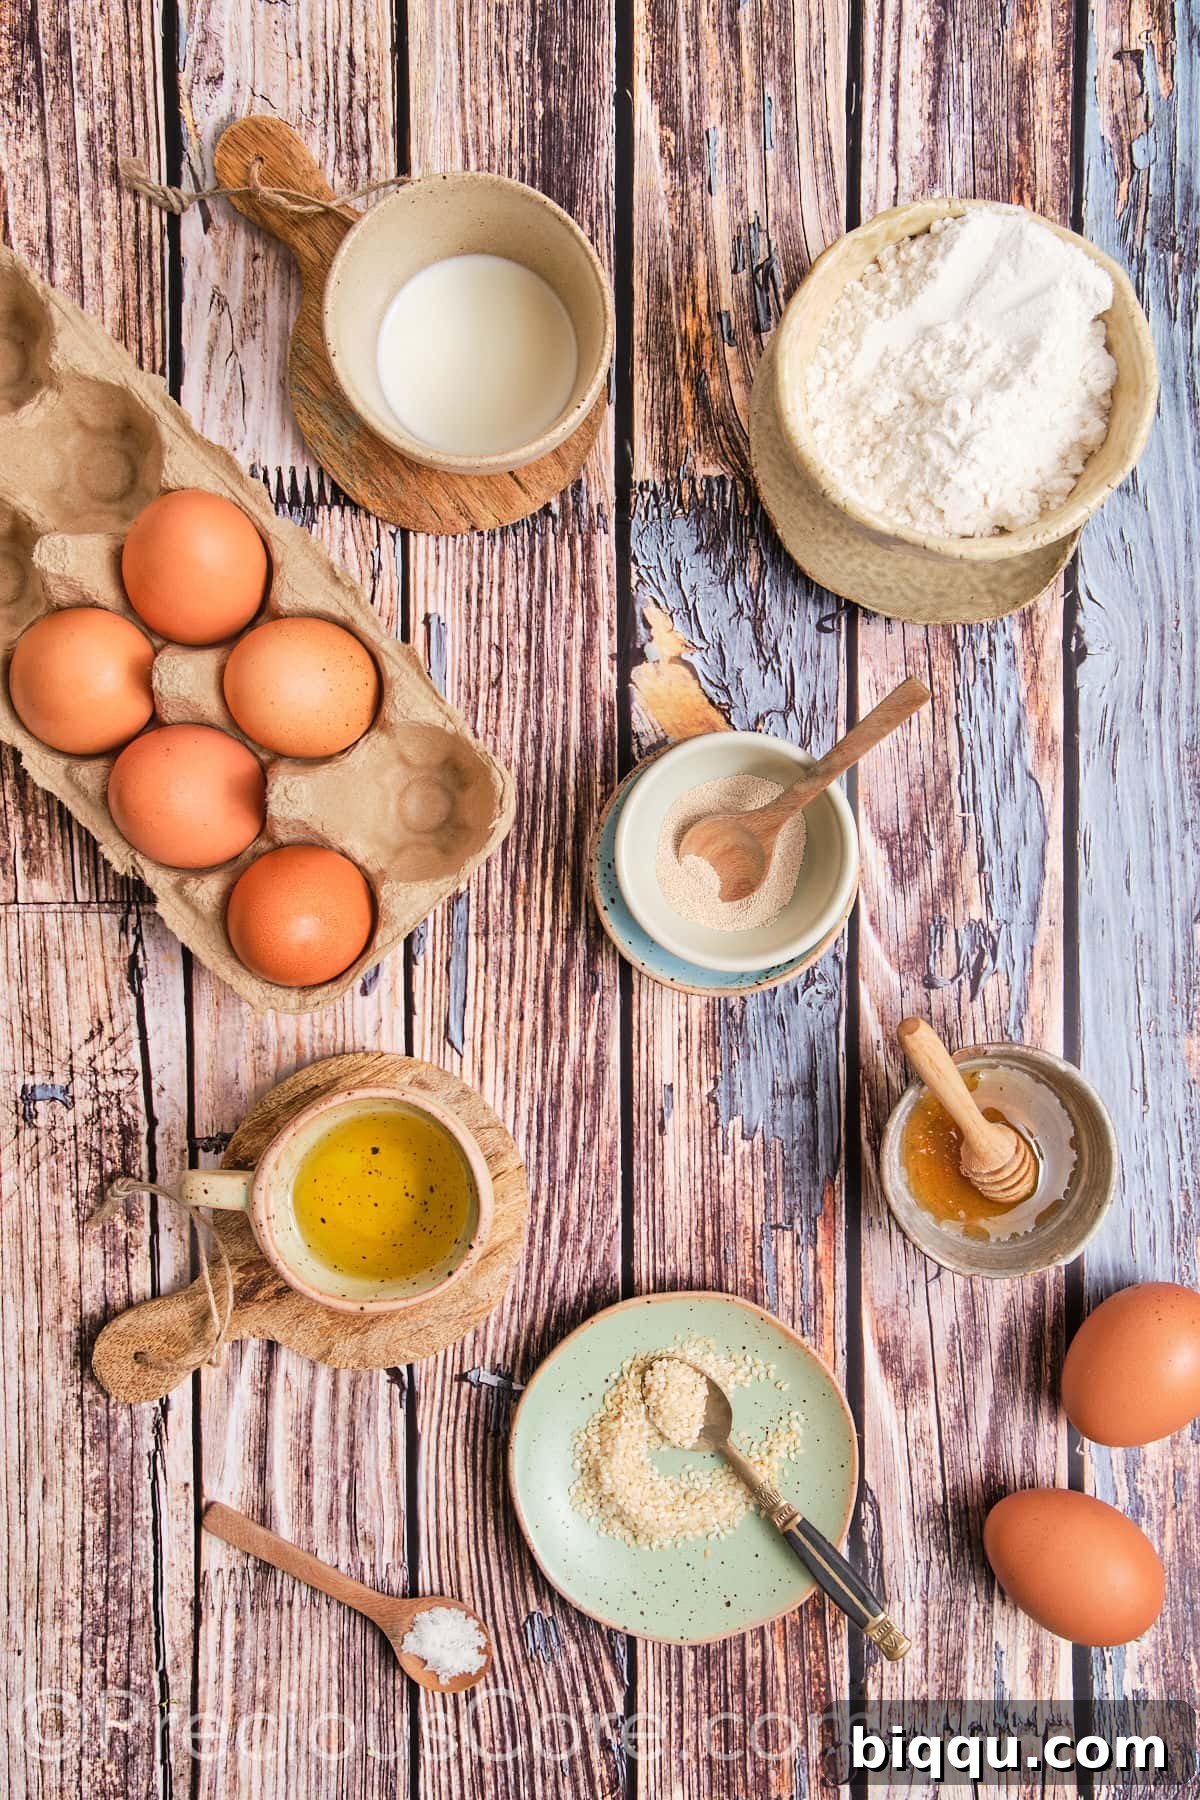
- Flour: The backbone of any bread, I typically use high-quality all-purpose flour for these rolls. However, you can achieve a slightly chewier texture by opting for bread flour, which has a higher protein content.
- Yeast: Active dry yeast is my preferred choice for this recipe. The freshness of your yeast is paramount for a successful rise. Always double-check the expiry date and perform a quick proofing test if you’re unsure (see expert tips for details!).
- Eggs: Two large, room-temperature eggs contribute to the challah’s rich color, tender crumb, and distinctive flavor. Room temperature eggs emulsify better with other ingredients, leading to a smoother, more uniform dough.
- Vegetable Oil: A neutral oil like vegetable oil keeps the challah soft and moist without imparting any dominant flavors. Canola oil or a light olive oil are excellent substitutes if vegetable oil is unavailable.
- Honey: Honey is the traditional sweetener for authentic challah bread, lending a delicate sweetness and helping with browning. If you prefer, brown sugar can also be used, which will add a slightly deeper, caramelized note.
- Salt: Essential for balancing the sweetness and enhancing the overall flavor profile of the rolls, a half teaspoon of salt makes a significant difference.
- Milk: For the richest flavor and most tender texture, whole milk is recommended. However, warm evaporated milk has also yielded fantastic results in my experience, offering a similar creamy richness.
For the complete list of ingredients with precise measurements, please refer to the detailed recipe card at the end of this article.
Challah Dinner Rolls Recipe Variations for Every Palate
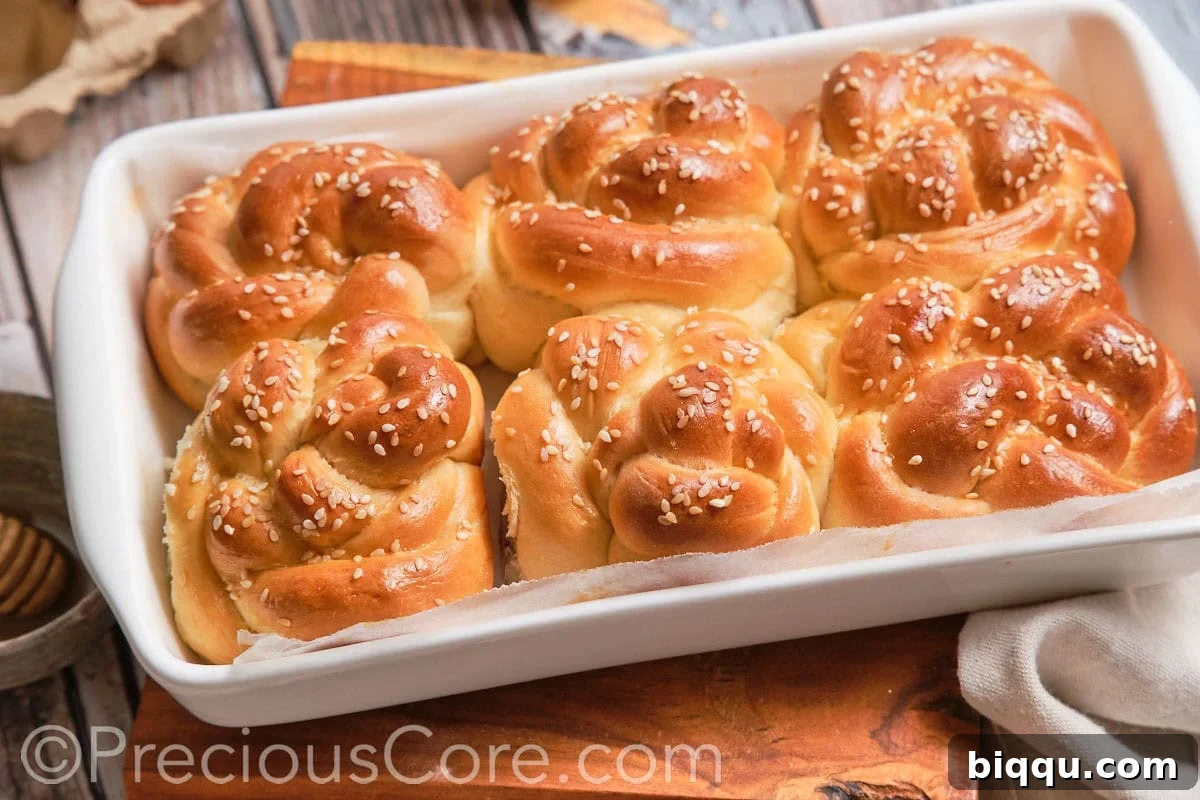
One of the joys of baking challah is its adaptability. You can easily customize these dinner rolls to suit your taste preferences, whether you crave something sweeter, savory, or uniquely spiced:
- Sweeter & Spiced Rolls: For an even more decadent treat, incorporate one tablespoon of ground cinnamon and a generous handful of plump raisins into the challah dough during the mixing stage. This creates a comforting, cinnamony roll reminiscent of a breakfast pastry.
- Savory Delight: Transform your challah rolls into a savory bread by mixing in dried herbs such as rosemary or thyme, a touch of garlic powder, or even grated hard cheese like Parmesan before the first rise. These are perfect alongside a hearty stew.
- Aromatic Cardamom Rolls: Add a unique, fragrant dimension to your challah by including about half a teaspoon of ground cardamom to the dough. Cardamom lends a warm, citrusy, and slightly floral note that is incredibly appealing.
- Topping Options: While sesame seeds offer a classic finish, consider topping your rolls with poppy seeds for a different visual appeal and a subtle, nutty flavor. Everything bagel seasoning is also a fun and flavorful option for a savory twist.
Smart Substitutions for Your Challah Rolls
Don’t have an ingredient on hand, or looking to tweak the recipe? Here are some simple and effective substitutions:
- Flour Alternatives: If you wish to incorporate whole grains, you can replace up to half of the all-purpose flour with whole wheat flour. This adds fiber and a nutty flavor. However, I advise against using 100% whole wheat flour for these particular rolls, as it can result in a denser, less fluffy texture. For a slightly chewier roll, bread flour is an excellent choice due to its higher gluten content.
- Oil Options: In place of vegetable oil, you can use other neutral oils like canola oil, light olive oil, or even melted unsalted butter. Each will contribute a slightly different nuanced flavor and richness to the rolls.
- Sweetener Swaps: Maple syrup or agave nectar can be used as a direct substitute for honey, offering similar liquid sweetness while potentially introducing their own subtle flavor notes.
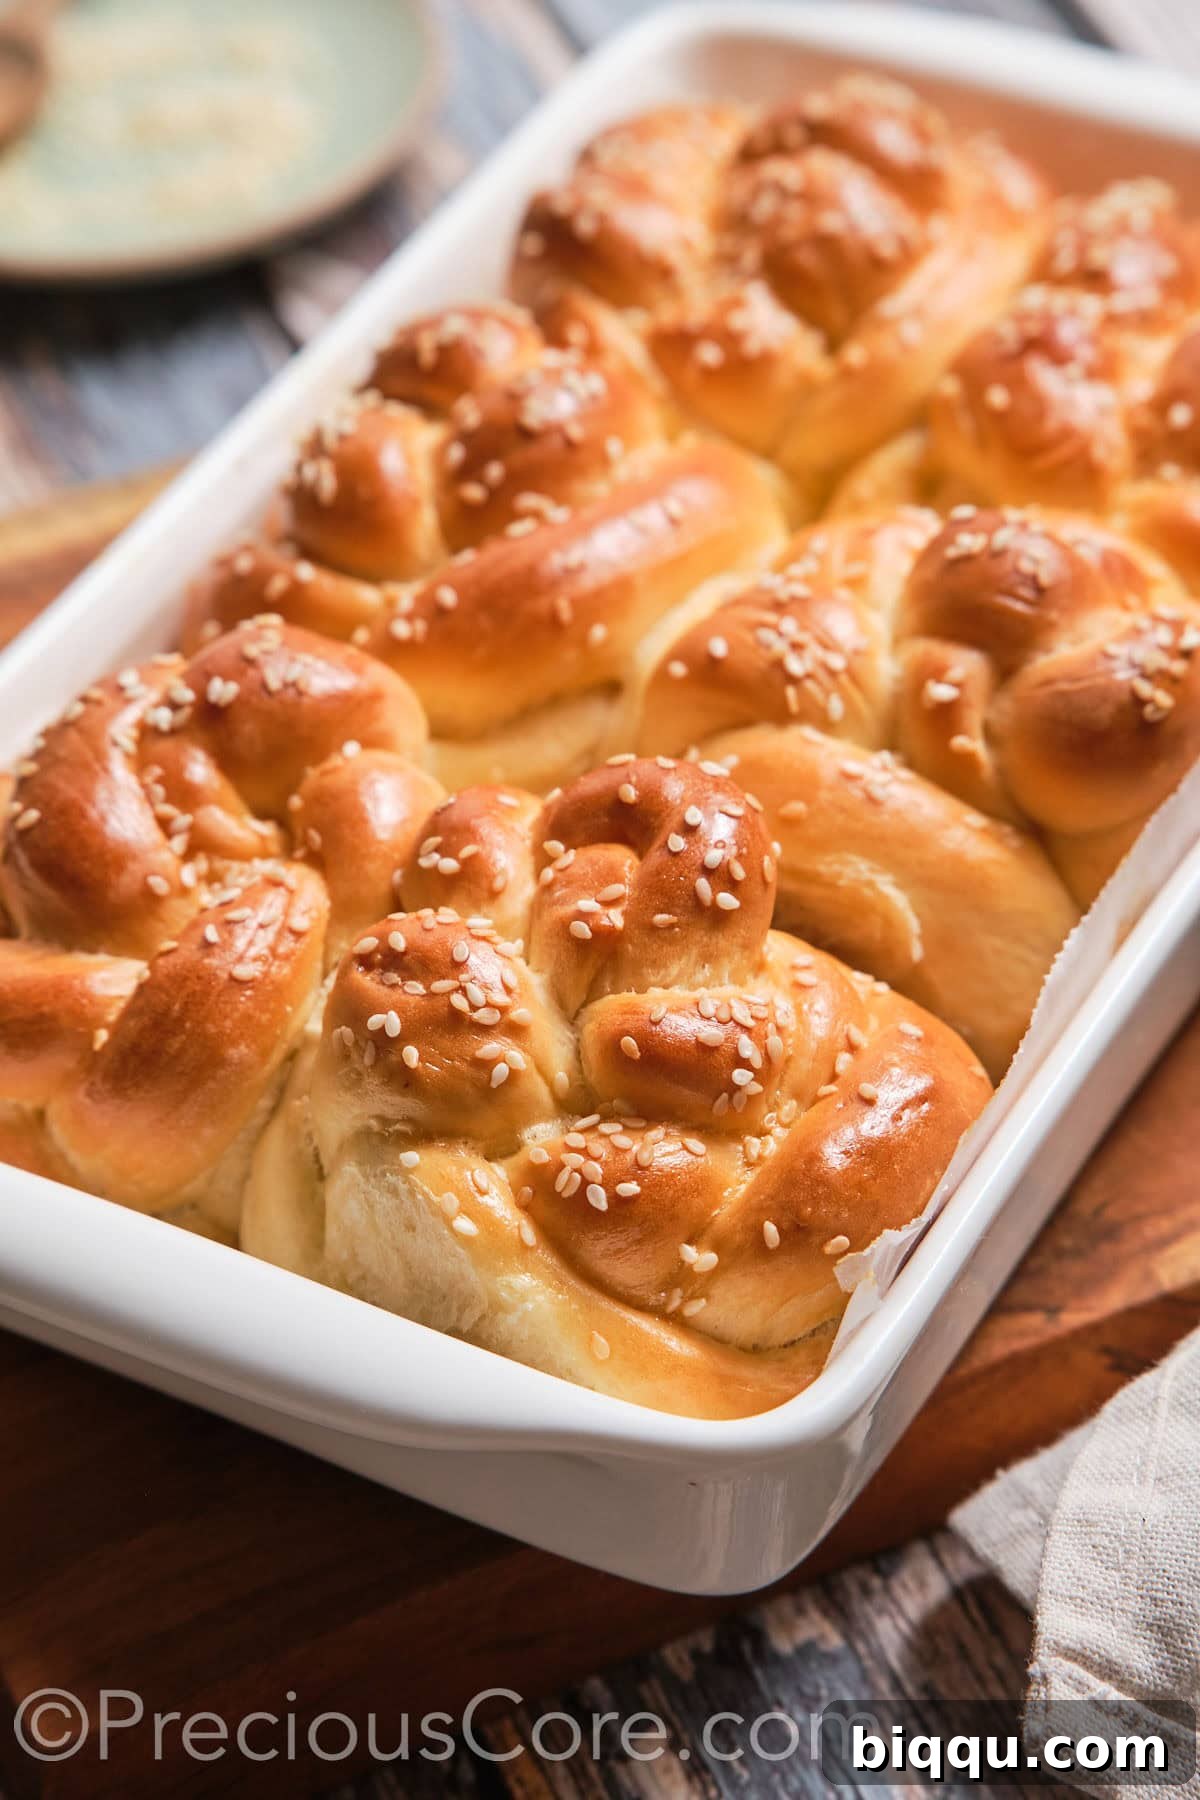
P.S. Please note that some of the photos accompanying this recipe showcase 6 rolls, rather than the 12 specified in the complete recipe. The images illustrate the division and shaping of half of the dough. If you follow the full recipe, you will yield a larger batch of delicious rolls.
Step-by-Step Guide: Crafting Delicious Challah Rolls
Creating these beautiful challah dinner rolls is a rewarding process. Follow these detailed steps to achieve perfect, golden, and fluffy buns every time.
Step 1: Activate the Yeast
Begin by gently warming your milk until it reaches a lukewarm temperature, ideally around 110°F (43°C). It should feel warm to the touch but not hot. Pour the warmed milk into a large mixing bowl. Add the active dry yeast and a small pinch of sugar to the milk. Stir the mixture gently to combine, then set it aside for 5-10 minutes. During this time, the yeast should become foamy and bubbly, indicating it is active and ready to work its magic.
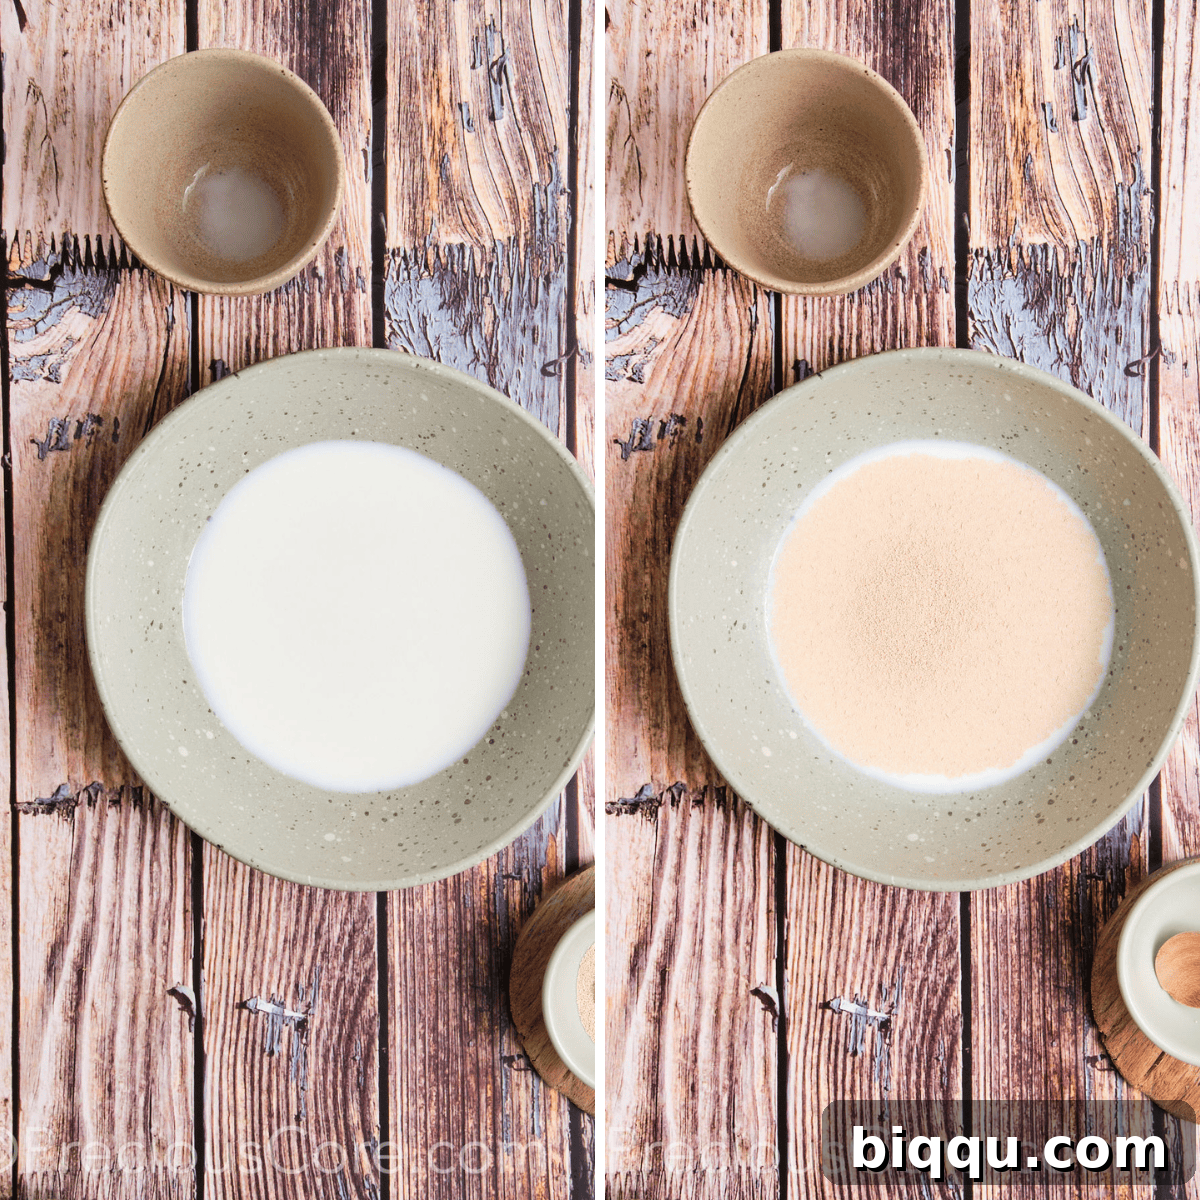
Top Tip for Yeast Activation: Always ensure your yeast is fresh and active. If your yeast doesn’t bubble or become slightly puffy after 10 minutes in lukewarm water (a good test is 1 teaspoon dry yeast in ¼ cup lukewarm water), it has likely expired and won’t properly leaven your dough. Using fresh, active yeast is critical for a well-risen, airy challah dough.
Step 2: Incorporate Wet Ingredients
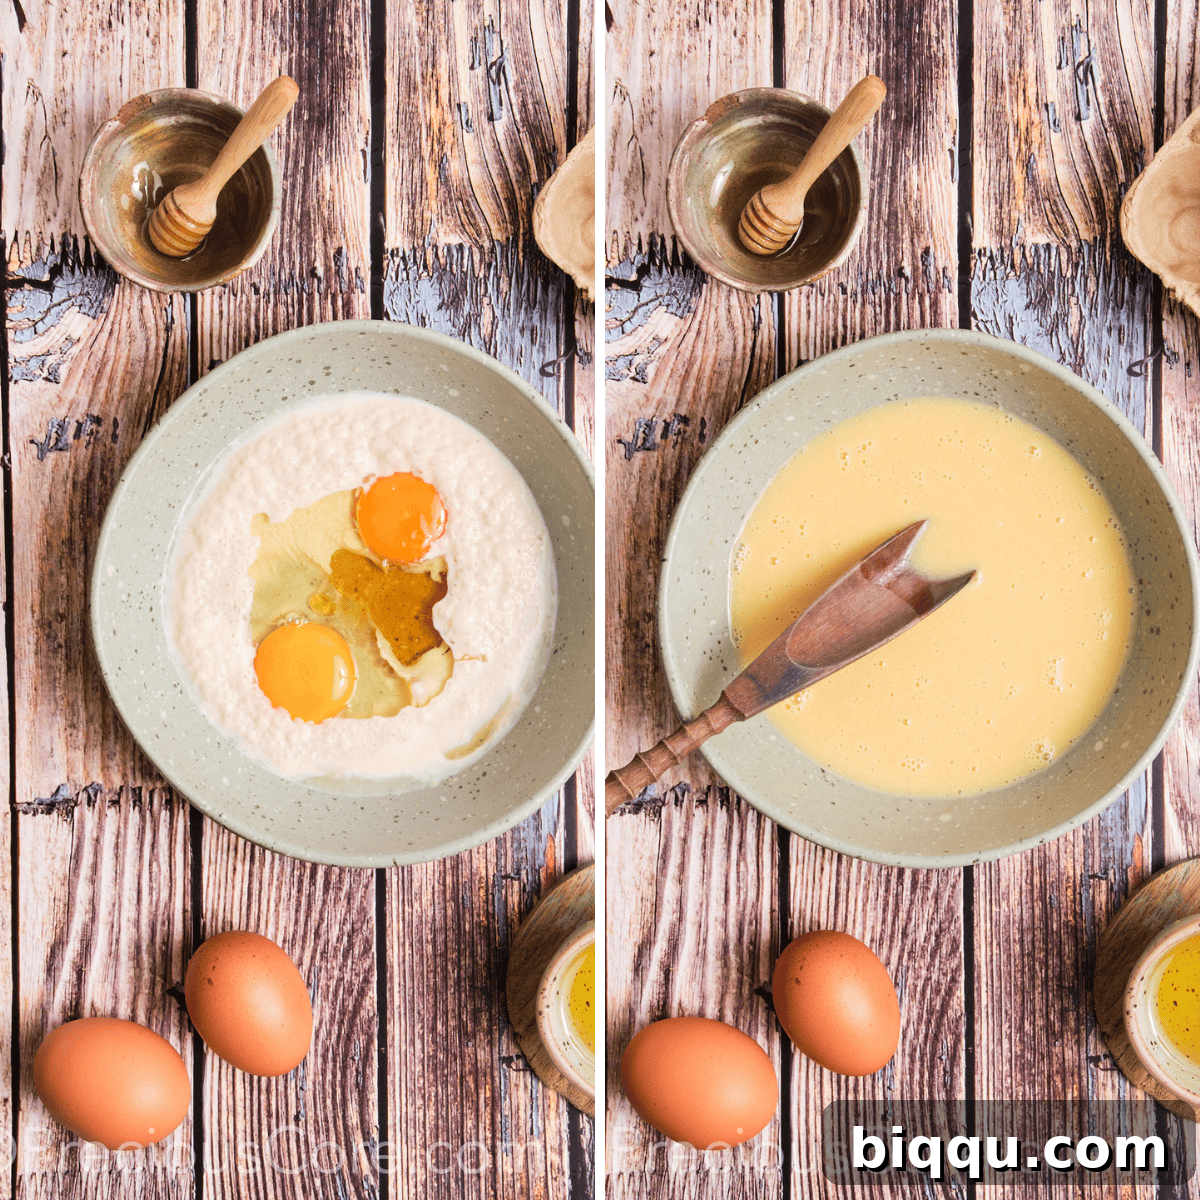
Once your yeast mixture is beautifully foamy, it’s time to add the remaining wet ingredients. Crack in the two large eggs (ensure they are at room temperature), pour in the vegetable oil, and drizzle in the honey. Using a whisk or spatula, mix all these ingredients thoroughly until they are well combined and form a uniform liquid base for your dough.
Step 3: Combine Dry Ingredients and Knead
Gradually add the all-purpose flour and salt to the wet mixture in the bowl. Begin mixing with clean hands or a sturdy spoon. As you combine, the dough will start to come together. Once it forms a cohesive mass, transfer it to a lightly floured work surface and knead the dough diligently for about 8-10 minutes. The goal is to develop the gluten, resulting in a smooth, elastic, and supple dough that springs back when gently pressed.
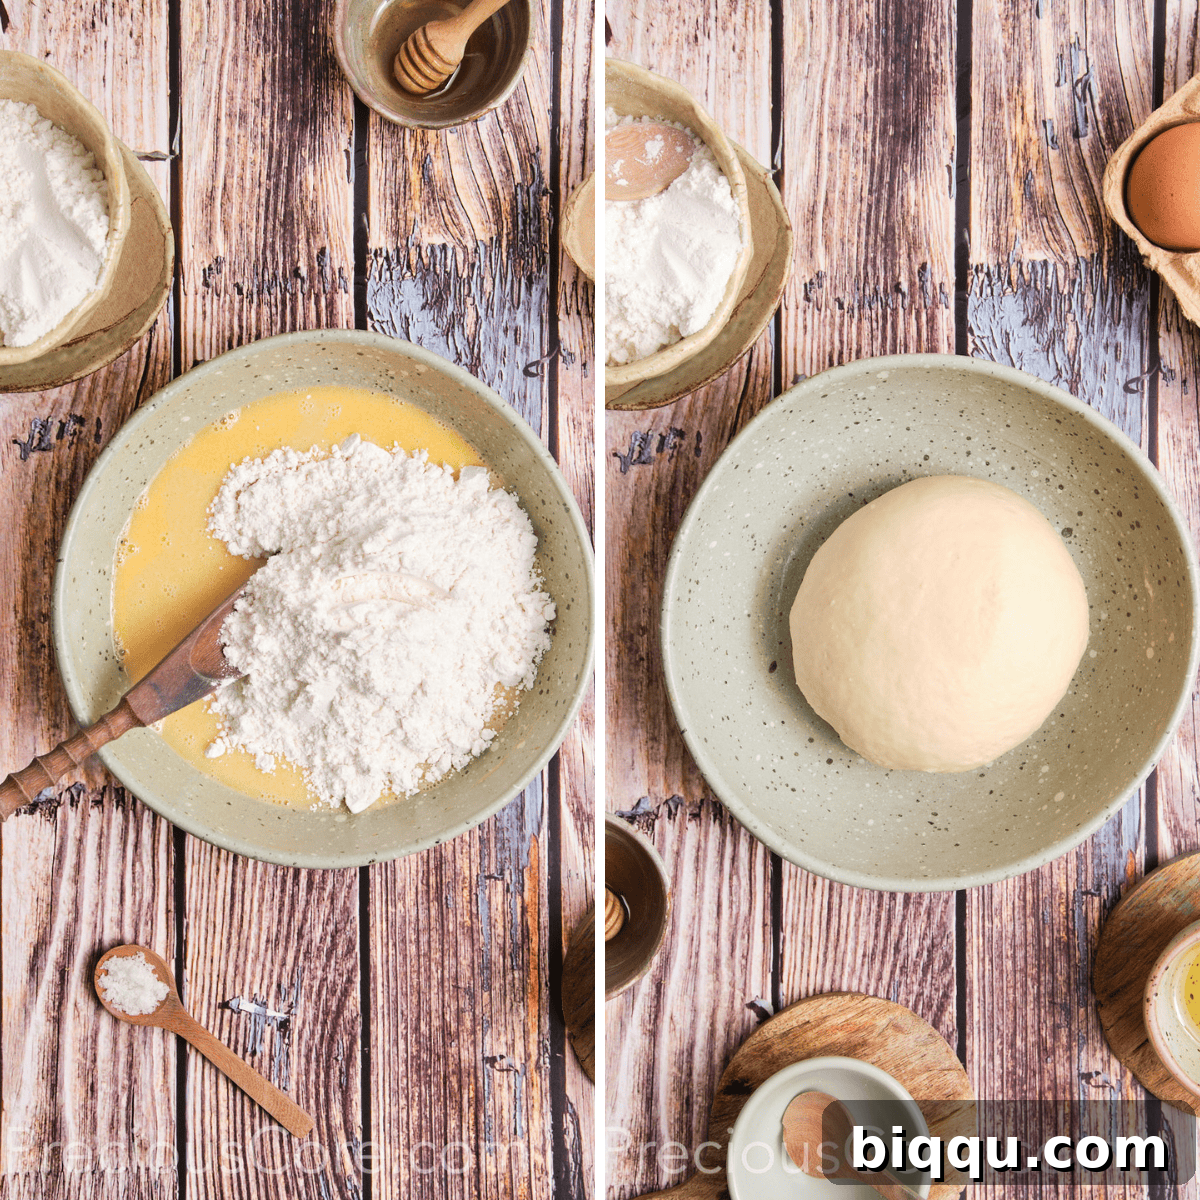
Step 4: The First Rise (Bulk Fermentation)
Lightly grease the mixing bowl, then place the kneaded challah dough back into it, turning it once to coat with oil. Cover the bowl tightly with a clean kitchen towel or plastic wrap to prevent it from drying out. Place the covered bowl in a warm, draft-free spot in your kitchen. Allow the dough to rise for 1.5 to 2 hours, or until it has visibly doubled in size. This crucial first rise allows the flavors to develop and the yeast to produce gases, creating a light and airy texture.
Step 5: Divide the Dough
Once the dough has doubled, gently “punch it down” to release the accumulated gases and deflate it. Transfer the dough onto a lightly floured, clean work surface. Shape the challah dough into a long, even log. Using a sharp knife or bench scraper, divide the log into 12 equal portions. For precise and uniform rolls, I highly recommend using a kitchen scale to weigh each portion of dough, ensuring consistent size and baking time for all your rolls.
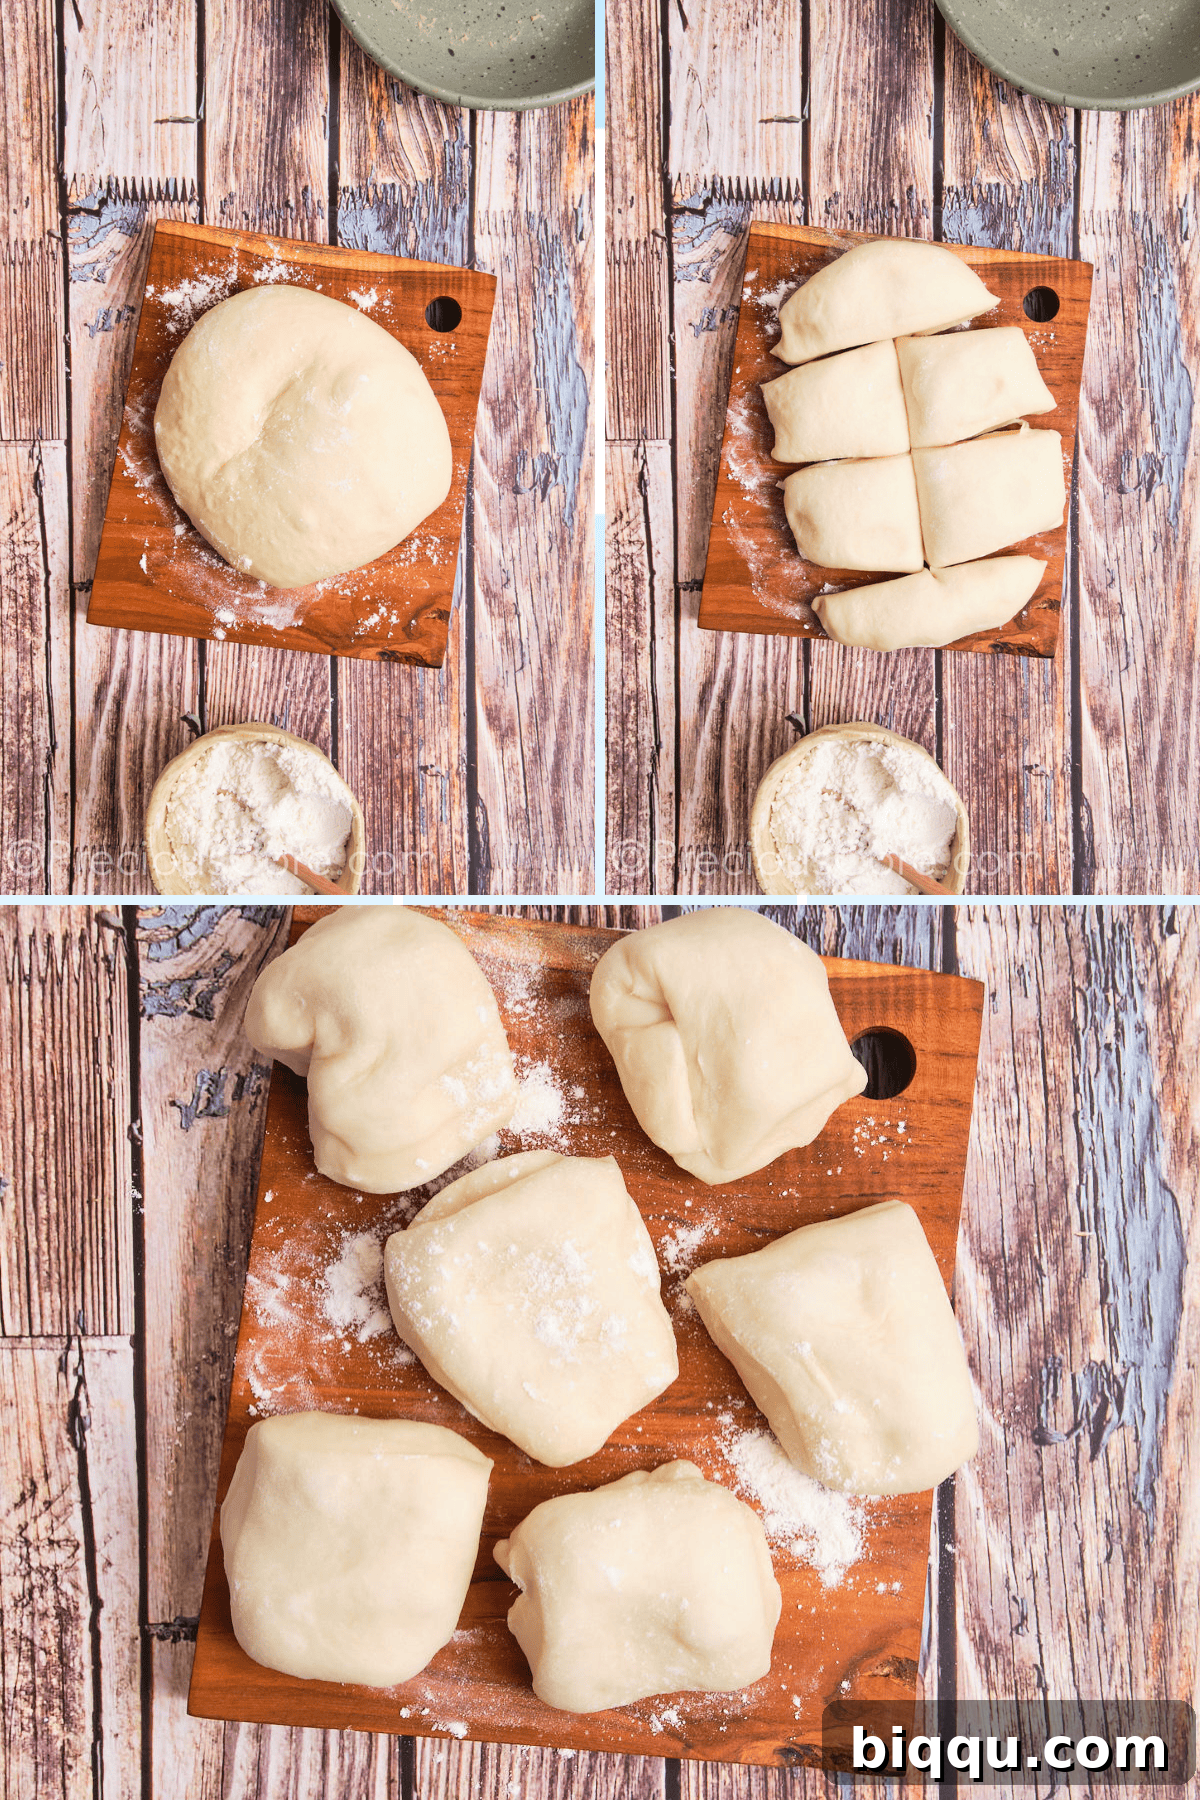
Step 6: Form the Braided Rolls
Take one of the 12 dough portions and further divide it into three equal smaller pieces. Roll each of these three smaller pieces into a long, thin rope, approximately 6-8 inches in length. Arrange the three ropes side by side. Pinch them together firmly at one end to secure. Now, braid them as you would braid hair, alternating strands over the middle. Once braided, pinch the other end tightly to seal. Gently tuck both pinched ends underneath the braided roll to form a neat, round, braided bun shape. Repeat this process for all 12 portions of dough. Carefully arrange the shaped challah rolls onto a baking sheet lined with parchment paper, leaving some space between each for expansion.
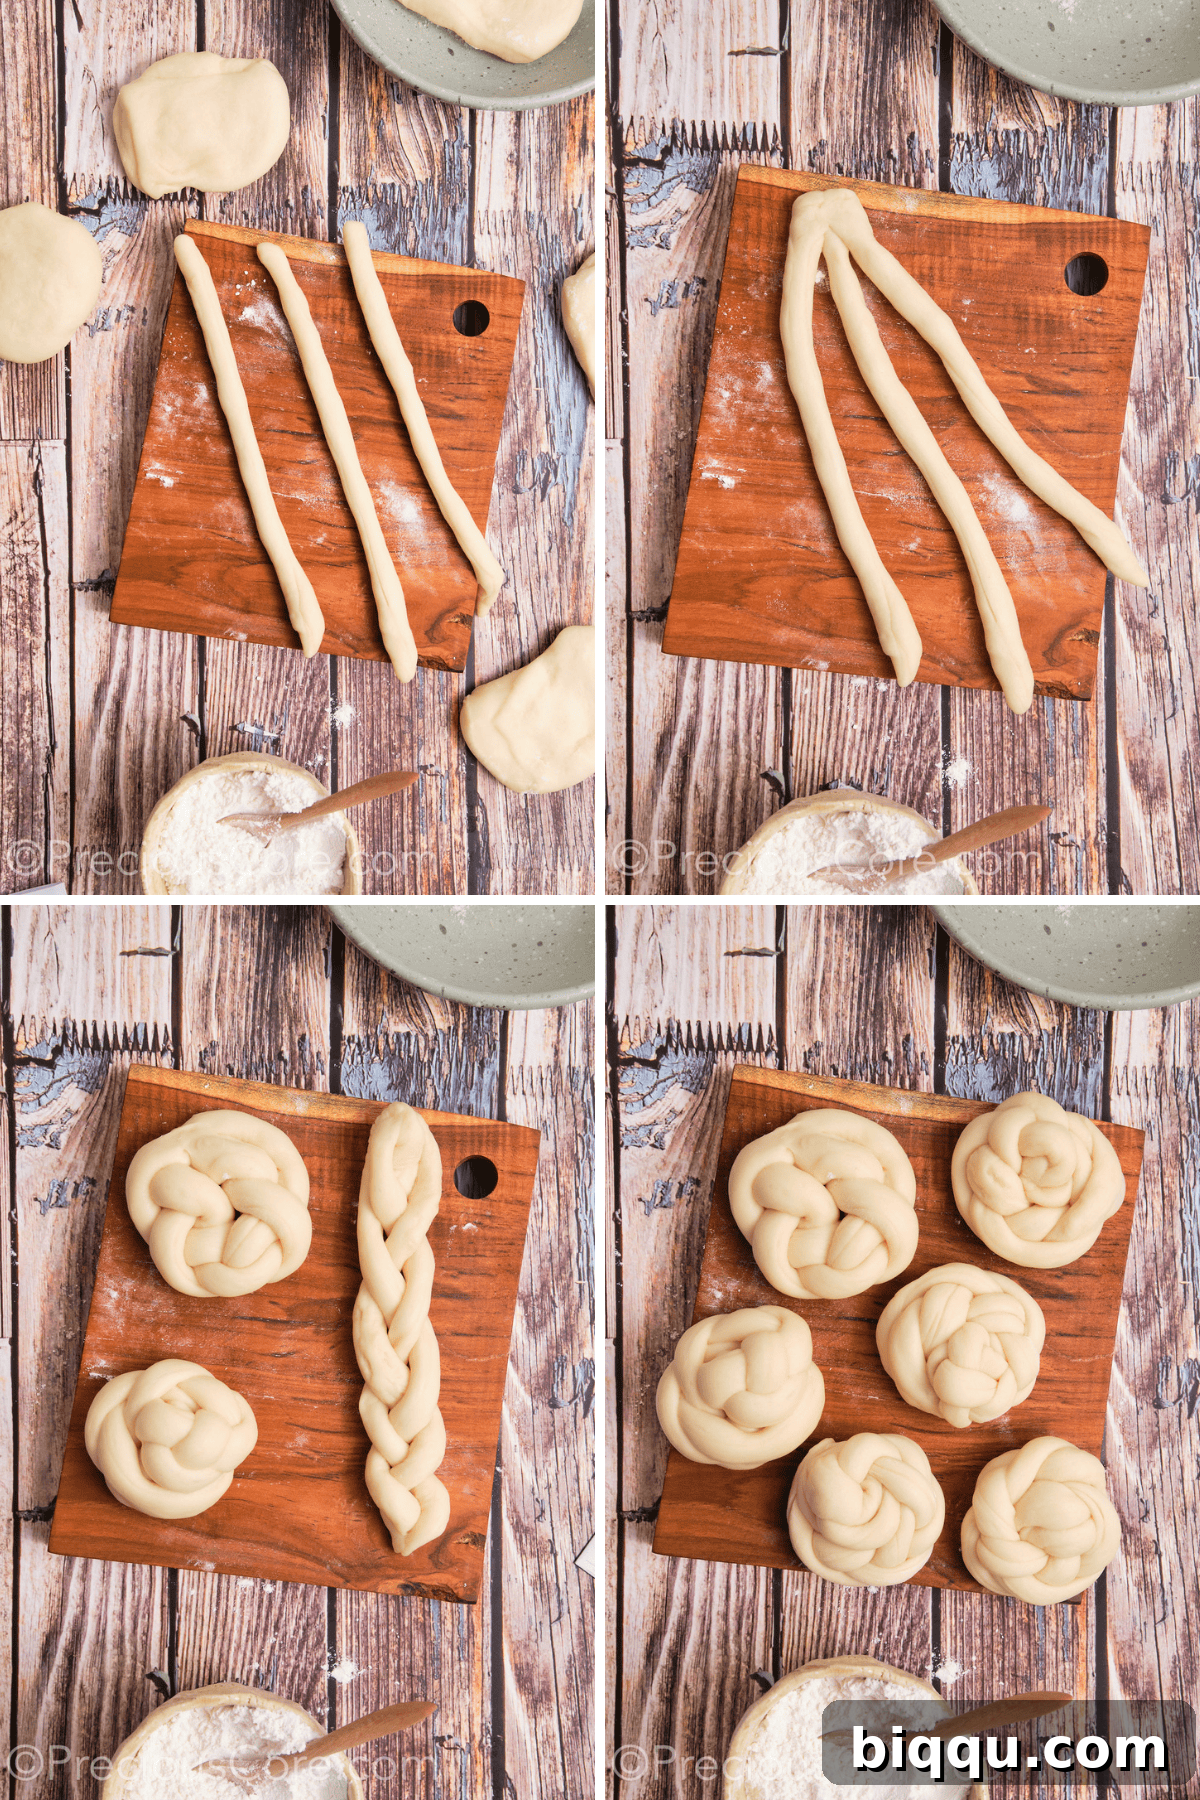
Step 7: The Second Rise (Proofing)
Once all the rolls are shaped and arranged on the baking sheet, cover them loosely with a clean kitchen towel. Allow them to rise again in a warm, draft-free place for at least 30 minutes, or until they have noticeably increased in size, nearly doubling. This second rise, known as proofing, is essential for achieving the light, airy texture of the final baked rolls.
Step 8: Apply Egg Wash and Toppings
While the rolls are completing their second rise, preheat your oven to 350°F (180°C). In a small bowl, whisk one egg to create an egg wash (you can use just the yolk for a deeper golden color, or the whole egg for a slightly lighter finish). Gently brush the tops of each challah roll with the egg wash. This will give them a beautiful golden sheen and help any toppings adhere. Immediately sprinkle with sesame seeds or poppy seeds, if desired, for added flavor and texture.
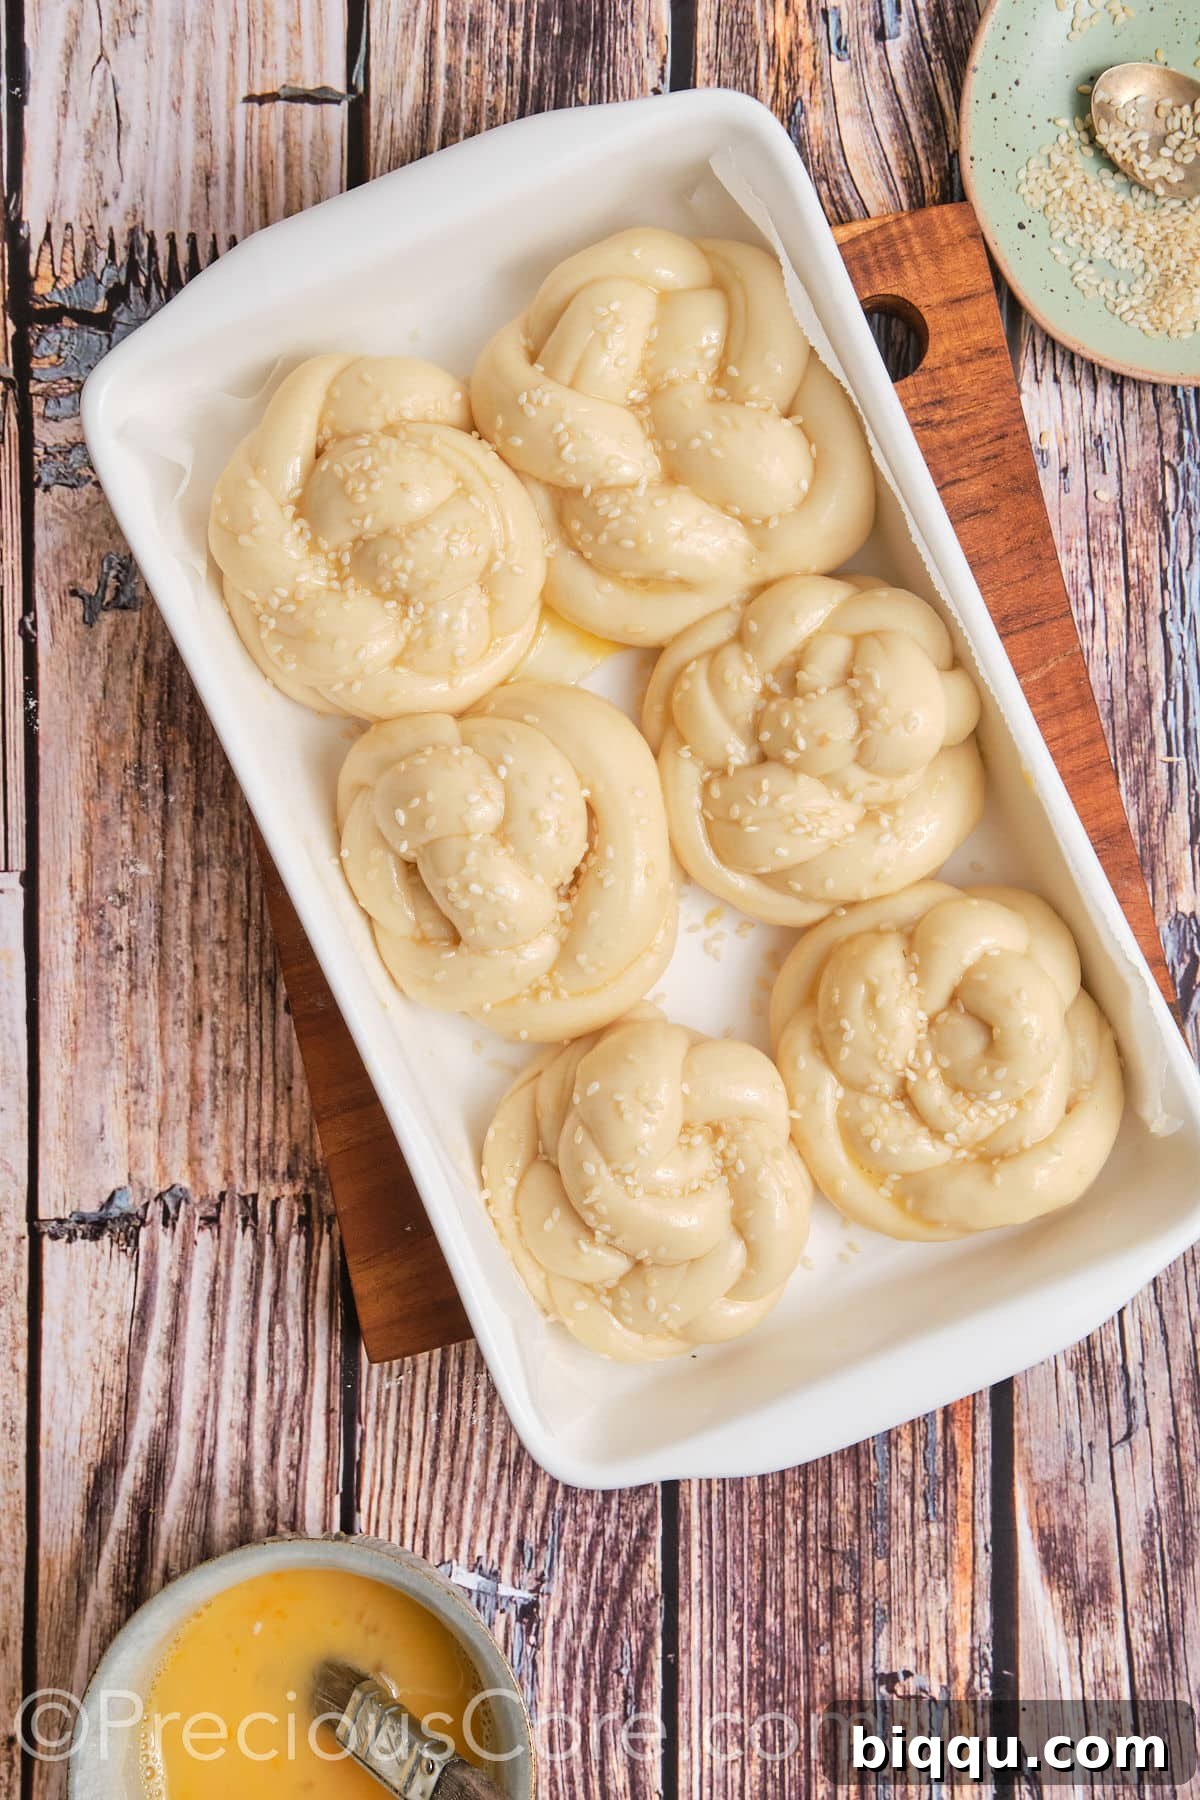
Step 9: Bake to Golden Perfection
Carefully transfer the baking sheet with the prepared challah rolls to your preheated oven. Bake for 20-25 minutes, or until the rolls achieve a magnificent golden-brown color and sound hollow when lightly tapped on the bottom. The rich aroma filling your kitchen will be your first clue that they are nearly ready!
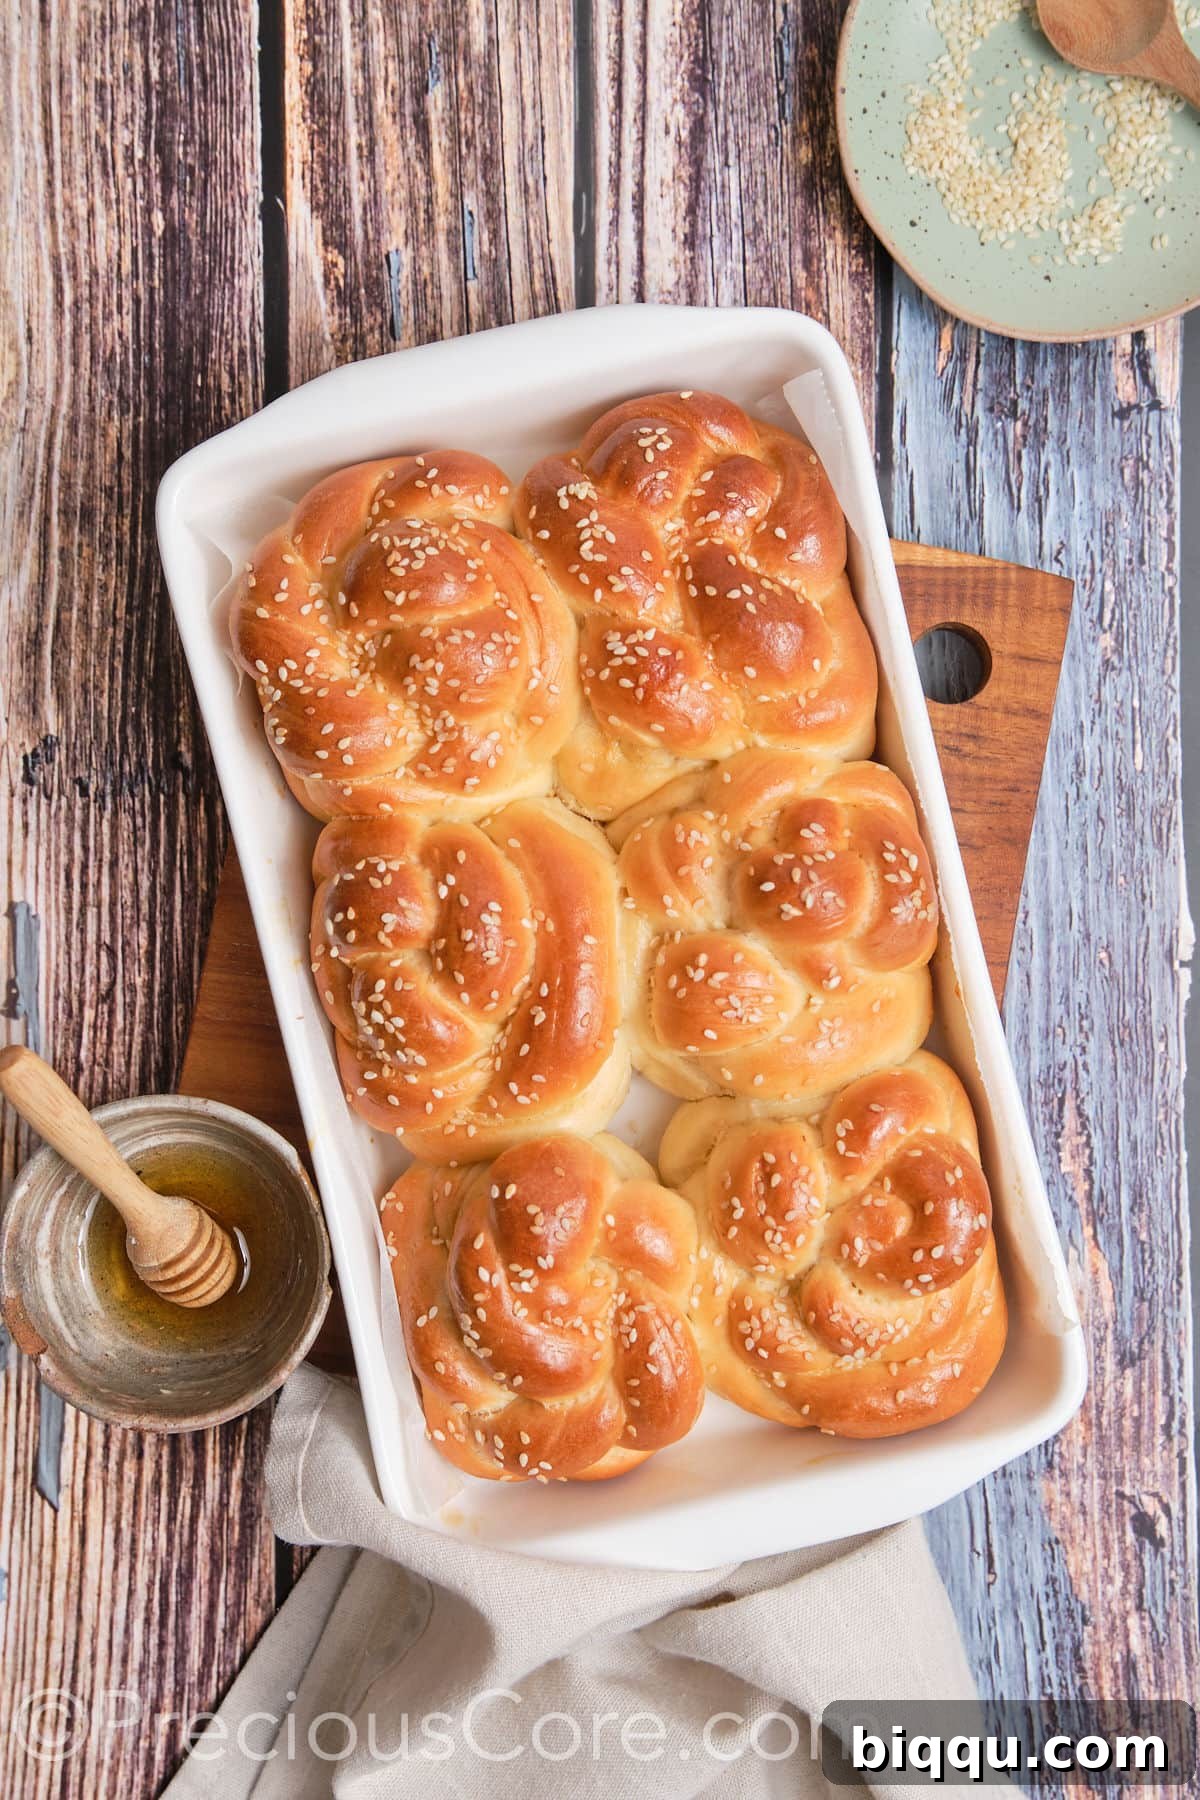
Congratulations, you’ve just baked a batch of irresistible challah rolls! Allow them to cool slightly on the baking sheet before serving. For holiday planning, particularly Thanksgiving, you can prepare these rolls ahead of time. Simply shape the rolls and freeze them individually on a baking sheet until solid. Once frozen, transfer them to a freezer-safe ziploc bag and store for up to a month. To bake, place the frozen rolls on a parchment-lined baking sheet and thaw overnight in the refrigerator. The next morning, brush them with egg wash and bake as directed. This ensures warm, fresh rolls for your holiday table with minimal last-minute effort.
If you’re a true lover of dinner rolls, you absolutely must try my amazing Garlic Butter Rolls for another delightful bread experience.
Patience is Key: The most crucial step for achieving the perfect texture in challah dough is allowing sufficient time for it to rise. Be patient and let the dough rise until it has truly doubled in size during both the first and second proofing stages. This generous rising time creates the incredibly soft, airy, and fluffy texture that challah is famous for.
Expert Tips for Challah Baking Success
Achieving bakery-quality challah rolls at home is entirely possible with a few insider tips:
- Choose the Right Flour: While all-purpose flour works well, I often recommend using bread flour for challah dough. Bread flour contains a higher percentage of gluten, which creates a more elastic and resilient dough. This elasticity makes the dough easier to handle, particularly during shaping and braiding, and results in a chewier, more satisfying texture in the final rolls.
- Flour with Care: When shaping your rolls, a light dusting of flour on your work surface and hands can prevent sticking. However, be cautious not to add too much extra flour to the dough itself, as this can lead to a dry, tough, and less tender roll. Use just enough to prevent stickiness.
- For Decadent Softness: To elevate the richness and tenderness of your challah rolls, consider adding two extra egg yolks to your dough along with the whole eggs. The additional fat from the yolks contributes to an incredibly soft, moist, and luxurious crumb, making your rolls truly melt-in-your-mouth delicious.
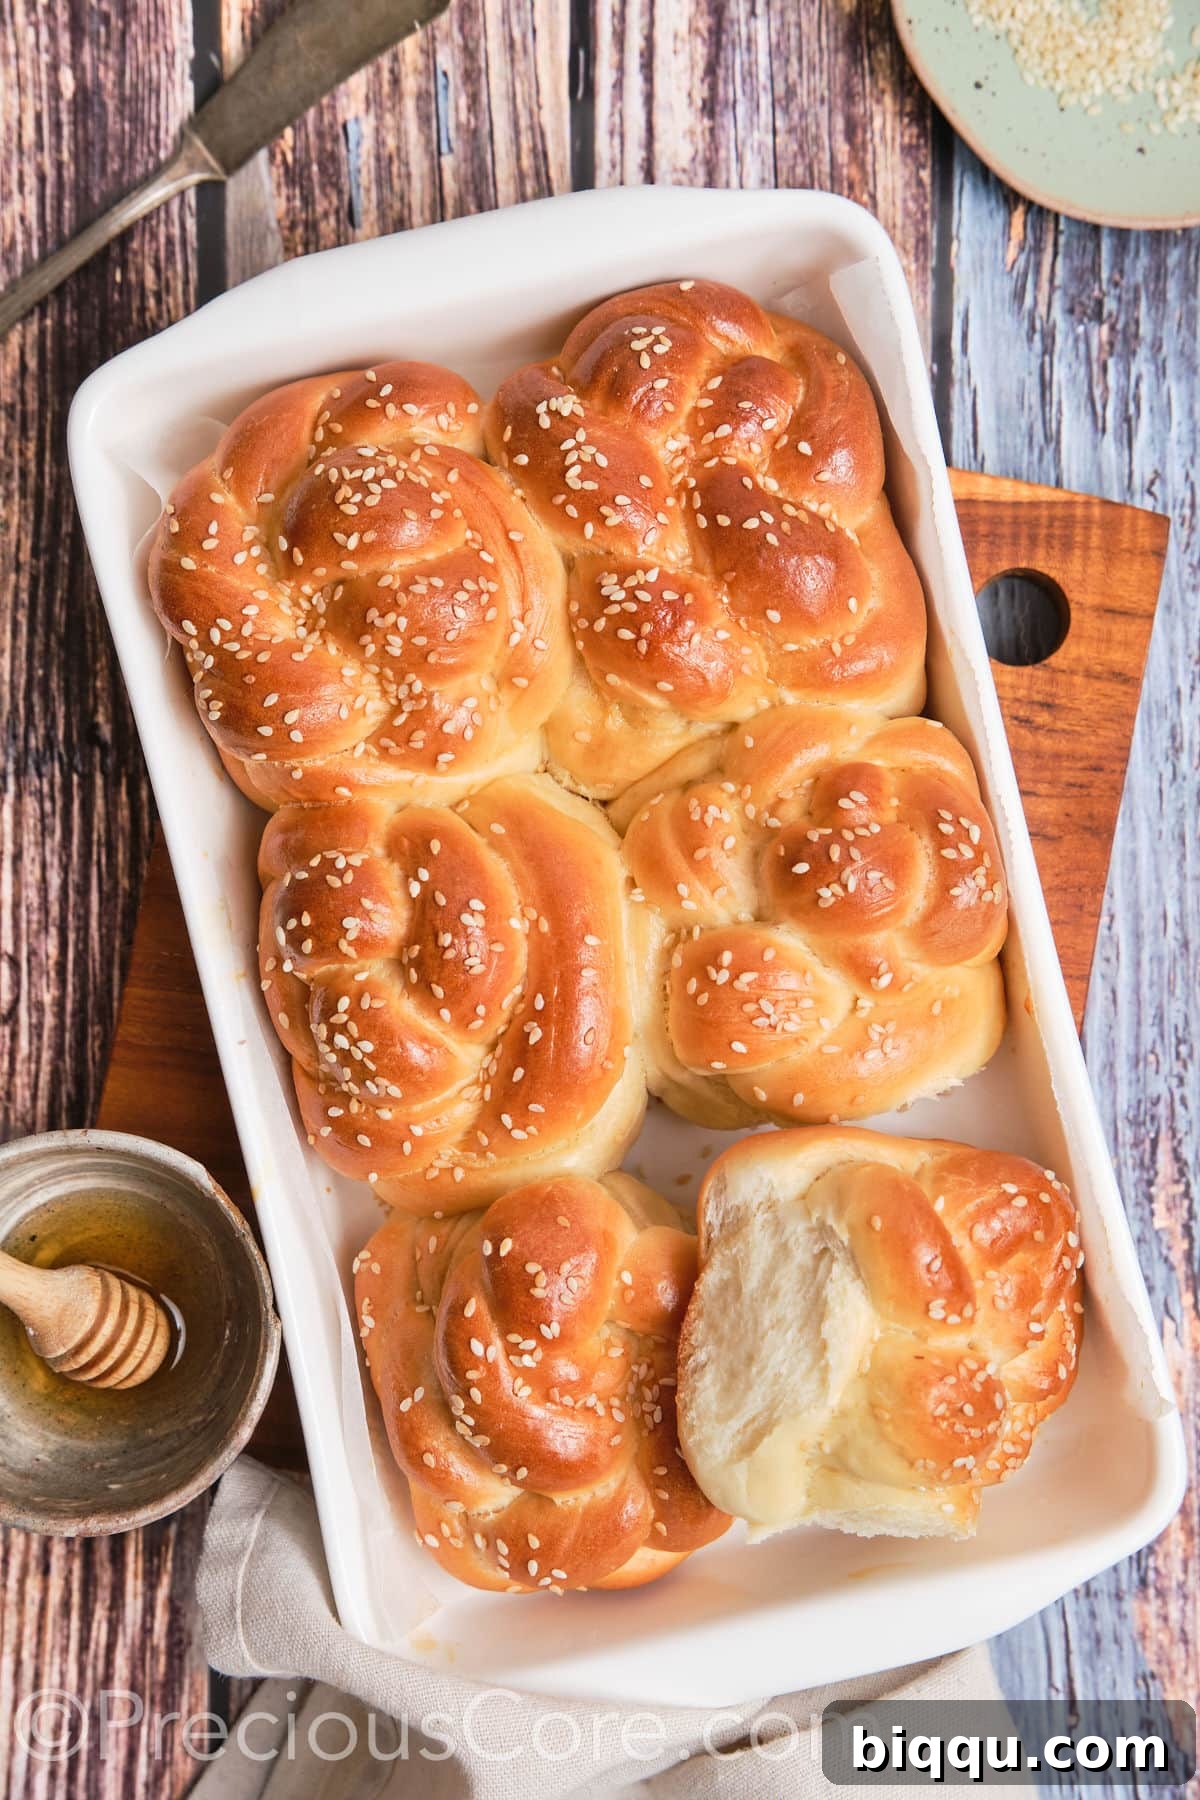
Serving Suggestions for Your Challah Rolls
These versatile Challah Dinner Rolls are an exquisite accompaniment to a wide array of dishes. Their slightly sweet profile and tender texture make them perfect for both savory and sweet pairings. Here are some ideas to inspire your next meal:
- Hearty Stews: Their ability to soak up rich gravies makes them ideal alongside comforting dishes like Beef Stew Without Wine or a flavorful Lentil Stew.
- Meat Dishes: They pair wonderfully with protein-rich mains such as tender Chicken Meatballs.
- Soups: Dip them into a warm bowl of Quick Chicken Noodle Soup for a truly satisfying experience.
- Breakfast & Brunch: Toast them and serve with jam, honey, or a savory spread for a delicious start to your day.
- With Butter: Simply served warm with a generous pat of good quality butter, they are a sublime treat on their own.
How to Store Leftover Challah Dinner Rolls
For the ultimate freshness and softness, these challah dinner rolls are best enjoyed immediately on the day they are baked or within 24 hours. While they will keep for up to 3 days, their delightful soft texture will gradually diminish over time. To maintain their quality, store them at room temperature in an airtight container, which helps to prevent them from drying out.
Challah rolls are also excellent candidates for freezing, allowing you to enjoy homemade bread at your convenience. To freeze, first arrange the completely cooled rolls on a baking sheet lined with parchment paper and freeze them until they are solid. Once frozen, transfer the individual rolls to a freezer bag or an airtight container. They can be stored in the freezer for up to one month. When you’re ready to enjoy them, simply defrost at room temperature, or for a quick refresh, warm them gently in a toaster or oven.
Complement Your Feast: Thanksgiving Recipes to Serve with Challah Rolls
These sweet and savory challah rolls are a perfect pairing for a festive holiday spread. Elevate your Thanksgiving table with these delicious recipes:
- Baked Brie and Preserves: An elegant appetizer that beautifully complements the rolls.
- Southern Deviled Eggs: A classic side dish that always pleases.
- Oven Baked Turkey Wings or Baked Turkey Drumsticks: Hearty main courses that shine alongside soft rolls.
- 3 Cheese Mac and Cheese: A creamy, indulgent side that is a family favorite.
- Street Corn Casserole: A vibrant and flavorful addition to any meal.
- Cinnamon Rolls With Apple Pie Filling: For a sweet ending to your holiday meal.
- Rosemary Garlic Mashed Potatoes: A fragrant and comforting potato dish.
Explore More Delicious Dinner Rolls
If you adore the comforting taste of Challah Dinner Rolls, you’ll be thrilled to discover these other fantastic dinner roll recipes:
Easy Dinner Rolls
Honey Whole Wheat Dinner Rolls
Sweet Dinner Rolls Recipe
Garlic Butter Rolls
If you make this recipe, please consider leaving a star rating below. Your feedback helps others discover and enjoy this recipe, and I love hearing from you! Thank you!
Challah Dinner Rolls
Pin Recipe
Print Recipe
Ingredients
- ¾ cup warm milk (about 110℉, whole or 2% milk)
- 2¼ teaspoons active dry yeast
- Pinch of sugar (about ¼ teaspoon)
- 2 large eggs (room temperature)
- ½ cup vegetable oil
- ¼ cup honey
- 4 cups all-purpose flour
- ½ teaspoon salt
- 1 egg (for egg wash)
- 2 teaspoons Sesame seeds or poppy seeds (to sprinkle on top)
Instructions
-
Warm the milk to about 110°F. Pour into a large mixing bowl. Add the yeast and a pinch of sugar. Stir to combine and let it sit for 5-10 minutes until foamy.
-
Once the yeast mixture is foamy, add the eggs, vegetable oil, and honey. Mix well until all wet ingredients are thoroughly combined.
-
Add the flour and salt to the bowl. Mix with clean hands until a dough forms. Transfer to a lightly floured surface and knead until the dough becomes smooth and elastic, about 8-10 minutes.
-
Cover the challah dough with a clean kitchen towel or plastic wrap. Place it in a warm, draft-free spot and allow it to rise for 1.5-2 hours, or until it has doubled in size.
-
Gently punch down the risen dough to deflate it. Turn it out onto a lightly floured work surface.
-
Shape the challah dough into a long log and cut it into 12 equal portions. For best results, weigh each piece for uniformity.
-
Take each of the 12 portions and divide it into three equal smaller pieces. Roll each of these three pieces into a small, thin rope.
-
Arrange the three ropes side by side, pinch one end together to seal, and braid them. Pinch the other end to seal and tuck both pinched ends underneath to form a round braided bun.
-
Arrange the shaped challah rolls onto a baking sheet lined with parchment paper, leaving space between each. Cover with a clean kitchen towel and let them rise again for at least 30 minutes, or until doubled in size. Meanwhile, preheat oven to 350°F (180°C). Beat 1 egg for an egg wash and gently brush over the tops of the rolls, then sprinkle with sesame or poppy seeds.
-
Bake in the preheated oven for 20-25 minutes, or until the rolls are golden brown and sound hollow when tapped on the bottom.
-
Remove the baked braided buns from the oven and allow them to cool slightly on the baking sheet before serving and enjoying.
Notes
- Do not use expired yeast, as this will not allow the dough to rise properly. You can test for active yeast by combining one teaspoon of dry yeast with ¼ cup of lukewarm water. If it bubbles and becomes slightly puffy after 10 minutes, it is active. If not, your yeast has likely expired.
- For more developed flavors, you can proof the challah dough in the refrigerator overnight during the first rise. This slow fermentation enhances the depth of taste.
- To ensure uniform size for your rolls, use a kitchen scale. Weigh the entire dough after the first rise, then divide that weight by 12 to determine the weight for each individual portion.
- Always use fresh ingredients for the best results in flavor and texture.
- The rolls shown in some photos represent half of the recipe. This complete recipe will yield a total of 12 challah dinner rolls.
Nutrition
Per Roll (approximate values):
- Calories: 280 kcal
- Carbohydrates: 39g
- Protein: 6g
- Fat: 11g
- Saturated Fat: 2g
- Polyunsaturated Fat: 6g
- Monounsaturated Fat: 3g
- Trans Fat: 0.1g
- Cholesterol: 43mg
- Sodium: 120mg
- Potassium: 92mg
- Fiber: 1g
- Sugar: 7g
- Vitamin A: 84 IU
- Vitamin C: 0.04mg
- Calcium: 32mg
- Iron: 2mg